Did you know that Saturn has 62 moons? That's more than any other planet in our solar system! In this blog post, we're going to show you how to draw this fascinating planet using simple step-by-step instructions. We'll also share some interesting facts about Saturn that you may not have known before. Are you ready to get started? Let's go!
Of all the more fascinating planets than others, Saturn is always a magnificent example of pure gravity and elegant grace. Translating these characteristics onto paper isn’t always easy unless you’re going to add layers of detail that give this iconic planet more realism and interest. Here is how to draw Saturn with confidence and get great results each time.
Step-by-step Instructions For Drawing Saturn
There are various steps that you need to take to draw the planet Saturn. That’s a formula that works for any artist, no matter what level you happen to be at. These steps are standard, so there won’t be any punches pulled for each step description. Since drawing uses so many special tricks and techniques, all of these elements, when combined, can produce an impressive image that is designed to appear three-dimensional.
Easy Drawing Tutorial In 5 Easy Steps
The first steps are straightforward, but the rest of your drawing will be a combination of shading and coloring. Here is what is required from start to finish.
1. Draw a circle that represents Saturn
2. Sketch rounded layers within Saturn
3. Draw the outer rings of Saturn
4. Add color to the planet
5. Add color within the rings
6. Finish the outer space background
Equipment You Will Need
You want to start with the essential tools that allow you to make corrections as you go, so a pencil and eraser are the first two items you’ll need. Drawing paper is another essential item that should include a smoother surface to allow as much detail as possible. Textured paper is not advised for this task since this will prevent your drawing from having crisp edges that might appear wavy over the surface.
A solid paper that is best is usually called hot-press paper and has a smooth texture instead of cold press paper. This variety of hot-press is perfect for sketching and finishing touches. Other items such as a blending stump are ideal for blending detail, but you can also use your finger to smudge detail, making softer edges as you go. Your work surface should include a smooth drawing table with no texture underneath.
Watch this Super Easy Step by Step Video Tutorial
Draw Circular Shape Of Saturn
While you could use a compass to draw a circle, the pin in the center may cause an indent in the paper. If you prefer, you can choose a cup or round object to trace around to get a round circle. Be sure to find a rounded shape that will be just enough to make room for the rings that need to be added around this circle. A traced edge only needs to be dark enough to see, while the rest of the edges can be filled-in later when you add contrast.
Another good trick is using various caps or lids from the kitchen and products that you find anywhere in your home. This way, you don’t need to deal with a taller item such as a cup while you trace around it. Always hold these items placing your thumb or forefinger in the center of a cap. While your free hand traces a line around the edges.
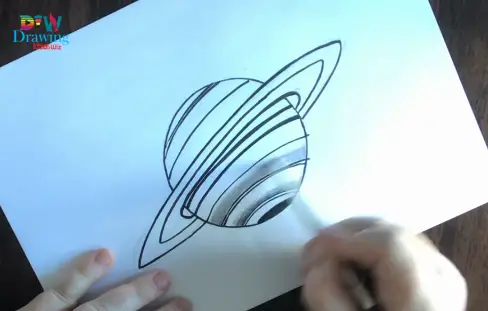
Draw Atmospheric Lines
Saturn has a distinct atmosphere that includes individual lines that circle in layers from the top of the planet to the bottom. Like individual layers, you see in a fancy cocktail drink, each layer blends into the next. Start by finding the angle of your layers by starting at the center of your circle and slightly curve each line to give the illusion this line is following the natural curve.
An easy way to do this is to draw a light line across one edge of the circle and another line less than a centimeter or two below that line. Carefully trace a connecting line from the top line that rounds down to the second line and back up to the top line on the opposite side. Use your eraser to remove the lower lines’ straight edge. This will give you a better ’rounded’ effect for atmospheric rings.
The rest of the rings can follow this example until you have enough atmospheric lines as you like.
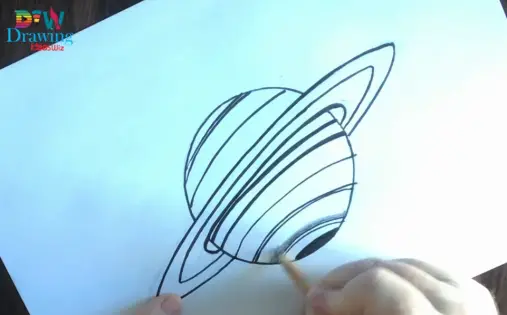
Draw Ringed Planet
The rings of the planet Saturn are another exciting feature that stands out immediately. To draw these, you’ll need to establish an equator down the middle of your planet. This all depends on the angle of where you want your rings to be visually appealing. This is done by tracing an angled line outside each planet’s edge. Starting somewhere at the center of the circle you’ve established.
The outer edge of these rings stretches no more than 3/4 of the total circumference of the planet outside Saturn on each side. At this point, you will need to use some imagination. This line will curve the outer ring in front of Saturn and those that disappear behind the planet. Use reference pictures taken from telescopes and from the Voyager 1 probe or Cassini.
There are great reference photos that show various angles of the rings and how they appear in reality. These can serve as a starting point to create your own Saturn ring design.
What Colour Are Saturn’s Rings?
According to NASA, the rings of Saturn will range from white and grey hues, whereas some sets of rings are colored brown. There are actually subtle shades of pink, sparkling pink, and sandy tones. Depending on the angle of the rings, they can take on a bluish tone since much of the ring material is made primarily of ice. Obviously, compounds and minerals in the ice will add color that determines the various rings with interweaved strings.
Add Colour
Saturn is primarily a gas planet containing a large abundance of helium and hydrogen, making real pictures of Saturn appear yellowish-brown. That doesn’t mean that other colors are mingling within its massive atmosphere. Think of the multiple layers within a latte when steamed milk is poured into espresso. When viewed up close, with the naked eye the various layers that separate the northern and southern hemispheres are stormy-looking.
Some very detailed pictures that aren’t color enhanced can appear to have orange layers within yellow and brown stripes. There have even been some pictures that show Saturn to appear bluish due to the angle that space probes have captured the colors that reflect light. It might be a trick of the light- however, these layers are heavily smudged together. This has made it very difficult to determine the true colors for many decades so far.
Select Colours You Will Need
The main colors essential for coloring the sixth planet Saturn will include a wide variety of earthy tones. These include yellow, brown, orange, blue, grey, pink, and white. The space around Saturn will obviously be black, but you can add more depth to this by adding the deepness of space by using blues, purples, greens, and iridescent colors. An excellent example of deep space is the movie Aliens, which might add more visual interest.
If you’re using color pencils, this will take a lot of blending to get darker and lighter shades to appear layered. If you decide to make a drawing of Saturn, don’t settle on drawing a small picture of the standard A-4 scale. Try making a more giant portrait several inches across to allow a grand scale of your Saturn picture. Even if you don’t know how to draw Saturn, your first attempt can look good if you follow these simple instructions.
Alternative Ideas:
Draw the Solar System
Draw a simple drawing of the planets of the solar system in order of
Draw a Cartoon Planet
Draw a Cartoon planet if you are looking to create a simple drawing that avoids a lot of the details.