If you’re a fan of standing stone circles such as Stonehenge and other mythical and mysterious stone circles across Britain and Ireland, perhaps your focus is on drawing them too.
Not all stone circles are perfectly shaped rectangle stones and will all have subtle differences in surface texture and overall shape.
Here is drawing a standing stone using simple tips and tricks to achieve the best results.
Drawing A Standing Stones And Stone Circles
Start with gathering a few essential items that will make this drawing project easier. The first item you want is your reference material that comes in photos of real a stone circle.
Only use high-quality images that are in color, but black and white pictures aren’t so bad if that’s all you have.
The best place to find great stone circle images is usually from Google, but Pinterest often has great images included for free.
The next item that you want to have is a printer to print out these images to at least A-4 size so you can get different angles and matching images to work from.
If you’re making an exact copy of a known stone circle like Stonehenge or The Ring of Brognar, you want to have plenty of pictures to have better coverage and exciting angles that appeal to you.
If you don’t have a good list of stone ring sites, Wikipedia has a great list of actual locations.
The last item will always be your drawing materials, including paper and drawing utensils. A good pencil is best for sketching, but you can easily use any media after that to fill in the detail and add shading.
It will be a good idea to use an eraser to remove lines that were mistakes, but gum paste also works nicely or perhaps a gum eraser.
Draw The Outline Of The Standing Stones

You will need to determine the viewing angle of your stone circle, so if you’re working from photos, this will make it easier to copy from.
If you already have a little bit of drawing skill, you start with creating your horizon line to help create the scale of how your stones will appear.
It also doesn’t hurt to create a mock circle using kids’ building blocks or nearly anything that resembles the stones you’re drawing.
These are set up similar to how they appear in real life and then placed on a table at the sightline you want to use.
Adjust the height you need so you can have a more dramatic towering effect. This method is excellent since the basic shapes are easy to reproduce when you start sketching.
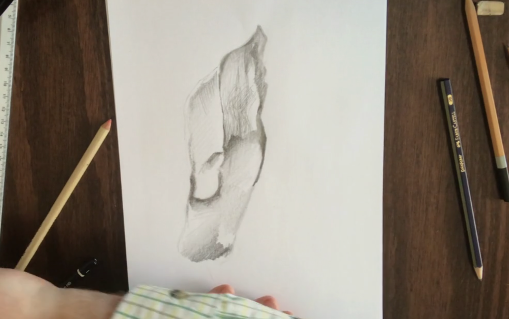
Sketching
Once you have rough outlines of your stones, you want to fill in these lines according to where the light is coming from.
This can be as simple as copying your reference pictures, but a mock model is perfect for controlling constant angled light that isn’t moving as the sun does. Use one of those adjustable desk lamps with a flexible neck.
If this lamp is on a dimmer, you can further control how strong the shadows are.
Don’t worry about texture at this point and focus on the lines and dimensional appearance of your standing stones. It’s not until you get these main lines sketched down lightly, using your imagination to create the edges and 3D angles.
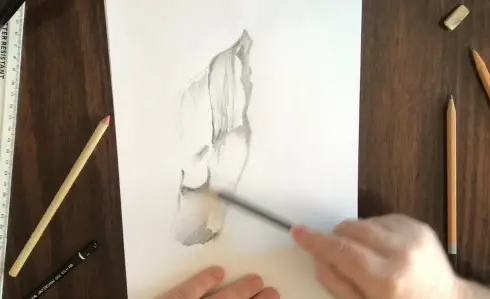
Adding Value And Tone
Shadows will be necessary at this next stage, so start to add shadowed areas that match your photo or mock stone circle.
Don’t go too heavy since there will be detail and texture that you might need to correct later. Always rely on a softer amount of shading. So you don’t need to remove what is on the paper already.
The tone of your drawing will also depend on the time of day (or night) your picture is supposed to be.
Texture
Stone has an interesting texture that is difficult to copy. There are so many complex angles and shadows that will emerge as the light changes.
The best method to copy the stone texture is by studying the type of rock you are drawing. It’s not going to be a single even texture and can have varying amounts of pockmarks, rough, sharp edges, or smooth and aged surfaces.
The better you copy what you see, the more realistic the stone surface will appear.
Adding A Background
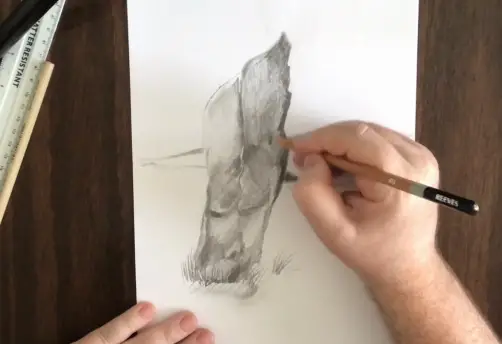
Every standing stone circle needs to have some background to help sell the rest of your picture. It can be as simple as an open grassy field or a thick forest in the distance.
This is where your horizon line will help you create the correct scale. Adding a background will also enhance your standing stones, so pay close attention to keeping the contrast as faithful to the lighting that you’re using that defines day or night.
Famous Stone Circle That You Can Draw On Location
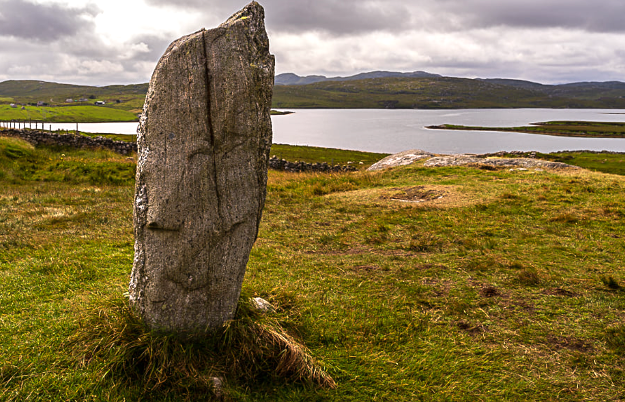
Once again, there are many famous ancient sites and stones across Britain, Scotland, and even Ireland.
If you can’t get out to an actual location, you can Google a Stone circle near you. Some of the most famous standing stones are mainly in the UK.
The rest of the lesser-known circles are peppered across various spots all over the globe. If you can locate one of these standing stones, you can find the best angle that will show off the unique nature of how they were positioned.