Landscapes have always offered a rich source of inspiration, with the sheer amount of detail and the range of features to draw inspiration from.
The drawing and paintings of the landscapes are one of the main traditions within the visual arts. Landscapes have been drawn since prehistoric times, expressing our love, interest, and desire to explore and record our surroundings and environment.
Landscapes or scenery paintings were initially drawn in the open air. However, artists such as Constable, would make sketches on location and produce a finished landscape painting in the studio.
In fact painting and drawings of the ‘Landscape,’ do not need to be limited to what we observe in front of us. Many cultures have chosen to depict and interpret our surroundings in symbolic form.
Observational drawings of landscapes in pencil can be complicated. There are many different elements and factors that you will need to master and understand to create and reasonable drawing. The best way to create a successful landscape drawing is to simplify and break down the different parts of the landscape in isolation.
Capturing Mood and Perspective
There are many ways in which you can create mood and the illusion of distance and space in your landscapes.
A simple lesson I was taught during a degree tutorial 26 years ago is that drawing, painting, and sculpture can all be likened to that of an orchestra. Were by the high and low notes can be compared visually to the colors and textures to create a mood or drama.
There are some alternatives you practically employ to help you achieve these effects.
- A full scenic viewpoint is an excellent way to create a dramatic view.
- Create a monochrome drawing is also an effective way to create mood and atmosphere.
- If you highlight textures in your painting and drawing, this works well with a color field painting that focuses on the interaction of light.
- Mood lighting, sunsets, sunrises are also great ways to create a sense of mood and atmosphere.
Use a Viewfinder
A viewfinder can be used to find an interesting viewpoint in the most lifeless and empty landscapes. The easiest and most direct way to do this is with two pieces of paper or card. Also, the angles and views you want to represent
- Cut out two L-shaped pieces of card.
- Place the viewfinder in front of your face, and overlap them to create a rectangular viewer.
- Each individual piece of card can be moved or adjusted to create a large or smaller viewing area.
- Move the viewfinder around to explore the landscape until you find a scene you are happy to draw.
Creating Drama
Creating a dramatic vista or views in your landscape is key to building a successful image. This can be achieved in many ways.
One option is through the depiction of light as it occurs at various points in the day.
Sunset in the evening or a dawn sunrise. In both alternatives, you will find that the interaction of light will offer dramatic ways to create drama in your artwork.
The Fauve paintings of Derain and the water sketches by the French Impressionist Monet are an excellent example of how the interplay of light, color, and surface can work.
What You Can Draw in the Landscape
Here are the individual features that can be found in the landscape.
Our countryside and the rural environment when we consider it offers stunning scenery in the form of coastlines, mountain ranges, woodlands, forests, tropical jungles, country lanes, cloud formations, sunsets, and sky. Artists can also choose to depict seascape, coastlines, rivers and the urban landscape in many different ways. To help you achieve this use a variety of drawing material and techniques. Read my post about the Artists Basic Equipment List.
The Expressive Landscape
The European painters in the have traditionally produced colorful which interpret the features of the landscape in an exaggerated way. The Fauve painters and impressionist produced vivid which paintings which interpret the elements of the scene in an exaggerated way.
The Symbolic Landscape
Images of the ‘Landscape,’ do not need to be limited to what we observe in front of us. Many cultures have chosen to depict and interpret our surroundings in symbolic form. The Dreamtime images of the indigenous tribes of Australia.
Pay Attention to Detail when Drawing
Observational drawing can be tricky when you first attempt it. The main advice I would offer is to look and observe more than you draw.
Developing your visual awareness is essential if you are looking to establish the quality of your observational drawing.
Spending more time looking rather than drawing initially will allow you to create a successful drawing. But to achieve this, you will need to focus on some things.
- Simplify your composition or the layout of your picture. This can be developed with a simple line sketch.
- Establish a focal point. This could be a tree, road or a river for example.
- Pay attention to the details of tone, texture, shape, and color. Begin to apply detail to your drawing.
- Try different mark making techniques
- Mark making is an excellent way to establish detail and visual interest. There are many ways to create marks on paper.
- An excellent way to develop a range of marks is to practice drawing the contours of the features of the landscape.
- Split the shapes into separate sections of dark, mid-tonal and light. Drawing mark closer together will create shadows. In the mid area, the tonality will be lighter as will the marks.
- Sparsely drawing marks in the light sections will give the appearance of highlights
- This method can be applied to a lot of the different features in the Landscape, such as trees, rocks, and mountains
Learn to Draw Weeds and Grass
Adding small details to your drawing such as weeds and glass l will bring the foreground of your drawing to life.
- When drawing grass in your landscape consider the variety of shapes and lengths and the resulting shadows cast upon them. The sky and the weather conditions will affect how the glass will appear.
- Summer colors and textures appear very different when contrasted with a dark winter scene.
- Glass and weeds can also be drawn from a distance, for example, large fields or grasses on a riverbank or stream. Remember to apply the techniques you have read about previously in this post.
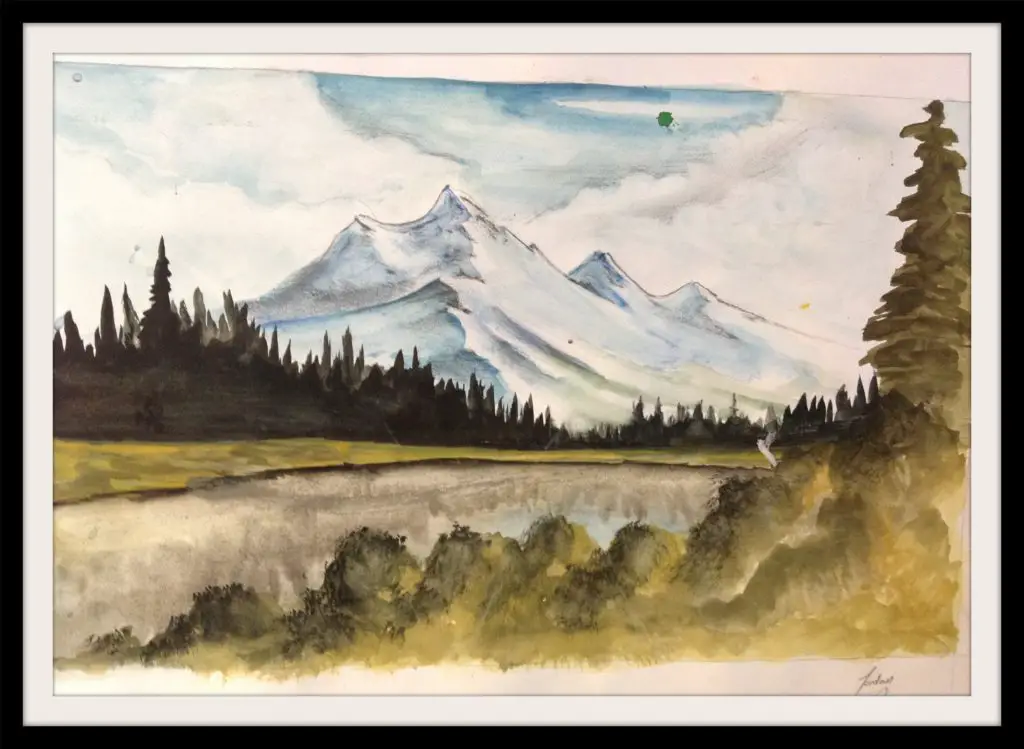
Learn to Draw Mountains
Follow these simple steps to help you draw mountains in the distance. This is a simple method which will allow you to create a drawing from observation or a secondary source.
- Think carefully about which medium you which to draw with. Fine line pen, pencil or graphite.
- The first step when drawing a mountain range is to establish your horizon line. This does not have to be straight; instead, it is best illustrated as a softly curved line. The mountain will be drawn above it. Some lines joined together.
- Next, draw some jagged lines which will form the outlines of the mountain range. Remember to vary the shapes and the peaks as you observe them.
- To create the illusion of distance add hills in the foreground and smaller mountains in any spaces between the mountains.
- The next stage is to add detail and tone.
Draw Tree Trunk
Trees can be found in many different shapes and sizes. However, they all have one thing in common which is the trunk of the tree.
- Focus on the form of the trunk. The simplest way to draw the trunk of the tree is with a simple cylinder form onto which shade and texture can be applied. You use different media to illustrate this. However, it is advisable, to begin with, a faint sketch.
- Texture and mark making. The surface texture of the trunk of the tree is the bark. The stimulate the effect of bark. Apply a mark making technique graduates from closely drawn marks to progressively lighter marks. This will produce the result of a shadow.
Reverse Drawing Draw White on Black
This is an excellent way to explore and render the qualities of texture and tone in your drawings. You will need a set of white color or charcoal pencils and some good quality black card or sugar paper.
- The secret to this technique is to reverse the values on the objects you are drawing. So instead of drawing the darker values onto a piece of white or monochrome paper, you will focus on applying lighter highlights or values onto a black surface.
- Choose a subject which has a high level of contrast, or a stable light source.
- Create a light contour drawing of the landscape, this could be a mountain range for example.
- If the lines are too dark, use a kneeled eraser or lift the charcoal off the page.
- Begin adding charcoal to the lightest area of value on your drawing. For example where you see the highlights.
- To create smooth graduation of tone and value, you will need to work slowly to achieve a uniform effect.
- You can create focus in your drawing by pressing harder with the pencil in the places that you want to stand out or have more of an impact.
- Use a blending stick to blend the sections of your drawing which appear rough or crudely mixed.
Learn How to Draw Water
A suitable method for learning to draw water or the surface of a calm stream or lake is with soft charcoal. As this will let you work in a fluid and direct way on to paper.
- Use charcoal to draw the waves by making more massive marks in the foreground of your drawing and smaller marks in the background. This will create the illusion of space and distance.
- Marks in the foreground will need to be drawn closer together.
- Marks in the background will be sparsely located with more space around them, creating the effect of reflecting light on the waves of the surface of the water.
- Next, take a blending stick to smooth out the edges of some of the marks you have drawn. This will give the drawing a softer appearance.
- Build up the values in your drawing by drawing with a compressed charcoal pencil to add some darker marks and increase the darker values in the picture.
- Continue to add darker values to the background of the picture by applying a few smaller darker marks with the pencil to the background of the drawing.
- Use a white charcoal pencil to add lighter values in the form of highlights in the spaces created by the darker marks you have drawn.
- Finally use the dark charcoal pencil to apply contrast in areas where you have applied the white crayon, including the background. Continue this process until you have finished.
Avoid Smudging your Drawings
There are many ways you can prevent smudging and smearing your drawings both in your sketchbook and when you are drawing directly by hand.
- The easiest way to avoid excessive smudging when drawing is to use a separate piece of paper to lean on when drawing. This will prevent the side of your hand from becoming excessively dirty when it makes contact with the graphite on the surface of the page.
- Another way is to use workable fixative which can be used to spray the surface of the page while you are drawing.
- Once you have applied workable fixative to the surface of your drawing, you can continue to use shade to different sections of the picture. This includes darker areas of shadow which you want to make darker.
Learn to Draw Rocks Realistically
Rocks can be an essential feature when contrasted with different elements in your landscape drawings. You need to follow a few simple rules to draw rocks realistically.
- First, draw contour outlines of the rocks or the group of stones that you wish to draw. If drawing a group of rocks the size of each individual rocks will need to vary.
- Next, consider your light source and from which side the light is coming from. You are now ready to begin adding shading and tone.
- Consider the rough surface of the rocks, you will need to simulate the texture of the surface of the stone when you are adding pencil shade.
- Progressively build up the darker shadow from mid-tonal shade to more shaded areas of shadow with the pencil. This will give the appearance of a roughly textured surface.
- Also, apply darker shadows to the base of the rocks, where you will find shadows.
Use a Blending Stump
Made from compressed paper blending stump are excellent for blending and creating the transition between different values of tone in your drawings.
- They are also suitable for creating a smooth appearance on your drawing if the shading is rough, grainy and has areas of white.
- They can also be used to create marks and pattern around areas or shapes that you have been shading.
- The tip of a Blending stump has a tendency to become dirty when it is used over a protracted series of time.
- To clean your blending stump simply rub the tip of the stump onto a piece of sandpaper, which will clean the tip.
- Always use a clean stump to add lighter values onto the drawing. If you use a dirty stump
Develop a Composition Using the Rule of Thirds
The rule of thirds is a guide that will help you compose a natural looking composition within a rectangle or square.
The rule of thirds usually works best within a rectangle.
- Begin by splitting your rectangle into thirds by drawing lines horizontally and vertically by drawing lines across the page.
- Where the lines intersect will be our key points of interest where objects or a focal point can be created on the image.
- The rule of thirds can also be used to give the impression of height in your landscapes, with two-thirds of the drawing used to depict the sky.
Create Art With My Favourite Drawing Resources
General Drawing Courses. I like Udemy if you want to develop your knowledge of drawing techniques. Udemy is an excellent choice due to its wide range of creative courses and excellent refund policy. They often have monthly discounts for new customers, which you can check here. Use my link.
Sketching and Collage. Take a look at this sketching resource I have created. Use this link.
Proko. Is one of my favorite teachers who surpasses in the teaching of Anatomy and Figure drawing. Prokos course breaks down the drawing of the human body into easy-to-follow components aiding the beginner to make rapid progress. For this, I really like Proko.
Art Easels. One of my favorite ways to draw is by using a drawing easel, which develops the skill of drawing on a vertical surface. The H frame easel is an excellent vertical way to add variety to the style and type of marks you create when using a drawing board.
To see all of my most up-to-date recommendations, check out this resource I made for you.