How to Draw the Leaning Tower of Pisa
Many iconic structures worldwide stand out for more than just their unique architecture and actually have character. One such structure is called the Leaning Tower of Pisa and is located in the Italian city of Pisa.
Its history proved many things over the last 850 years that it's been standing and, more importantly, the characteristic lean to one side dubbed it the Leaning Tower of Pisa.
Watching My Step By Step Drawing Tutorials
Draw Leaning Tower Pisa Step by Step?
A leaning tower should always start with an angle that will show that the base of the tower and the top of the tower is dramatically different from each other.
Instead of a perfect vertical tower drawn with a 90-degree angle to the horizon line, this line will become angled to at least 4-5 degrees to any direction off from the 90-degree angle that should be represented. This will visually allow a tower to appear to be leaning.
How Do You Draw A Lean?
One of the essential lessons in drawing the Leaning Tower of Pisa is to capture the iconic lean. A lean is any object usually standing perfectly straight up at a 90-degree angle according to a flat horizon line.
Whenever any building or structure is leaning, the very top of that object tilts off to one side, adding more increments to lean the object off of its center of gravity.
One perfect example is someone standing next to a wall and leaning against the wall and is not free-standing anymore.
This is called leaning and is sometimes found in buildings experiencing poor architectural design due to a shifting foundation underneath that structure. Often, leaning has been seen in iconic towers due to structural failures that led to their collapse.
Draw a Centreline
Once you've established a horizontal line that represents the horizon, you can now start to draw a centerline using the horizon line as your guide.
A simple angle square ruler will give you the most accessible center line since the 90-degree angle along the edge of the angle square helps make your centerline.
You could use a protractor which gives you better access to finding the exact center line and allow you to add degrees to make a tower appear to be leaning.
The centerline also determines the angle and perspective from which the tower is being viewed. The most dramatic angle most people line to draw is from the side where the tower is leaning to the right.
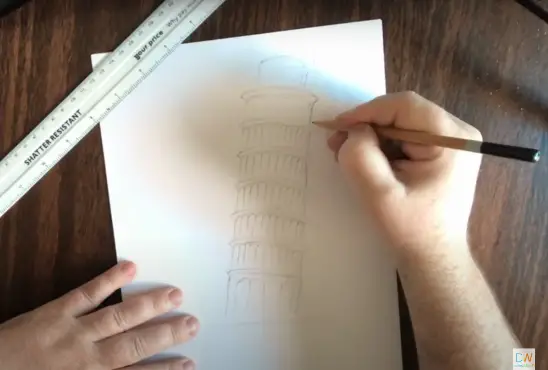
Draw The Basic Outline Of The Tower Of Pisa
The Tower of Pisa is essentially a straight column cylinder-shaped like any energy drink aluminum can. The general proportions are first drawn [http://www.supercoloring.com/drawing-tutorials/how-to-draw-the-leaning-tower-of-pisa] using straight lines to establish the width of the tower, and then an added line is drawn down the center to help create the cylinder shape. Since the tower will be leaning, the angle where the tower is viewed will also determine the degree of leaning angle before you start the centerline.
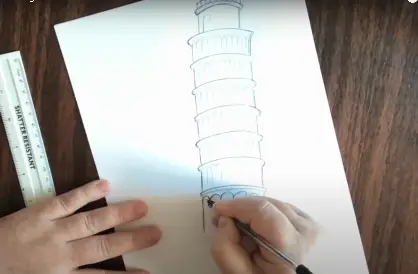
Subdivide The Various Levels
There is the base level at the very bottom, followed by a series of 6 subdivided sections and then the peak tower arch. The top arch is nearly as tall as the base but slightly shorter unless you count the railing that encircles the very top.
It's like a divided wedding cake that has been elevated over to become a tower shape rather than a typical 3-layer cake.
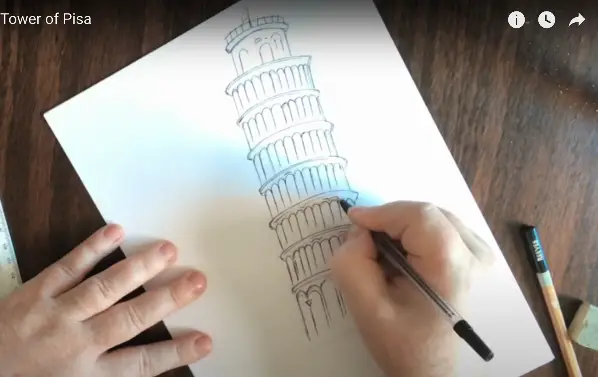
Add the Details
The Tower of Pisa is adorned with several exterior columns and arches that adorn the exterior of each subdivided ring. At any given angle, 14 columns encircle the 6 divided levels.
The base has about 8 columns that can be seen, with each arch connecting between these columns. The very top of the tower has a combination of large and small arches displaying the bells within the more enormous archways.
It's best to look at close-up pictures of these details to get a better understanding of how they look up close.
Architectural Style of Leaning Tower of Pisa
The architectural style of the Leaning tower actually began as Romanesque when it was first constructed in 1153. Since it was being built next to the Piazza del Duomo cathedral, it soon followed the gothic style that most cathedrals of that era were known to display.
The most prominent feature of the Romanesque style is the columns and arches that circle many of the subdivided layers.
Additional Questions:
Is the Leaning Tower of Pisa actually leaning?
Quite literally, the Tower of Pisa is leaning currently 4 degrees off of its foundation. It was previously leaning as much as 5.5 degrees back in 2008 but was finally corrected to a modest 4 degrees before the Italian architectural engineers could remove soil from one side to allow the tower to slump back to a lesser lean that might have caused the tower to fall over entirely.
How Do you Draw a Famous Building?
The best way to draw a famous building is to visit these landmarks in person and take many photos from several angles. Make a lot of close-up pictures of little details and sketch thumbnails of possible ideas based on the lighting conditions.
This isn't always easy to do if you happen to be on holiday, so the next best thing is to search for photos online of that building for better reference.
When you start to sketch a famous building, always look for an angle that best represents your appreciation for that building.
This is often through dramatic angles to give more of a stark and powerful image, but you can also show the simplicity of a famous building by capturing the angle from further away, showing how it has a presence within its environment.
This isn't the best tip for how to draw the Leaning Tower of Pisa, but merely a suggestion.