To create a line drawing of a mountain, read on. This blog post discusses the qualities of a good line drawing, how to add textures and rocks, and how to accomplish making your work appear three-dimensional.
How to Create Accurate and Realistic Mountain Drawing
- A few things to remember while drawing mountains: they must look accurate and realistic. The following list comprises the necessary equipment for this project:
- A pencil
- Paper
- Pen
- Erasers
Draw the Horizon
The next step is drawing the horizon line, where the earth occurs to meet the sky. This can be done by trying this simple exercise:
Position yourself somewhere with an unrestricted view of the horizon;
Close one eye.
Raise your arm in front of you and use your thumb and forefinger to make a small “V” shape;
Line up the horizon with the top of the “V,” and draw a straight line along the horizon using your thumb and forefinger as a guide.”
After you draw the horizon, you can use this guide to sketch an accurate landscape representation. Keep your horizon line level as you draw so your final product will look realistic. With some practice, accurately depicting nature's beauty will be a breeze!
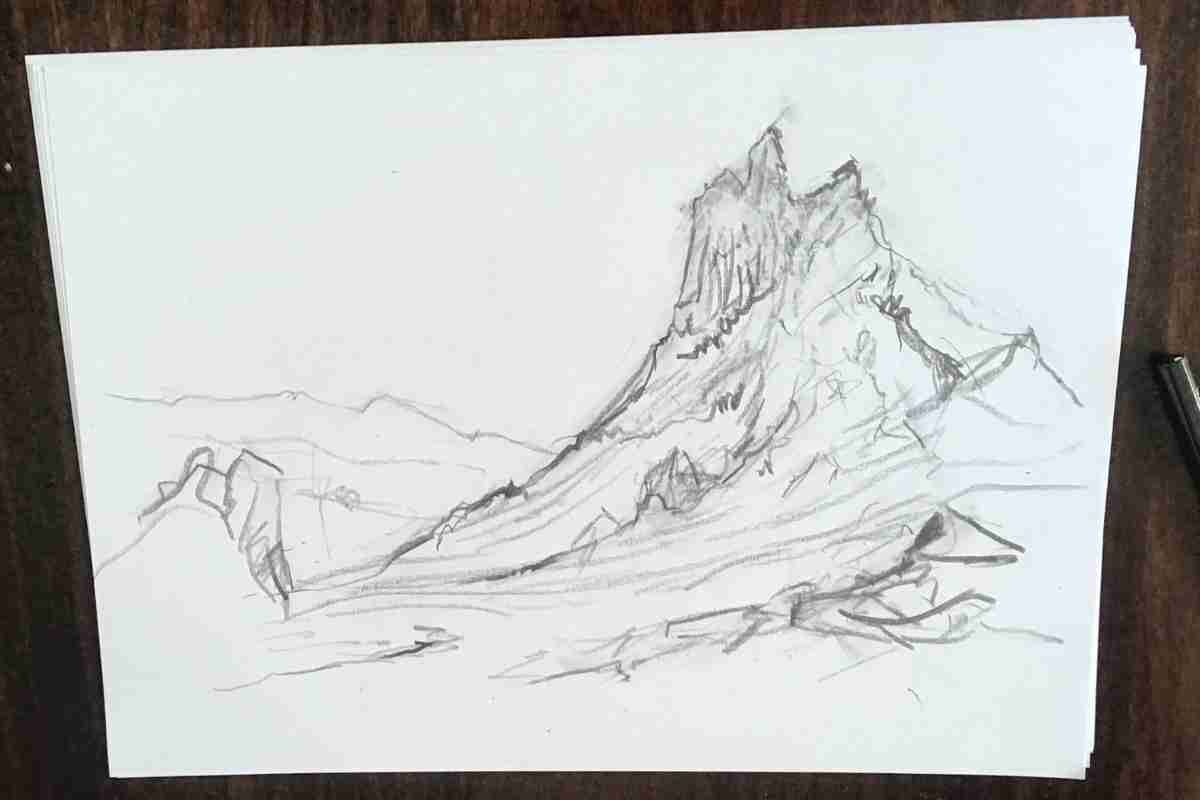
Create a Sense of Depth and Space in Your Drawing
You can create movement in your drawings by adding curves and swirls. To create a sense of volume, add shading to your drawing. The pressure you apply to your pencil will also affect the line width.
Softer pressure results in a lighter line, while harder pressure creates a darker line. Experiment with various techniques until you find the desired effect for your drawing.
To make your drawing more three-dimensional, vary the width of your lines. A thinner line will make something look further away, while a thicker line will create the opposite effect.
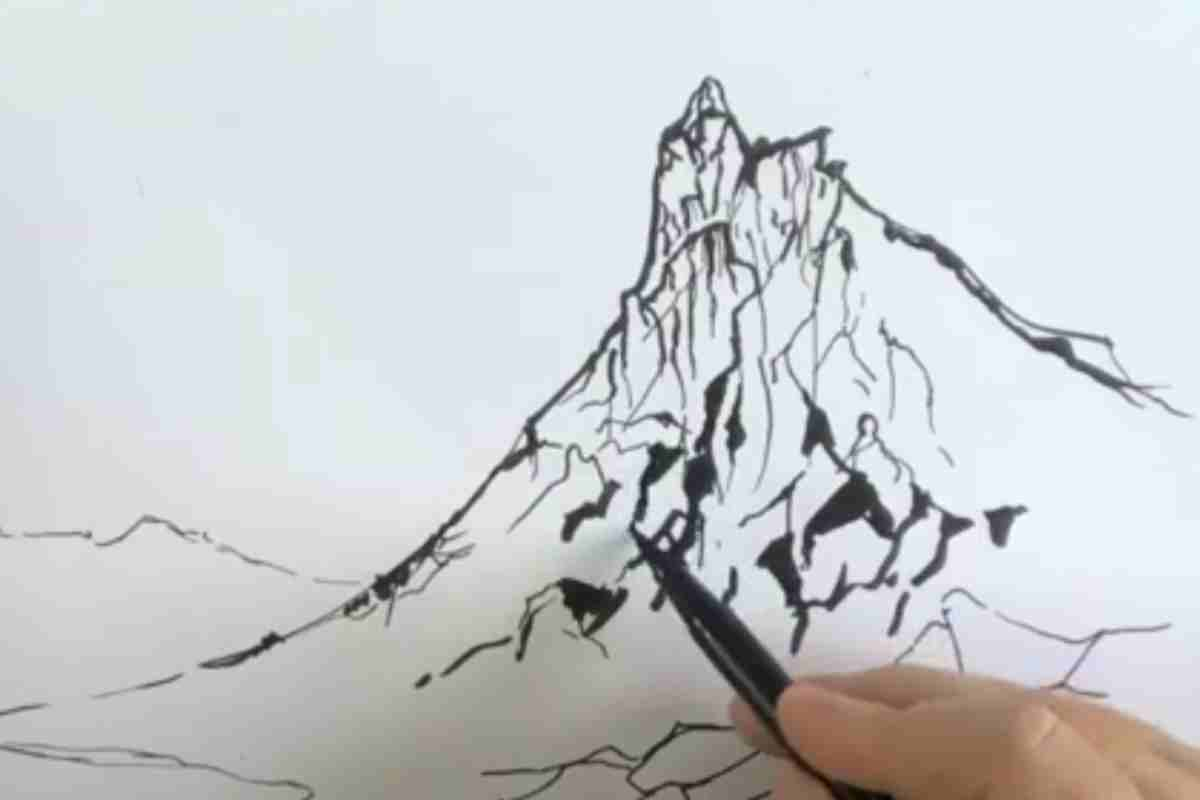
Drawing the Outline of the Mountain
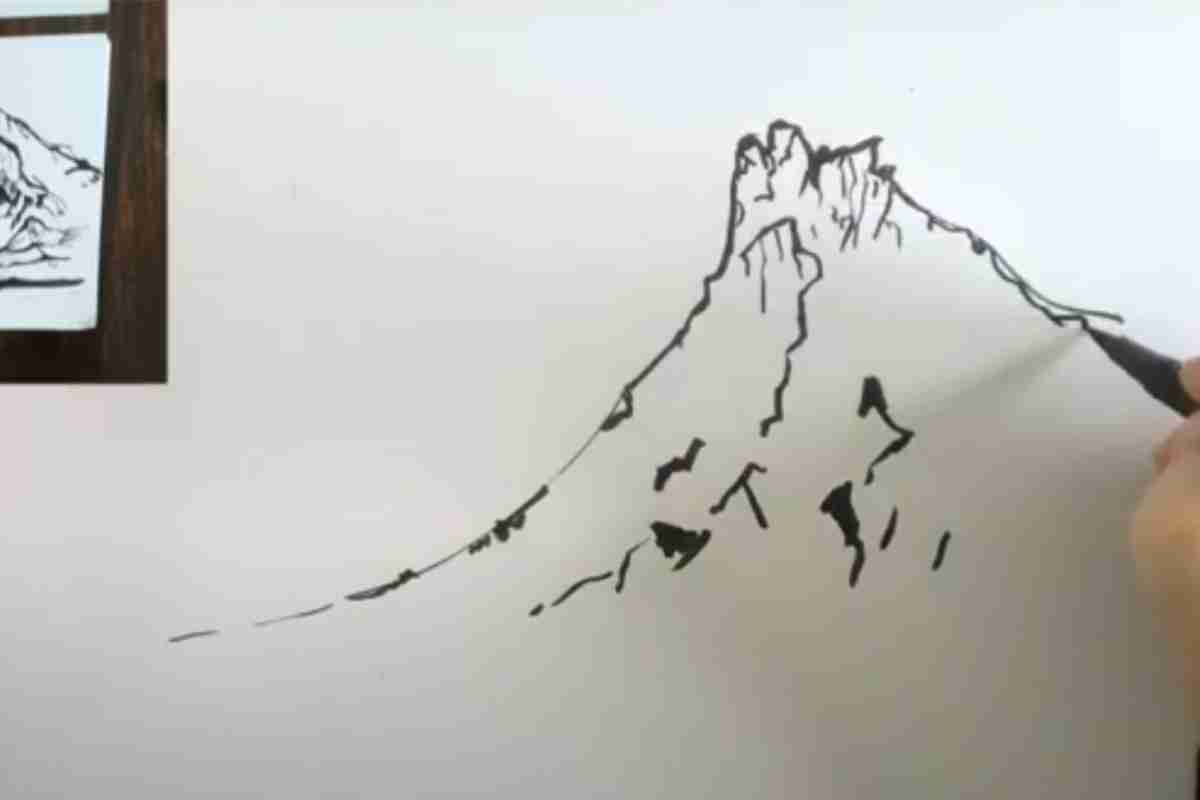
Begin by depicting the basic outline shape of the mountain you want to draw. This means creating a simple outline that looks like an actual mountain. You can do this by starting with a central peak and then constructing the sides of the mountain using lower peaks.
Hatching to Create Texture for your Mountain
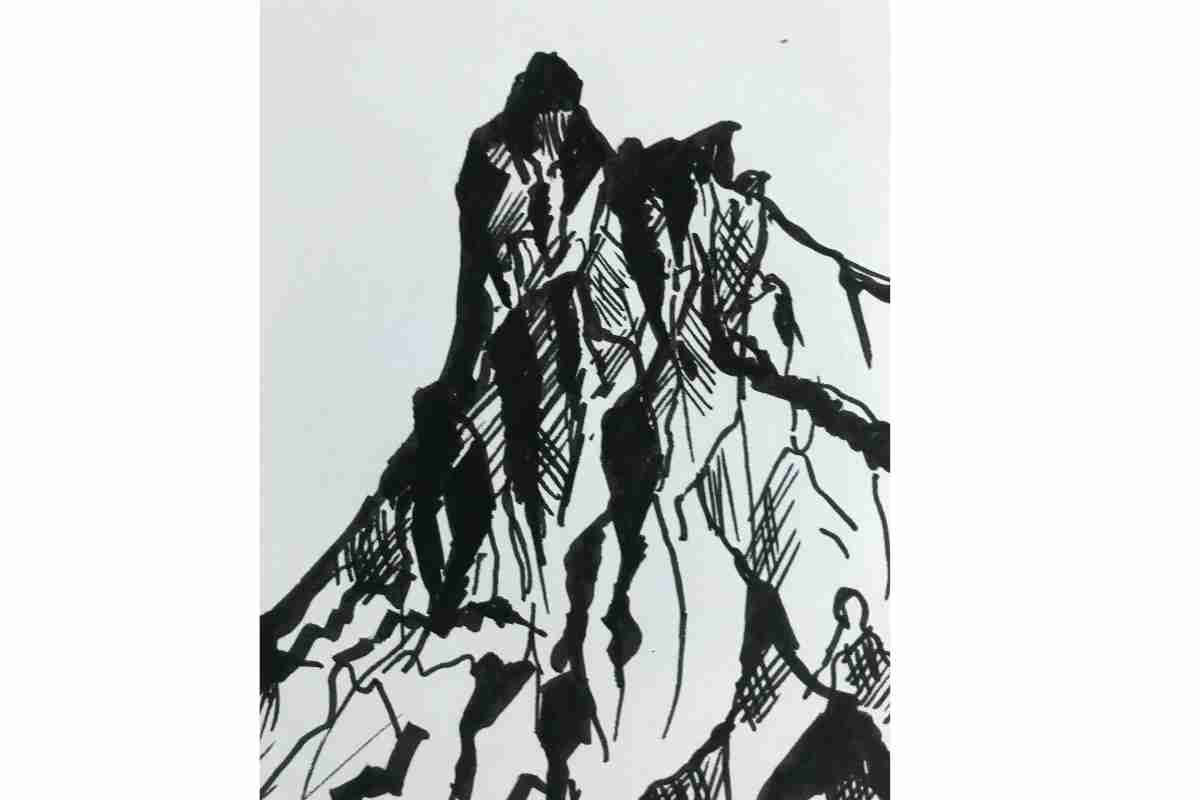
You can create unique textures on your mountains by using hatching. Hatching is the art of shading and volume creation through parallel lines. You can also use mark-making to produce both light and dark areas. All you need for these mountain design techniques is a sharp pencil and some paper.
First, draw a basic mountain shape. After you have the outline, start adding parallel lines. The space between each line is up to you and will affect how your finished product looks. Make the lines closer with more marks if you want a darker area.
If you would like a lighter area, place the lines further apart. The thickness of the lines can also be adjusted to create more texture. To learn How to Draw Rocks and Cliffs, look at this post.
Hatching is an interesting technique that adds depth to drawings. Try different line placements and thicknesses until you find a combination you love!
Add Additional Details
Adding extra features to your mountain can make it appear more realistic. Some examples of these include trees, rocks, and snow. Adding different elements creates depth and texture that wasn't there before.
Finally, when adding finishing touches to your drawing, consider the lighting. The Sun's angle and time of day greatly affect how a mountain looks, which should be reflected in your work.
By following these tips, you can create an accurate and realistic mountain drawing that will impress everyone who sees it.
You will need some patience and undertake regular practice to improve your skills.
In summary:
Begin by sketching a basic outline of the mountain on your paper. Use your pencil to draw a rough shape that resembles a mountain.
Once you have the mountain's general shape, add details like trees, rocks, and other features. Again, use your pencil lightly so you can erase it easily later if needed.
Qualities of a Good Line Drawing:
If you want to create beautiful line drawings, follow these tips:
- Use reference material: Instead of imagining your mountain, use photographs or look at real-life mountains for guidance. This will help you make your drawing more accurate.
- Be patient: A quality line drawing can only be done slowly–it requires time and patience. Rushing it will decrease the overall quality of your work.
- Create depth with light and dark lines: Varying the thickness of your lines will create an illusion of depth. This is especially useful when you want to add shadows.
- Keep your lines consistent: Inconsistent widths or directions will make your drawing look sloppy and unfinished. Use the same width for all your lines, and ensure they all go in the same direction.
Creating Textures:
There are various ways to make your line drawings look more lifelike, and adding textures is one method. This can be done by changing the type of lines you use or shading selected areas. To create textures in your drawings, keep these approaches in mind:
- To create hatch marks, draw a series of close-together lines in the same direction.
- If you want to add some extra dimension and texture to your drawings, cross-hatching is a great technique to try. Cross-hatching involves drawing a series of close-together lines that crisscross each other. To create cross-hatching, draw a series of close-together lines that crisscross each other.
- When stippling, you create texture by using dots instead of lines. To do this, dot your paper with the pencil rather than making continuous strokes. The closer together the dots are, the darker the area will be.
To create texture, start by shading in one direction with light pencil strokes. Then go over it again with strokes in a different direction. The more directions you use, the more textured the area will appear.
Creating Depth and Dimension:
Creating the illusion of depth is important to make your mountains look more lifelike. You can do this by using perspective with vanishing points. To find vanishing points, draw two parallel lines on your paper and extend them until they meet at the horizon. Once you have found your vanishing points, use them as a guide for adding perspective to your drawing.
For example, if you want to make something look farther away, draw it smaller than the things closer. You can also use shading to give the illusion of depth and dimension. The darker an object is shaded, the closer it will appear because more shadow is cast. The reverse is true for lighter objects; they will appear further away because less shadow is being cast.
Conclusion
Below are step-by-step instructions on how to properly draw a line of a mountain. Follow along and see how yours turns out in the end!
Use light pencil strokes to sketch out the basic outline of your mountain. Make sure to include any major features, such as peaks or valleys. You can also start adding in any minor details, such as trees or rocks, at this point. Remember, take your time!
After completing the general outline, add more intricate details. Start by adding shadows with hatch marks or cross-hatching. You can also start stippling now if desired.
Add some final details to your mountain, like highlights or small patches of color. And that's it! You've now learned how to draw a line drawing. Remember – practice makes perfect, so keep at it until you're comfortable with the process!