
Within some landscape drawings, they can include various rocks that form hills and cliffs. Drawing any of these rocky shapes might sound like an ordeal if you're not used to drawing them. Here are several helpful DIY tips that can help you learn how to draw rocks and cliffs that look more like rock and have realistic textures.
How to draw rocks and cliffs: Rocks and cliffs can easily be drawn with a pencil using a number of step by step methods. The artist should concentrate on the fundamental underlying form of the rocks and start to utilize tone and value. Texture can also be combined by progressively enhancing and improving the surface of the drawing.
Related Posts You May Want to Read:
- How to Draw Landscapes in Pen and Ink
- How to Draw Realistic Rain
- How to Draw Clouds with Charcoal
- How to Draw Clouds with Pen
HOW TO DRAW ROCKS AND CLIFFS
Rock is an impressive natural composition that is created from solidified layers of sediment that's pushed-up through the ground. This is caused by the movement of tectonic plates on the Earth's surface. As plates move and collide with each other over millions of years, mountains and hills are formed, creating impressive rocky landscapes.
They can also be revealed through natural exposure through erosion making massive canyons and valleys. Rivers and glacier action were responsible for creating impressive sights, including Yosemite Valley and the Grand Canyon. Water also has a way of softening the exposed edges of rock through natural erosion.
With that being said, the look of rock will all have different textures depending on where you find rocky outcrops. The one thing these forms all have in common will include fundamental shapes that are mostly geometric forms. Consider the basic shapes such as circles, squares, triangles, and rectangles, with a combination of all -in between.
The formation of rocky shapes will all follow natural patterns that expose cracks and their sediment layers. These shapes also tend to include textures that will vary depending on the type of rock you are drawing. It will be essential to have a basic understanding of how rock is created and becomes weathered over time.
Any rocky surface you will draw is fine if you are trying to copy that image. It doesn't hurt to learn what causes their formation and how they end up looking through thousands of years of natural exposure. You can use images of interesting rock formations as a visual reference for ideas to help you create rocky surfaces.
Start building rocky shapes that follow similar patterns that are found in nature. Keep in mind that gravity can make any rocky shape more realistic. Erosion and debris that collects at the base of cliffs give mass to large rocky formations. Steer clear of fantasy-like formations that just don't exist in our world.
HOW TO DRAW A CLIFF
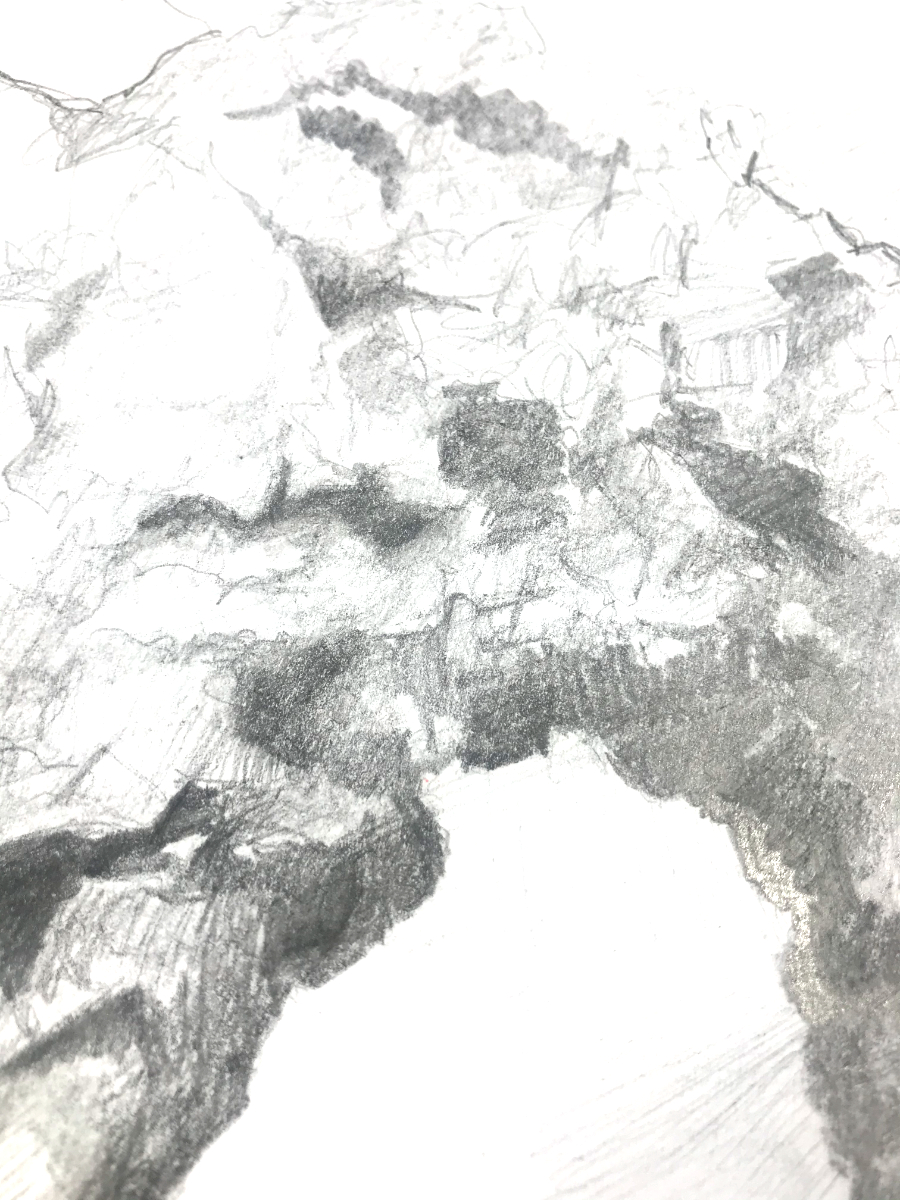
The first step is to determine the scale of your cliff and where it will be placed in your drawing. How close is the cliff in the foreground or background? Don't forget that perspective will predict where shadows are placed and how far your cliff decreases in size toward the horizon line.
The addition of light and contrast will dictate where your sunlight is coming from. The sun's position will make more shadows over rocky surfaces, depending on the time of day. An excellent way to draw cliff surfaces at home is easy if you take aluminum foil and crumple it to make different rocky shapes.
After that, you can spray it with a gray color and prop it up next to an adjustable table lamp. Then you can position the lamp to simulate the sun and see where shadows are falling. This will act as an excellent guide for seeing where actual shadows are falling on a rocky surface.
This aluminum foil piece can be repositioned several times so you can get different angles and textures you can sketch from. This speeds up the process of drawing a cliff and gives you plenty of ideas that add to your cliff picture. The rest of the process is adding shading and creating a texture that makes a cliff look natural. To see amazing examples of cliffs visit the site of the artist. Sean Briggs.
HOW TO DRAW REALISTIC BOULDERS
Boulders aren't rounded humps that stick out of the ground unless they've been sitting exposed for a very long time. Some boulders have natural geometric shapes from cracking and shattering after large pieces come loose from a rock face. Whether they stand-alone or within croppings, a boulder needs to appear with intent.
• Add Scale and Depth to your Drawing
How large are your boulders going to be within your picture? The detail added will give you a good idea by adding objects that provide a sense of scale. These additions and objects will allow anyone who looks at your picture to estimate the size of your boulder.
Objects such as buildings, trees, bushes, grass, or even animals and people immediately give a size reference to any boulder that is drawn. Another great way to address scale is to add a generous amount of sediment layers that run through rock. Despite the shape involved or how weathered and rounded boulders can be, there are still sedimentary layers.
• Pay attention to natural erosion
The sun and rain, and all other elements cause a rock to slowly break down depending on what kind of rock your boulder is made from. Most people might not realize that ice and harsh weather break down the rock in different ways. Boulders in icy climates will be more rough and jagged than boulders found in a dry desert.
The power of sand and wind in desert environments will make rocks have softer and more rounded surfaces. It's a natural sandblasting effect that makes interesting textures and surreal shapes. On the opposite of that spectrum, water that's trapped on rock and boulders has incredible power.
It can shatter and fracture boulders into pieces when water crystals form inside minute cracks. Boulder will then take on sharp knife-like edges that often look deadly and foreboding. Take a look at rock formations in Antarctica that show how destructive ice can be to rock.
DRAWING THE FORM OF A ROCK
The first rule is going to be all about what kind of rock you are drawing. No matter what kind of instruction or DIY tip you get, you need to have a concrete location that defines the rock you are drawing. If you don't know what kind of rock you want to draw, use the internet for images or from real locations you've visited before for reference.
Different kinds of rock also tell you something about that picture and add to the visual impact. You might want to tell a story without saying anything, using rocks and boulders to guide a feeling based on the type of rocks showing. This can make a more significant impact on whether you are trying to give a fantasy or something mysterious.
Unlike cloud shapes, rocks have to follow a geological guideline on how they are formed in nature. Rounded rocks can represent a very ancient location but not limited to one that experiences abrasive weather with lots of wind, rain, or sand. At this point, you must study the type of rock, so you get a better feel for drawing them.
Without learning about rocks and geology, at least beyond the surface of your knowledge, is essential. This is what will give you more knowledge of the rocks you want to draw. If not, your rocks, stones, and boulders will look out of place.
ADDING TEXTURE TO YOUR DRAWING
Rock texture will always be full of detail with lots of cracks, spots, sediment lines, and surface blemishes. You might say that a rock surface is a visual guide into the history behind it. The landscape around your rocks also gives subtle hints, but that's all part of your style when you draw rocks.
• Drawing Cracks
Your rock surface will have many natural sediment layers, but they don't always follow these layers. Drawing cracks can appear anywhere that apply to the type of rock that you are drawing. This will help you decide where natural crack would appear.
• Tips for Adding Texture
You can get different effects using dots to make sandy-looking textures heavier and lighters depending on how weathered your rock is. Use a paper stump to soften these spots to get softer patterns.
• Mottling
Rock can contain different minerals that give rock surfaces a speckled or mottled surface. These spots don't follow round shapes and will have misshaped blobby spots that are randomly spaced. Yet, this all depends on the mineral composition of your rock.
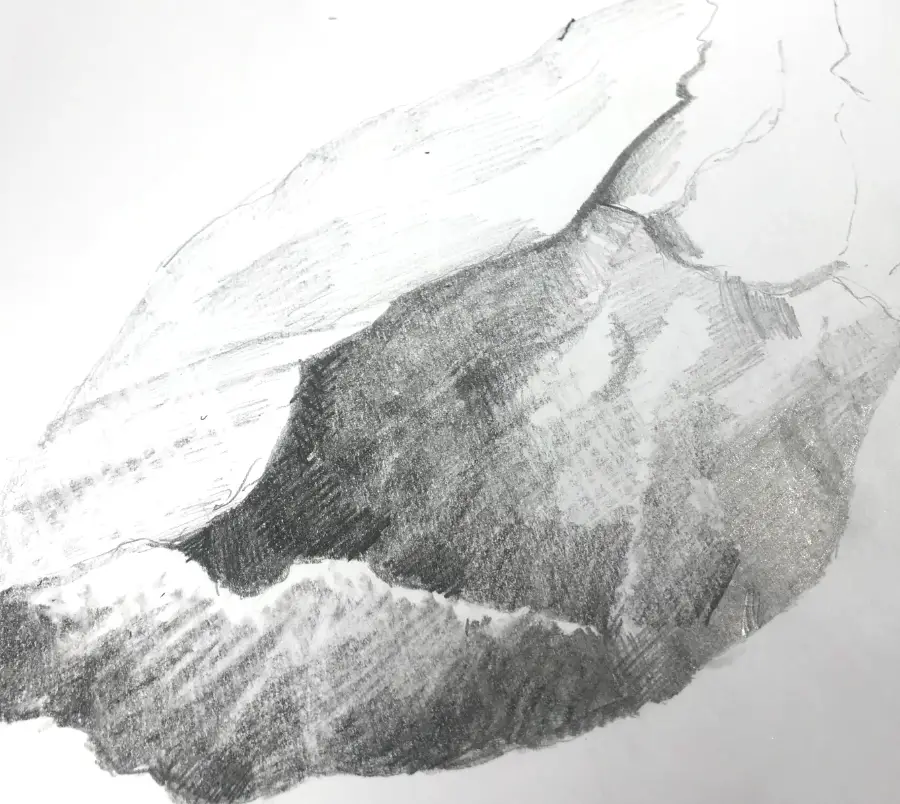
ADDING LIGHT AND SHADOW
Rock and stone surfaces will always show harder shadows depending on their overall appearance. If they are sharp edges, the shadows will drop off at varied angles that define their shape. Rounded stones have softer shadows that creep up from the lowest end and gradually get lighter toward the middle.
Factoring where your light source is coming from in the sky also dictates where natural light and shadow would fall. These shadows will be lighter or softer in the morning and at dusk and be the strongest from 11am to 2pm. You can practice these shadows using adjustable lamps and a model of your rock to see what time setting looks best.
The technique that looks best for rock is cross-hatching, spots, mottled spots, and basic shading. Rounded rock surfaces will need a blending stump to help blend over smooth looking rocks. Hard shadows won't need so much blending, but you can also have deeper shadow spots to further accents to any rock shadows.
MY CONCLUSION
You don't need a degree in geology to study rock and rock formations to be an expert. Being familiar with how certain types of rock are separated from others does make a big difference. If you are going to draw rock textures and surfaces, become a student of curiosity.
This way, your artwork and landscape of rocks or cliffs look natural on their own. Yet, it helps to add a personal message that helps tell a viewer more than just a detailed drawing. You can get more visual impact that affects the mood of those who look at your work.
