One everyday object that we see more often than buildings are to no surprise- trees! Tree make-up a majority of the landscape we live in, and without their help, oxygen would be in short supply. When it comes to drawing trees, your imagination may seem to limit how they grow. Most people do not know that trees grow the way they do result from weather changes, wind direction, and the angle which they grow. But let's start with just the basic everyday shade tree in the park.
You'll need to have something that you can reference for this project, so finding a picture will help guide you. It should be a lovely green shade tree like this one:
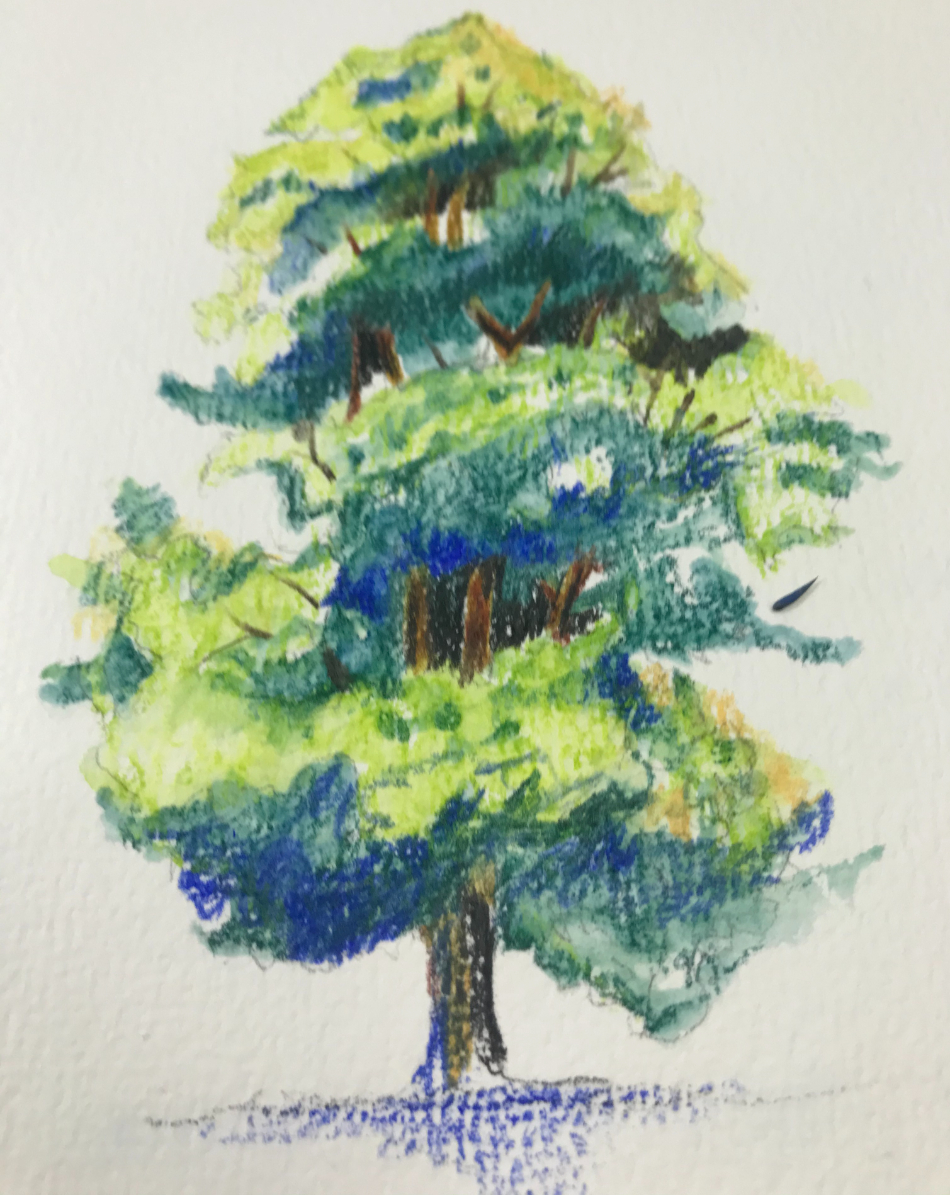
https://pngimage.net/wp-content/uploads/2018/05/arbutus-unedo-png-1.png
This can be printed out on a digital printer or projected onto a large white wall where you are drawing and painting. Because it's a PNG, it can be pasted onto any background you like. A light blue or white background would be suitable for this tree. You can even store the image on your laptop to use as a photo guide. I like the idea of projecting the image onto a nice thick drawing paper meant for watercolor. This can make the ease of drawing the colors a bit easier for you at first.
How to Draw a Tree in Water Soluble Pencil
This is where the magic of watercolor comes in because the average watercolor pencil feels like any regular color pencil. Only after you apply a paint brush lightly dipped in water do the colors begin to intensify and saturate your paper. This project is one of many that I will help you learn from and soon draw by yourself. But you need to start somewhere, and this is why drawing a tree is the simplest way to get used to the chaos of nature. Even if you don't like the way the top part of the tree looks, relax already.
Trees are essentially like hairstyles for people. They all have their own individual shape, and not all of them are asymmetrical. Trees look better when they have a story to tell, just like any good James Bond villain; trees have character. Drawing their hair first helps to describe how organized they are just plain nutty. What appeals to you should feel natural and not forced. This way, you can walk into this project and have more confidence to make your tree look more natural than this sample I've provided.
How to Use Watercolor Pencils?
You need some color pencils that are meant for watercolor. I personally recommend the Staedtler Luna Aquarell watercolor pencils. This set is not so fancy or pricy since it gives you 48 colors to work with. It doesn't come with a fancy tin, and I will tell you why. It makes the set more costly, and you can do better with a cheap plastic Tupperware storage from the dollar store. Here's why this is so important. Watercolor pencils are moisture sensitive, so humid temperatures will make these watercolors subject to getting too soft to draw with.
They need to be dry like regular colored pencils. Throw some dry Silica Gel packets that come from floral supply shops or in bulk from Amazon. If they are protected in a Tupperware, they'll last you for years. I made a mistake once using a tall cup of water for my paintbrush. I tipped it over by accident, and it soiled all my watercolor pencils in the storage tin. After that, I switched to a locking flip-top Tupperware that cost me $1.00 at Dollar Tree. I'll go more into my expert tips on how to use them within each step I mention.
Organize your Color Scheme:
These are the colors you should use for this exercise. They match perfectly with the Staedtler Luna Aquarell watercolor pencils watercolor kit. Click here to view the price on Amazon. I'll also let you know which colors to use and how to use them in the instructions. Once you have your pencils set-up, have your image nearby, projected onto your drawing paper, or printed out. We will now get started.
• Light green
• Deep green
• Olive Green
• Ultramarine blue
• Yellow ochre
• Medium yellow
• Dark brown
Lightly Sketch the Outline of the Foliage and Leaves
Use your Light Green pencil for this starting point. For this first step, you will use a technique I call the up-down stroke. It uses your forefinger and thumb to make the pencil rapidly go up and down using your wrist while you hold your pencil. Depending on how comfortable you are, hold this closer to the tip to have better control. This should be about ¼ of the length from the tip. Later if you are doing more random shading, you can set the pencil further back towards the middle. But this step needs to be more precise.
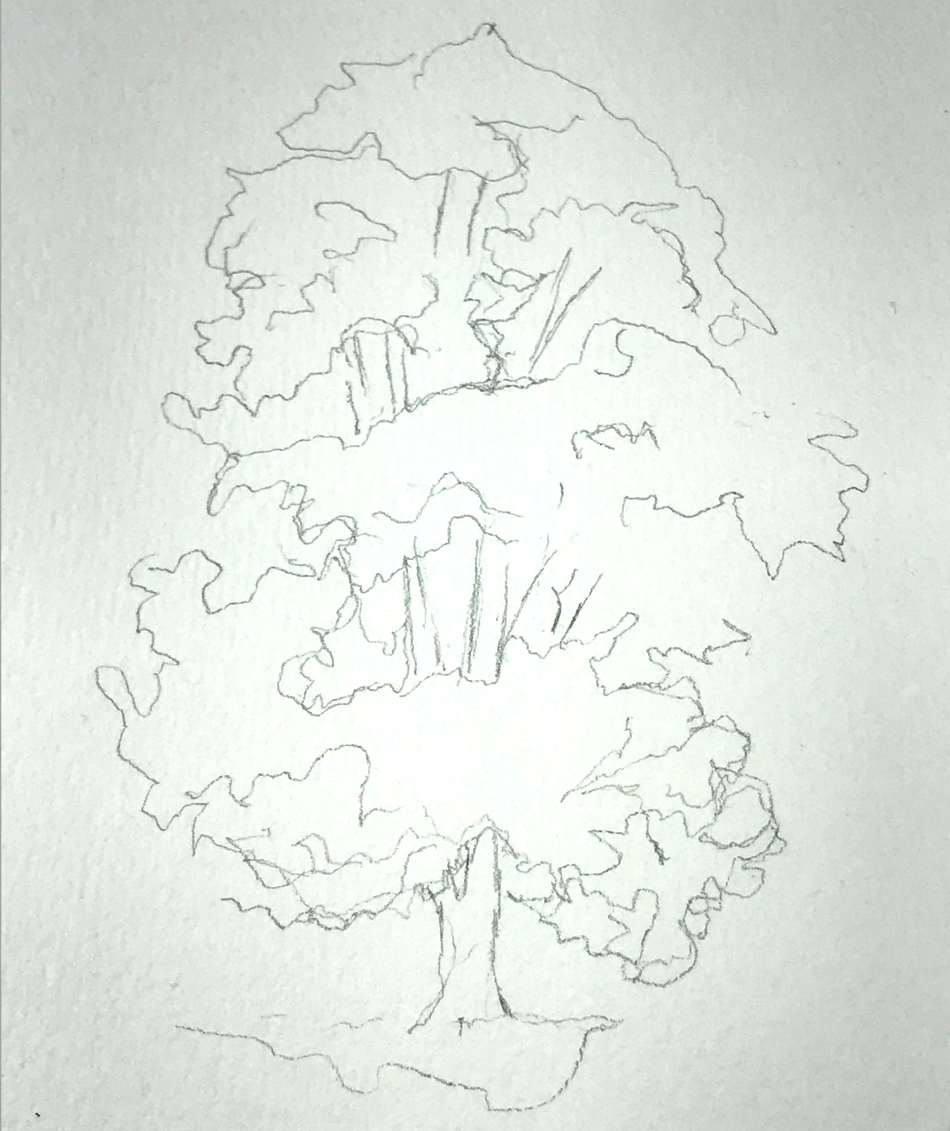
Start with the top shape of the tree and work your way downward in zigzag patterns. You don1t need to press the pencil very hard to see the color coming through. Don't follow a specific pattern, so keep all the patches open and not so connecting to each other. As you draw this outline, it doesn't need to have a specific shape just yet. You will go back and refine this further with a different drawing technique after this. If you need to unfocus your eyes to see a blurry shape, this is an excellent way to determine mass.
Apply a Light Layer of Light Green too and at the Top of the Tree
Using the light green watercolor pencil, you might need to sharpen it to have a good point. Now you will use a new technique that is more advanced, but not so hard to do. This uses the wrist movement to put more pressure on the pencil. Only this time, you bring the pencil forward and backward with your thumb and forefinger. It looks like some inchworm movement, but as this gets combined with the wrist shaking in one. This helps to make defined light green patches.
Not so many that it stands out, but something looks like random scribbles. These will end up looking like connecting scribble sections that weave through the light green mass. Once again, you need to unfocus your eyes to see just the mass of color. If things start to look too connected, back-off and leave areas with less color coverage. Make it even in spots and connected in others. When this is done, you should start to see where this makes sense and already has a defining tree canopy shape.
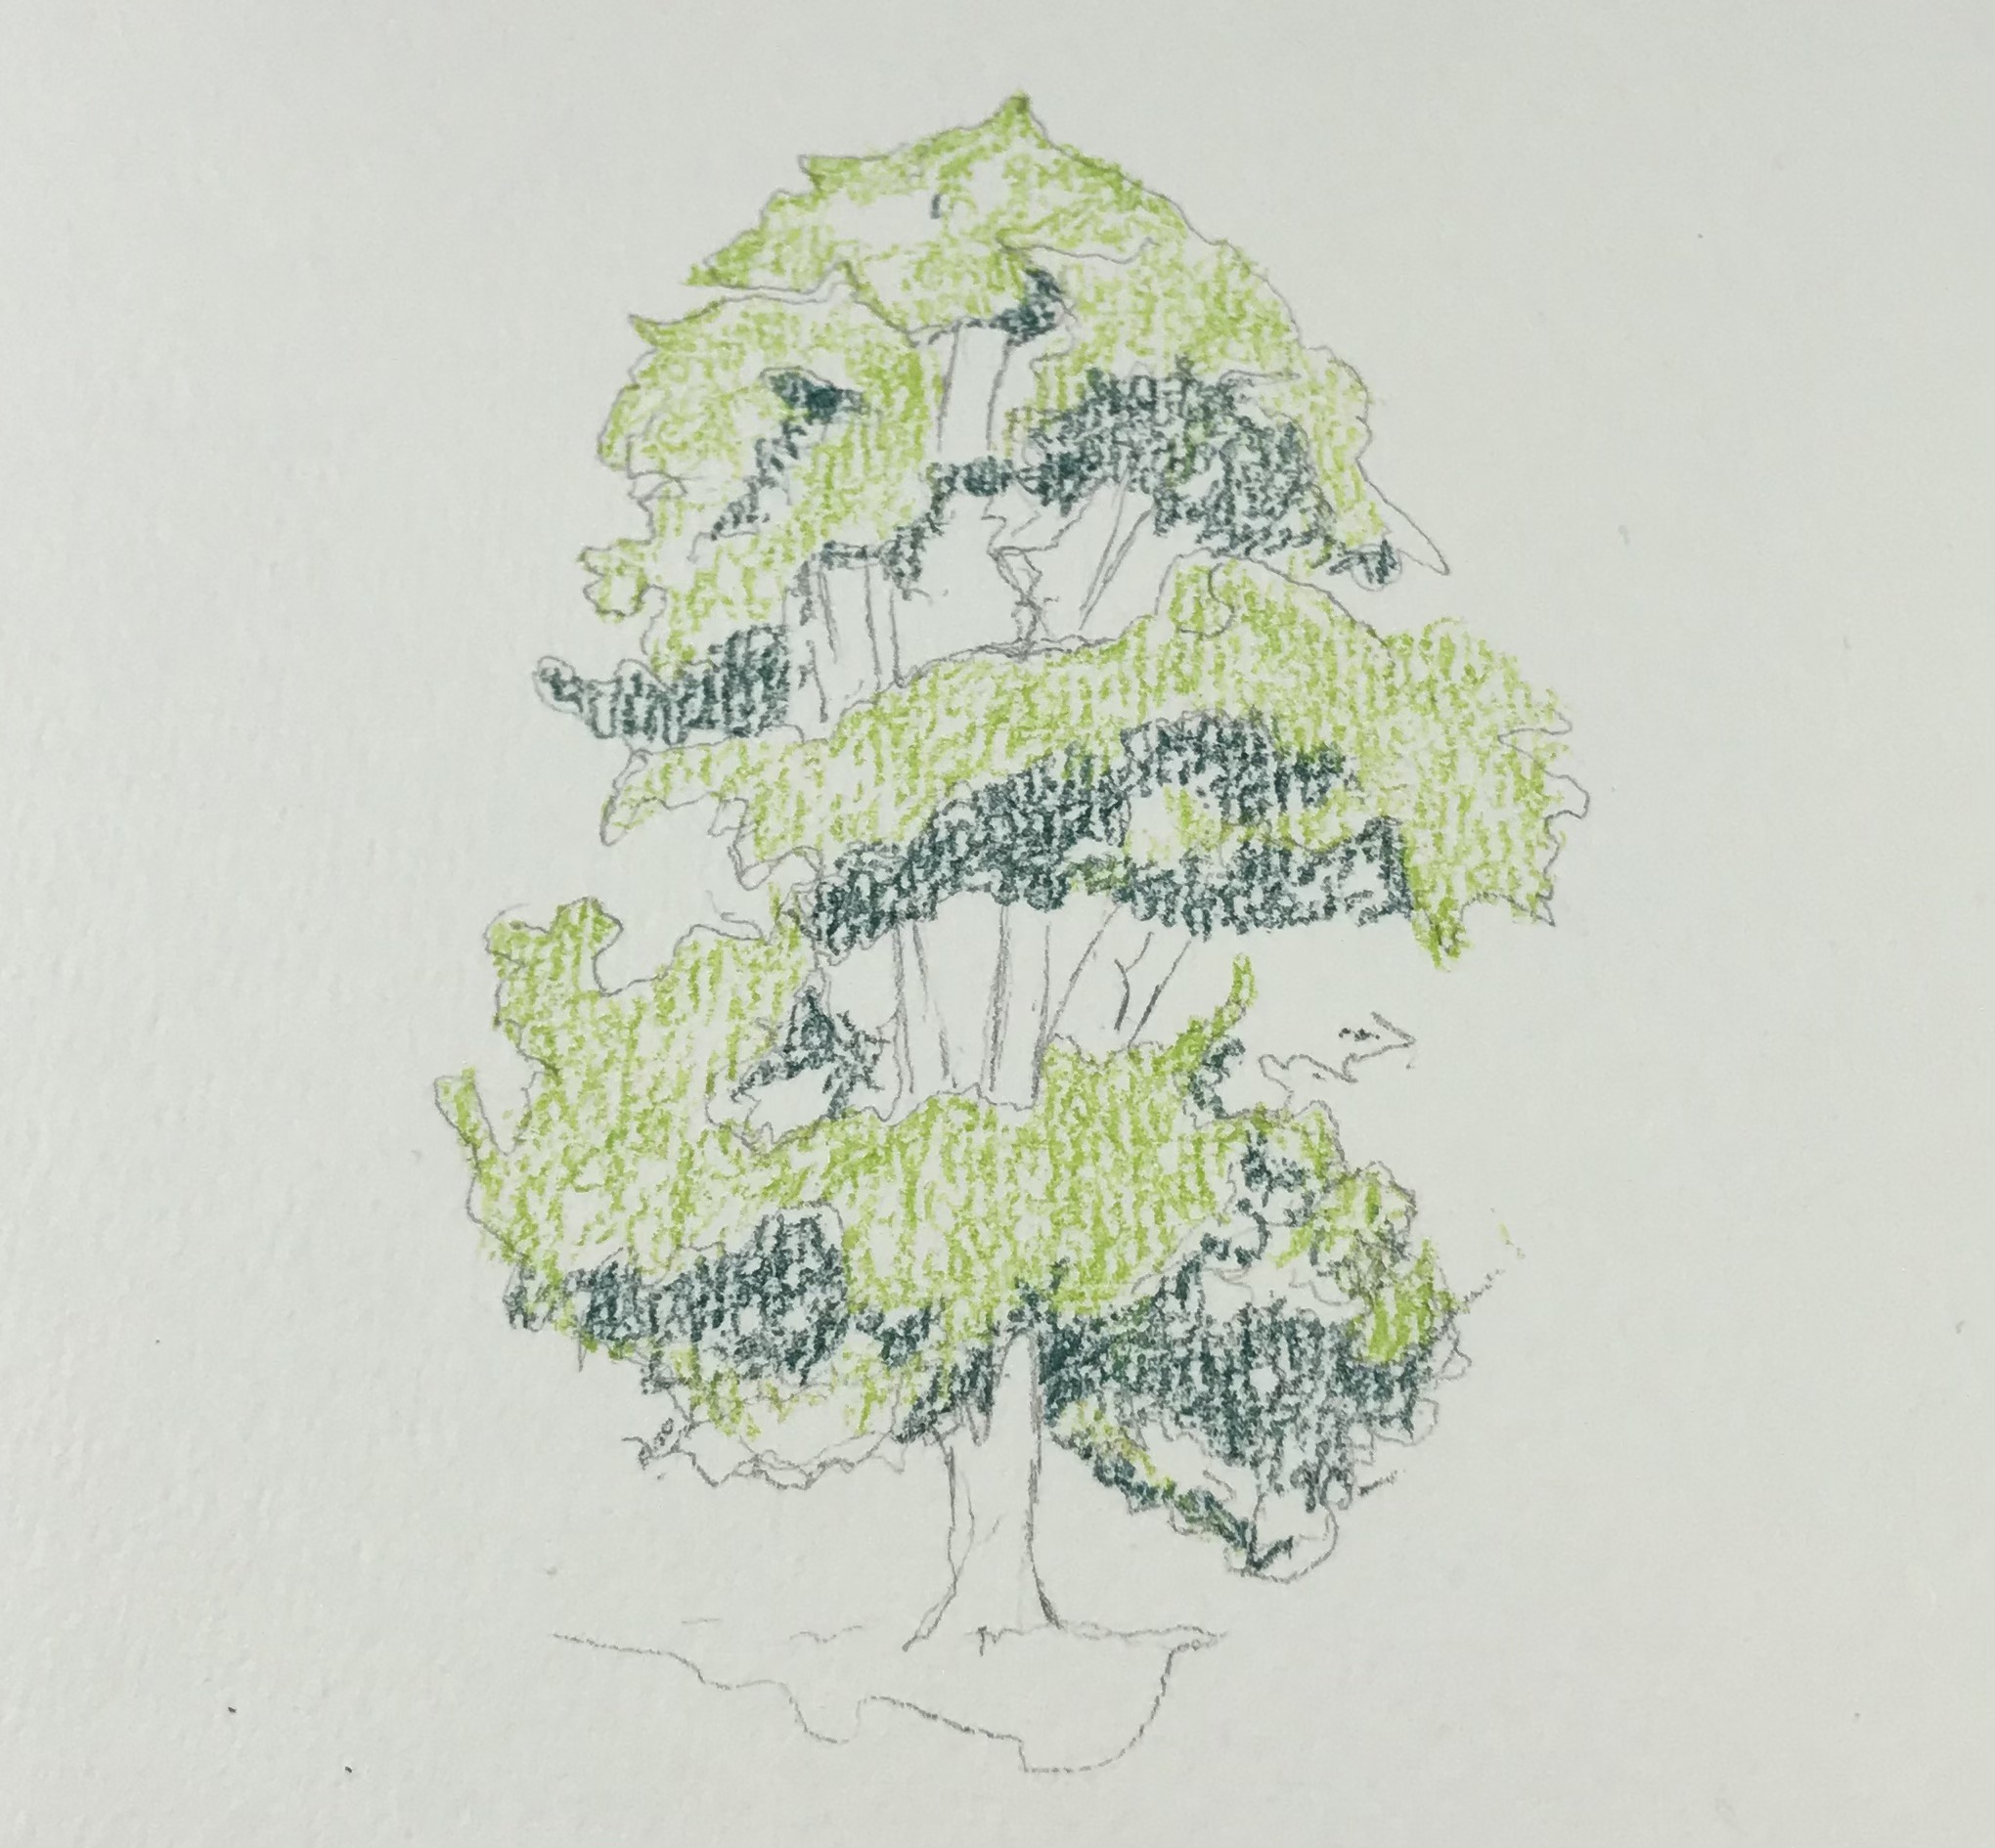
Layer a Deep Green to Introduce Depth and Shadow
Now you grab your Dark Green pencil for this next color used. Do you remember how you used the last technique with your finger and wrist? This will be using the same for this brand new color. Now here is where it will go a lot faster and starts to make sense as you begin this color. When you unfocus your eyes, you will see those connecting areas that stand out from each other. Some will be darker than others but don't worry about where to start. Anywhere along the edge is good.
Begin with the lower bottom and work your way up. This time you'll be looking for the darker scratchy patches to outline your dark green colors. Then zigzag up to a new area where dark patches can be scratched-out further. If you start to see a pattern emerging, break it up, so it doesn't become solid blocked-out areas, just light chicken scribbles where your light green was darker on the second scribble technique. By the end, you will see how the dark green is connecting but not overpowering the total canopy color.
If you like, you can do darker shading areas towards the bottom sections as you feel it needs. Shadows are more likely to be at the bottom of a tree at high noon. Make smaller, controlled bursts of squiggles randomly at the very bottom.
Apply Color in an Irregular Motion
Using a new color, you will need Ultramarine Blue for this. In this next task, you will be making minimal accents to darker spots all through the tree canopy. I used to wear snow ski sunglasses that have mirrored lenses. What this does is darkens your sensory and vision so you can see darker patches easier. Plus, you get the benefit of looking so cool while you color this tree. Take the ultramarine blue and Scratch in random connective dark spots within the canopy. It will be obvious where to color these with your rock star glasses on.
Keep in mind that these scribbles will be more evident towards the bottom of the tree canopy. You can add lighter splashes toward the top to fill in some empty and lonely areas. These lonely areas are the parts where color can be added to give it visual balance. Not that it needed it, but perhaps there are some darker spots deeper within the light green after all. Not all of the blue should ever be connected, and it should be as random as splashes are concerned. Don't let it connect until the next color is added.
Apply Medium Yellow to Bring out Sunshine Highlights
That's right kids, now it's time to grab your Medium Yellow and move onto the fun stuff. So towards the top of your tree canopy, you will see lighter open spots. Imagine it's a little like Swiss cheese, and these holes need to be filled with that yellow Scratch the color into these areas and keep it slightly random. What the yellow is doing is making your highlights on the very top of the tree as the sunlight hits it. This is why you need to make controlled scratch bursts to fill in areas closer to the top and leading edge of the canopy.
You can also go over darker spots with a little bit of pressure to cover them slightly. Since this is a lighter color, it will be easier to see why this color works in your favor. You will immediately see where the lighter colors can go. But they do need to be smaller as these are leaves that are lit-up from the sunlight shining on them. If you are careful enough, you can begin to do zigzagging steps down an unseen branch where leaves catch the light just right. Keep it minimal with that last step in drawing a tree in watercolor pencils; it's not a zebra here…
Begin to Blend and Merge Shadows with a Damp Brush
Are you ready to rock? This is now when you are ready to make the colors pop and begin to look pretty. For this, you need a medium-sized artist brush. I recommend around, pointed brush. It holds just enough water you need if you give it a good wrist shake first. This is not a tough job since it will be a little bit between slytherin and dabbing. You mustn't slither too much and end it with a few dabs. Slithering is pulling the brush at an angle with half of the brush touching the paper.
You can only do this three times before your brush picks up too much watercolor. It will then need to be cleaned off. This is helping to merge the darker shadows and creating the so-called lower shadow canopy branches. Don't go too heavy and always try to switch directions for each side of the tree. Slither down to the left or to the right. Do you get it? As you pick-up watercolor paint, these will make the darker spots as you finish-off a slither swipe. These will look like darkened leaves underneath the tree canopy.
Clean Brush and Blend Yellow Highlights Separately
You are then going to dab at no more than 10 times in a selected area toward the top. Start with the medium yellow areas first. The idea here is to dab and not pull the brush. Dab it, so it activates the watercolor. Move onto a new area if it starts to muddy-up. Only hit the parts where you've placed the yellow and avoid the darker spots you already hit within the previous shadow line. Also, be sure to have your water close by so you can clean and dip your water.
I use two bowls of water, one for cleaning and one for dipping to get clean water. This is by forced habit and keeps my watercolors cleaner and brighter. Once you have the yellow complete, you can move onto blending-in darker green spots. It's not 100% needed at this stage, but if you want to give it more blended appeal, okay. If you're getting pretty quick, these colors won't run, and they will dry by the time you make another pass. This is why I don't stick around in one area for too long. Keep it random, so it dries faster.
Draw Branches using the Dark Brown Pencil
Remember that I mentioned something about nothing that should look asymmetrical, and it should be random. This is where the body of your tree is the most important feature that doesn't look phony. If you ever look at a real tree body and the branches, they all have an outer radius they reach for. This is so each limb catches as much light as possible. Trees run off solar power to create photosynthesis, which then produces oxygen. So how do you draw that without it looking terrible?
Start with adding a splash of olive green in one spot, so it looks V-shaped. This is the part that gives your tree a different color value (non-symmetrical), and then dad it up to make a background shadow color. Starting near the canopy base is where you start forming the branches that emerge from the trunk. This is the lowest point you should go, and the rest of the tree is devoted to upper branches. Think of how a split branch splits-off and radiate them outward but not in straight lines.
Draw with a Variety of Fine Thinner and Thicker Lines
Here's what you'll need for this. You want to have a Dark Brown watercolor pencil for drawing the first branches. Begin with light strokes to trace a line where you want your main branch to reach. These can have Y-shaped branches that form from that main branch. Others can follow but make it a little bit like your reference picture too. Some branches may sprout off the side while others will be behind an existing branch. Be sure to lead a healthy branch up to the olive green area.
This will help it look like it's going to the back portion of the tree somewhere so the angle can lead to that arrow V-shape that you painted earlier. Some spots should be behind greener or brighter patches. This helps create the illusion that branches are behind more leaves or foliage. Use chicken scratches to fill in the branches to create texture. The higher the tree, the further back these lines go to create depth. These higher branches also should be wispy and a little wavy. It won't hurt to be creative to see where they are going.
Draw and Shade the Trunk of the Tree
When you have these main branches finished, now it is your task to finish-off the tree trunk. Now you can give your tree character with branches that have turned into stumps in some areas. It should feel healthy, so anything you draw as a trunk is slightly thicker at the very base and spread-out, giving mass or weight. Now you can start to fill in this area with more dark brown chicken scratches. Remember that one side of the tree does need a highlight somewhere, so leave that open while one side has a shadow.
If you need to add more lines here and there, don't go overboard so fast. Upper branches should be lined, so they are more dominant. Since they are in the shadow of the canopy, yet a trunk will have sunlight hitting along the edge, depending on how you see the reference picture looking. It doesn't hurt to define further branches that move through the tree as long as you follow that dark-to-light flow. You want to trick the eye into thinking these branches are going behind leaves. So follow a line only until it makes sense to add a line here or there.
Apply Yellow Ochre that Adds Highlights and Further Lighten the Trunk
Now you are ready to add the Yellow Ochre for the highlight spots. Mostly towards the base trunk of the tree but not up into the upper branches. It has to give the illusion that your trunk is getting a large spot of sunlight glistening off the edge. Bring it on the same side of the main branch reaching upwards and on some selected branches. It won't be needed to add this for upper branches, the sun isn't hitting them. These are considered to be in the shade, and it won't help your drawing any better.
While you can see how this creates the effect of sunlight reaching from behind, watercolor painting is minimal. Hitting that with a wet brush just yet will ruin the effect, so carefully study how the ochre is merely rimming that color. Just select edges and how that light goes through the tree to reach them. And since this is a practice picture, you will improve each time developing a more realistic effect by tricking the eye. Add some color and unfocus your eye to see how it looks. This method always helps to decide where added color can go.
Add Deep Black to Deepen Shadows on the Tree Trunk and Base of the Tree
You will be using a couple of colors besides black for this part of your picture. You can use the yellow ochre, dark brown, olive green, and deep green. I think that you can start to draw the ground area around the tree. This establishes an area filled with different layers or levels of the soil in front of and behind the tree. Perhaps, you should be rounding these colors slightly downward around the tree. This looks appealing, but it also makes the tree look like it's on the top of a soft rolling hill.
Use a few layers of color in between colors that are scratched in. Be sure to give both sides of your tree a generous amount of yellow ochre around both sides of the base. This makes it look like the sun is filling in the grassy highlights. It wouldn't hurt to use a generous squiggled slash of ultramarine blue that leads off in one direction. This will create another illusion that a larger shadow of the tree is diffused off to the side. Fill it in slightly with brown or even splashes of yellow.
Use a Damp Brush to Blend the Branches and Trunk of the Tree
You're nearly at the finish line at this point, so you'll need to clean out your water dishes for this step. This is a very delicate step, so please take your time. When you get to be good, you can cruise through this part like Lindsay Lohan at a red light. But until that point, be careful to not ruin your tree with a bad stroke. Your brush should be damp but not wet! It should feel like there is moisture on the bristles but not completely dripping.
Dabbing is preferred, but be careful in making any kind of directional strokes. Areas, where there are shadows, can be softened but will leave a harsh dark line behind. This is why the higher limbs and branches of the tree should be the softest. Towards the bottom, they can have defined dabbing to make them stand out. Some limbs should have dotted line edges. This helps to create incredible light tricks.
Blend the Base of the Tree using a Newly Cleaned Damp Brush
By the time it comes to finishing-off the base of your tree, you need to clean your brush to all the colors you lay down is worth the effort. It should look crisp but willowy or dreamy. This is why watercolor paintings are attractive to look at. When it comes to covering your final strokes, you need to remember the slithering method I mentioned earlier. You might want to practice on a separate piece of paper. The area where you lay down the ultramarine blue is going to mix with other colors.
You start at the top edge of your tree's base and begin to zigzag downward in a slithering motion. If you need to fill in some spots, you'll need to move quickly before the water soaks in. Give it one more slice through with another smooth slither to finish it off. If you did this correctly, the upper colors remain in place, and your blue shadow won't look out of place. Now you know how to draw a tree in watercolor pencils, and all you need now is to do it yourself.