Creating Texture in a Drawing
Textured drawing sounds pretty advanced and can be intimidating. Why you wonder how to generate texture in a drawing. Here are some valuable pointers and how-to tips that make textures easier and more realistic for any drawing you're creating.
Everything that you draw will have varying amounts of texture, from subtle to very rough. This is what makes your drawing appear natural and gives a level of realism that is instantly appreciated by others right away. But if you haven't practiced these skills, you may miss out on one of the most essential drawing skills worth learning. This guide will give you valuable lessons on what makes textures so important when drawing them.
You Also May Like:
- Creating Textured Drawings
- How to Draw Without Looking at the Paper
- How Do You Draw a Blind Contour Drawing?
- Drawing with Lines and Shapes
- Line Drawing Techniques
• Textures in Drawing
Several methods are used to create texture while drawing, and many of them come from traditional and non-traditional methods. You might save some time by using tricks that save time but aren't always perfect if your surface is rounded or have curved surfaces. From the subtle texture of a superhero costume or armor to the soft leathery wrinkles of a battle Ork, learning about textured surfaces is the very first step.
The texture doesn't just apply to skin or fabrics since we see every surface in nature. The surface of the water, the detail of rocks, and even the coarseness of fur will be tell-tale signs of a surface. All of these elements follow one rule, which is based on gravity. Unless you're drawing something in outer space, even zero-gravity has a flow to it. But for your first lesson in creating texture, you'll find out how to map out textures on nearly any surface.
How Can You Show Texture When Drawing?
This lesson is all about identifying a surface that best suits the texture you want to draw. This is where you need to be aware of the wide variety of surfaces to fit in with a natural texture without your drawing. If a texture is too heavy, it can draw the focus away from what you want to be the focal point within your picture. Keep in mind that you can't add focus in a two-dimensional drawing, but you can trick the eye into focal points.
Drawings need to have depth perception, so objects in the background are gradually softer and less textured than objects in the foreground. This same trick can also be applied to objects that are the main focus of your image. A character leaping forward can have softer details on them that are further to the background. But to keep a good flow of texture means you'll need to start with a texture map.
• Direction of Texture
It's vital to remember that all textures will follow a direction depending on what type of texture you're drawing. Not to the exact nature, but rocks with cracks will be irregular due to natural erosion. For the most part, fabric, fur, feathers, hair, and wrinkles all reflect similar attributes. They all follow a direction that their texture will dictate. The one exception is hair and fur. Spikes, on the other hand, will be an exception.
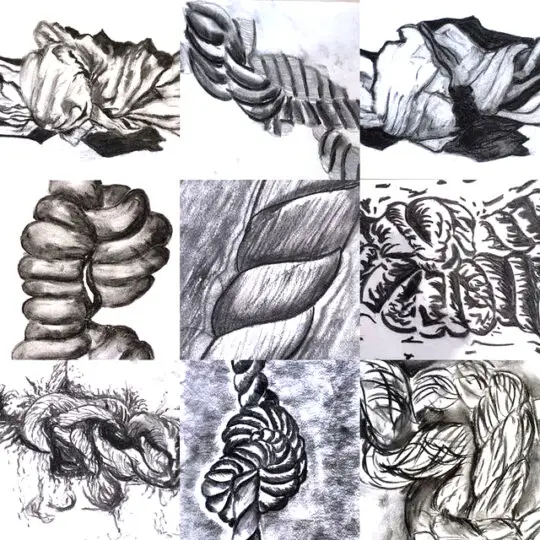
When any texture is drawn, the object that it's applied to needs to make sense of where that texture is going. It can flow over the surface and around rounded surfaces, giving your drawing perspective and three-dimensional qualities. This can be further highlighted with light and shadow. You can start with a light pencil to start mapping out where your texture best fits onto the surface where texture will be seen.
• Shape of Object
Giving a drawing more three-dimensional qualities starts with allowing a shape to become evident to the viewer. Are you drawing a rounded or curved surface? How much texture needs to be applied? Characters or objects with bumpy surfaces need time to follow the same rules that their muscles or form will portray. They have a basic shape that needs to appear natural to trick the eye into thinking there is mass and dimensional detail.
The same rule will apply to a rounded tree stump as it does to a reptile body since they both will have rounded points that provide you with a base shape that requires texture. This is why pre-sketching ideas on textures will give you different choices on choosing a good direction. Thumbnail sketches are the fastest way to get various choices before you put them onto your final drawing.
• Example of Skin Detail
Skin is an exciting feature for all sorts of animals, creatures, and anything living. If you use a magnifying glass to look at your skin, you'll notice that skin is a remarkable series of connecting and intersecting lines.
It can look like the surface of a dry and deserted alien planet or even cracked mud on a lake bed. Either way, you can use inspired pictures from satellite photography to get great ideas.
Like any skin detail, you start with the natural lines that follow muscles' repeated movement and where the skin is bending the most. Use reference from elephants and rhinos or from pictures of old people's faces.
These skin maps are essential to get natural and organic skin textures. All fabrics also react similarly, but depending on the thickness and amount of surfaces involved, they will also become distorted and wrinkle differently than skin would.
• Gravity Flow Textures
In all types of gravity, everything is being affected by this downward pull. Even trees will have a certain amount of weight that allows branches to hang lower due to gravity.
So keep in mind that the mass of an object will sag in spots where skin or excess material is hanging due to gravity. Think of how loose chainmail is hanging or dripping lava will ooze downward depending on the amount of mass involved.
Do plenty of research on surface textures that are hung lower because of extra weight or lack of elasticity. Providing a good amount of gravity and flow to an object will increase the realism, make your drawing appear natural, and provide plenty of character.
Yet on surfaces that are not so organic, textured surfaces related to liquid flowing should follow the rules of gravity at the lowest and most straightforward path of resistance.
• Light and Shadow
As described before, light and shadow play a big part in giving your drawing more contrast and depth. It also helps to make a three-dimensional drawing look natural and believable. You can always start with your simple line drawing with faint sketch lines to block your objects.
Tone, value, and shadow are the final touches since you want to add texture and detail to your drawing before deciding where a light source shows off your texture.
Remember that textured detail will be less visible in areas where highlights are added, while shadow spots will be more evident. Depending on how the sunlight is bouncing (indirect light), darker shadow areas can also be lightly illuminated from a secondary source.
One good example is the reflection of shining armor, angled limbs that have highlights, and foreground objects that are bouncing light.
How Do I Add Texture to My Artwork?
The Four Types of Texture in Art:
- Actual,
- Simulated,
- Abstract
- Invented texture
How Do I Add Texture to Your Drawing? (example- simple textures and surfaces you can draw)
In my opinion, there are many ways to add texture to your artwork. The first is a standard method, and that involves drawing textures by hand. This is achieved by using your pencil or pen to create a series of minor marks on your paper.
There are many methods you can employ, including different types of markings on your paper. Depending on the texture you have chosen, these markings should follow the pattern you want to recreate.
The second type of texture is what I call the quick cheat method. It uses materials that you borrow from physical objects to create markings on your paper.
You may know what rubber stamps are used for, so in this case, you are using found objects to create a variety of quick textures you simply fill in later with your pencil to make them lighter or darker. Is it cheating? Well, yes and no, depending on how much time you have to make your drawing.
The easiest is using found objects that you use as a rubber stamp to give quick texture to any drawing. What you find may surprise you since any item around the house can work great.
All you need is a generous amount of graphite that is scribbled onto a piece of paper. This will be your transfer paper, so you can use a found object to pick up this graphite and transfer it to your drawing.
• A Pencil Eraser
Any pencil eraser will do, so size is up to how small you want your detail. You can take a razor or even a serrated steak knife to your eraser and create a texture on the rubber. Once it has an interesting texture, you can rub it onto the graphite and move it onto your drawing paper. Do this several times to get the right look on your paper.
• A Dry Kitchen Sponge
An old kitchen sponge is already textured and can make cool textures, depending on how you use it. Sea and luffa sponges are also great candidates because their texture is different from a standard kitchen sponge. Makeup sponges are especially fun since you can take tweezers and pluck out detail as you like. Remember that you'll need to luck out your detail in reverse since you're using it as a stamp.
• A Bouncy Rubber Ball
Those cheap rubber balls that come from vending machines at the mall are great for making continuous texture. You can cut away sections on one half of the ball, so it has a bit twist handle like the one on your oven. On the other rounded side, you add your detail to roll your detail onto the paper easier.
• Aluminum Foil
Left-over foil makes cool-looking rock texture or even wrinkled fabric. But the downside is that foil does tend to dent easier when you press in on paper. If you have a foil stamp, you need to compact the foil enough to be used many times. Using a lot of graphite and light pressure will yield the best results if you want to know how to create texture at the last minute.
• Crumpled Paper
Crumpled paper is another quick and cheap method for making texture on the go. You won't have any problem finding left-over scraps in your garbage big, either. Heavier textured paper or the kind that has a lot of surface detail will work great. If you want to see some cool texture, use those decorative paper lace doilies. Famed artist H.R Giger was notorious for using these as his airbrush stencils that were traditional and ornamental Swiss doilies.
https://www.lv426.de/articles/files/AirbrushAction_01_1987.pdf [https://ojs.lib.uwo.ca/]
• A Rubber Spider
Every now and then, you'll find those silly rubber spiders at the thrift store or sold in coin vending gumball machines. They'll have pronounced wrinkles carved into the abdomen that can also make great texture patterns. You'll need to cut off the rest of the spider to use the abdomen effectively, but the results are totally worth it.
Drawing Smooth Texture
Making smooth texture is easy if you use your stump blender stick. You can use your finger to smudge the paper, but using a stump can be shaped with a razor so you can angle and smooth areas like a pencil. If you need to soften detail faster, you can use a paper towel that picks up graphite faster. Later, you can use an eraser to add shine and highlight spots to make an object appear smoother.
Drawing Rough Texture
Anytime you've added texture, you can double-down on this detail by darkening the spots you've put onto paper. These can be accentuated by adding shadow or thicker lines or detail to appear deeper or heavily textured. There's a word of caution for this technique since you don't want to go too heavy or too thick. Rough texture isn't all about darker lines! The critical feature of heavy texture is the variation of highlight and shadow across your object.
How to Draw Light and Dark Textures
This will all come down to your ability to gauge the difference of contrast. I recommend drawing with outdoor sunglasses while you make your drawing contrast. If you can barely see you're fine lighter detail, don't go any heavier. But when the darker lines are as evident as bold printed lines in a book, you better stop there. This technique is used by many Hollywood FX artists while painting film props for 35mm film.
The resulting lights are used to drown out the heavier shadows making a prop appear realistic under film lighting. This technique was a favorite for comic book fans and FX artist Rob Bottin for drawing and sketching. His monster sketches were done by famed storyboard artist Mike Ploog who typically wore sunglasses while making his detailed drawings.
Create Marks to Show Texture
Not every drawing will use the same technique, so you can rely on using every trick in the book to make detail work. I recommend chicken scratches' which is a form of cross-hatches in one direction. The best is light for subtle shadow, while double scratches make a heavier detail. When you make a line opposite to these scratch marks, it really stands out for shadowing. This is then blended with a stump and modified as you like after that.
Create Rubbings
This is an age-old trick that uses a rough texture underneath your paper. The surface detail can be captured by rubbing graphite over the top. You have to keep your paper steady, so the texture doesn't shift around. This is great for capturing brick and stone texture that is relatively flat. You'll have to experiment a little bit for this trick to find a texture that works best for you. Flat 2 x 2-foot tile slabs from Home Depot work the best.
You can also try using the flat cleaning brick to clean charcoal grill tops made from pumice stone. This surface can be further textured by scratching detail into it. It will then act as a reverse texture stamp for select rubbing tricks. Plus, they are very cheap and lightweight.
Drawing Simulated Textures
Choosing a texture is all part of the design process. You don't have to decide on one single texture, but try to imagine where your character is living and what kind of weather they live around. Is their skin wrinkly or smooth? Do they need protection from the elements, or is it very warm? All of these elements also work their way into your landscape. Harsh and cold places have sharp and rugged rock, while warmer places are sandy and smooth.
Your drawing needs to have a character much like the main character in a feature film, so every detail- you need to know why they wear what they wear, or why an animal or creature looks the way they do. Invent a reason if it doesn't make sense, but have a good reason why it's essential to be seen. In essence, this is all part of telling a story within your drawing that won't need much explanation later.
The same applies to your textures since you'll need to dig deep to uncover why your drawing has the kind of texture included. You'll feel better about your drawings, while others will see so much more in return.
Create Art With My Favourite Drawing Resources
General Drawing Courses. I like Udemy if you want to develop your knowledge of drawing techniques. Udemy is an excellent choice due to its wide range of creative courses and excellent refund policy. They often have monthly discounts for new customers, which you can check here. Use my link.
Sketching and Collage. Take a look at this sketching resource I have created. Use this link.
Proko. Is one of my favorite teachers who surpasses in the teaching of Anatomy and Figure drawing. Prokos course breaks down the drawing of the human body into easy-to-follow components aiding the beginner to make rapid progress. For this, I really like Proko.
Art Easels. One of my favorite ways to draw is by using a drawing easel, which develops the skill of drawing on a vertical surface. The H frame easel is an excellent vertical way to add variety to the style and type of marks you create when using a drawing board.
To see all of my most up-to-date recommendations, check out this resource I made for you.