Nature in all its glory provides the graphite artists, in particular, an immense source of inspiration from which they can produce artwork. Trees are without a doubt one of nature’s most beautiful creations. There form and structure offer an immense source of beauty which makes drawing tree a real pleasure.
A complete guide to drawing a tree? There are many techniques you can employ to draw a tree, the following methods will give you a comprehensive insight into the various approaches you can take to draw trees.
How Do you Draw a Pencil Tree?
Whether you’re attempting to draw a tree for the first time as a novice. Or you just need some necessary information to get you on the right track when drawing.
In this post, I will outline a simple step by step drawing techniques that you can employ to help draw different varieties of trees.
How to Draw a Tree from Direct Observation
A tree is best drawn from direct observation as this will let experience the full form of the tree in the round. If you want to learn how to draw a tree in pen, please read my post, How to Draw a Tree in Pen and Ink.
- Drawing from direct observation will also allow you to find the best view from which to draw a tree, a flat photographic representation of a tree will never replace this.
- Also, consider your location, are you drawing trees on mass in woodland or is it a single isolated tree in a garden or park.
- So studying the 3-dimensional form of the tree in the round can offer real benefits. A good piece of advice is to produce a series of quick warm-up sketches, which will allow you to develop a feeling for what you are drawing.
How to Draw the Crown of a Tree
The crown of the tree is the furthest extent to which a clump of branches will grow. One effective method of drawing trees is to draw the branches first from the crown down.
- To begin you will need to draw many faintly drawn lines of representing the extent of growth from the branches, these lines can overlap, as they would be nature.
- Next, begin to draw faintly drawn lines which will represent the branches of the tree. These lines represent the newest growth and will, therefore, be the thinnest parts of the tree.
- The branches which are drawn closer to the main tree trunk are thicker since they are older and have to support the mass of smaller branches and leaves.
- Remembering that trees are not flat objects, rather complex organisms with many intersecting elements. When drawing the branches, an excellent way to create a feeling of space is to vary the strength and quality of line you are drawing with. Darker lines will appear closer than the faintly less distinct marks depicted in the background.
How to Draw the Branches of the Tree
First, consider and count how many main branches, then draw the main branch diverge out from the main trunk, this could be 3 or 5.
- Next draw smaller branches which are attached to the side of the main branches, your drawing should now begin to resemble a realistic tree.
- Continue to draw smaller and finer lines to represent the smaller branches and the newest growth on the tree.
- Finally, progress onto drawing leaves round in front and behind the branches.
Drawing the Textures of a Tree
Tree trunks or the trunk of the tree can be found in various shapes and sizes from chunky, heavy English Oak. To the tall and elastic birch trees.
The trunk of a tree expresses the solid massive, dense base of the tree which roots it to the ground and earth.
- Perhaps the most notable quality of the trunk of a tree is the texture of the surface of the trunk. The tactile quality and feeling the surface of the bark can only be experienced from first hand.
- Most trunks have around a cylindrical form, some will have a more irregular shape.
- The best way to approach drawing the trunk of the tree is to illustrate the underlying form with a faint line. Once you have done this progress onto applying tone.
- Once the form of the base has been established, continue onto adding shading. If the light source is shining from the left add a graduated shadow on the opposite side.
- You can also draw and add any additional surface details should as broken branches or knots on the surface.
Frottage Techniques
Although not drawing technique frottage is an alternative way to explore the texture of the surface of the bark or individual leaves through rubbings. Natural forms and surfaces are an excellent way to explore the surface qualities of natural materials.
- To create rubbings, you will need a thick graphite stick and a large piece of paper which is durable enough on to tear which placed onto a rough surface.
- Simple place the paper onto the surface of the tree and use a graphite stick to rub onto the paper.
- This method is a quick and immediate way to explore the surface and textures of the tree.
How to Draw a Basic Shape of a Tree
If you are looking for a simple method of drawing a basic tree the following process will help. This is a method which young children will be able to access.
- Begin by drawing the trunk of the tree first by drawing two simple lines, parallel to each other and curving outwards thicker at the bottom.
- Progress onto drawing the branches of the tree, these should be drawn pointing in different directions, as they would be observed when looking at a real tree.
- Next, draw the canopy by drawing a series of cloud-like shapes, these can take the form of being many shapes drawn next to each other or overlapping, color and tone will be added to this section of the drawing to enhance and make them seem more real.
How to Draw a Tree using Color Pencils
The layering of a color pencil is a simple but effective technique that I have been using to draw with for many years. This is a quick and accessible technique which will let you create a simple but realistic drawing of a tree in color pencils.
- To create the illusion of a tree in the summer months color, you will need a set of good quality color pencils, with a selection of different shades of green blue-grey and brown.
- Using the light shade of green, apply a series of small motions to represent the mass of leaves on the branches.
- Continue to apply darker shades of green and blue. This will give the impression of shadows and add depth to your drawings.
- Ensure that you leave parts of the drawing blank, these negative spaces will represent the spaces between the leaves and will add contrast to the drawing.
- With a brown pencil, you should draw fine lines in the spaces. These will represent the smaller lighter branches.
- Progress onto adding color onto the trunk of the tree using a light shade of brown. Having a range of different color browns will allow you to texture and shadow onto this part of the drawing.
- Next, using the darkest shade of green, apply and layer a dark shadow onto and next to the areas of green you have blended.
- At this stage it is a good idea to blend the different shades of green together, this can be achieved by taking a white charcoal pencil and layering this color over sections of the various shading of green you have already applied.
- To give the drawing a little more definition draw small dashes of dark green or blue over and around the colors already applied.
- Use a warm color pencil such as a yellow to add highlights to the leaves on the tree.
How to Draw Different Types of Trees
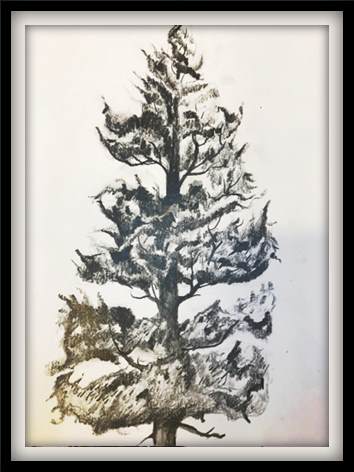
Tips for Drawing a Winter Tree
Deciduous trees during the winter months take on a unique majesty of their own. Deciduous trees without leaves, in particular, take on an immense sculptural appearance and quality. When viewed on mass they have a magical quality which is an excellent subject for drawing.
- Having a structured routine to how you approach drawing from observation will ensure you get the results you want.
- The basic rule of looking more than drawing really does apply here. Begin by working from direct observation and study the tree in the round from as many different viewpoints as possible.
- Trees are best drawn from direct observation, as this allows you to study the formation of a tree, its shape of the tree and its individual branches.
- Begin by drawing at the top of the tree and the ends of branches
How to Draw a Summer Tree
As the weather improves and the sun is shining on the leaves, consider taking your sketchbook out to draw on location. A tree drawn during the summer months will offer a whole different subject than one illustrated in the winter months.
Some people are put off drawing trees on location because they are complex and challenging to draw. The complexity of a tree can be off-putting for those of us who have not attempted to draw one since a child.
However, drawing a tree is easier than say drawing a face, portrait or the even the human form. The simple reason being that if a branch is drawn ‘out of place’ it won't affect the rest of the drawing dramatically.
I would suggest you use the following pencils to begin your drawing. H4, Pencil for lightly sketching the basic underlying shapes and proportions of the tree. An HB pencil for additional value and tone, plus a B4 pencil for applying the darkest values to your drawing.
- To begin your sketch, you will need to faintly draw a series of faintly drawn overlapping shapes.
- The shapes can loosely represent circles or irregular shapes. At the bottom of the drawing add a faintly drawn triangle facing upwards.
- Practice drawing the shapes with a 4H pencil changing the relative proportions of each form, varying the shapes and making certain sections of the drawing larger.
- If you are prone to drawing with heavy lines, you can also practice varying the strength and quality of the lines you are producing, with the aim of drawing with a fainter line.
- It is probably a good idea to produce some preliminary smaller sketches at this point until you become proficient at drawing the shape of the tree.
- Once you have grasped how to draw the underlying proportions of the tree, you will begin to recognize the shape of an emerging tree.
- Don't worry if your drawing is not perfect at this stage.
- Progress onto draw the individual branches. These should be drawn with a loose raggedy line and should diverge outwards in different directions.
- When you are ready to begin drawing the leaves, the approach is not to draw the individual leaves. Instead, start using the side of the pencil to draw small light draw circular shapes. For this task, you will need to use both an HB and 4B graphite. As you will be building up the values from light to draw.
How to Draw the Leaves on a Tree
- The best advice I would give to anybody attempting to draw the leaves of the tree is not to each individual leaf. This would be a tedious waste of time.
- A more economical approach is to suggest the clump of leaves through the application of marks of increasing darker value.
- Using a 4H pencil to create a light contour, onto which the leaves will be drawn.
- Next use an HB pencil held at an angle to apply small circular marks, which when progressively built up will give the impression of the mass of leaf shapes.
- Sticking to the rule of applying up darker values of shade on top of or next to the lighter values.
- Progressively press harder with the HB pencil to create patches of shadow, this will result in your drawing looking like a more authentic tree.
- A good tip, which I think you will need to bear in mind if you are attempting drawing a tree for the first time. To attain darker areas of tone, you will need to use a 4B graphite pencil will be required.
- You will be able to shade darker values with an HB pencil, but it will take you a lot longer to achieve the desired results.
- Continue to add tone until you feel that that the shadows and areas of tone have been added to your drawing to create an illustration of a tree.
How to Draw a Sycamore Tree
A sycamore tree can be a draw in precisely the same manner as described earlier in this article. However, when drawing a particular type of tree, you will need to illustrate the specific characteristics of that type of tree.
The sycamore tree is one of the largest trees found in the Eastern US.
How to Draw a Dead Tree
- Even during the summer, when the sun is shining, and the trees are full of foliage. The appearance of a dead tree is particularly reminiscent of the deciduous tree in winter.
- A dead tree can present you with the perfect opportunity to draw the skeleton structure of the tree and its branches.
- Focusing on the negative spaces created by the branches of the tree as they overlap and intersect with each other.
- A negative space drawing can accentuate the spaces between the branches which can be shaded with a water-soluble pencil or a watercolor wash.
- Emphasizing the textures of the tree is also possible with a drawing of this type due to the lack of leaves on the tree.
- Drawing the trunk is an excellent way to highlight areas of character which can produce amazing drawings.