Are you attempting the simplest way to create an ammonite drawing? In this post, I will describe step by the step the easiest approach to apply detail and add texture to your illustration.
An ammonite, maybe some of us already know about it, a marine mollusk animal from the subclass Ammonoidea. According to the British Geological Survey's lasted reports, ammonites could be extinct. Visually, it is a curly shell animal with squit-like structures coming from its openings.
SKETCHING AN AMMONITE takes only a few minutes, provided you've mastered the essential tips and skills necessary for a quick and quality sketch.
This article offers baby steps guide into this entire procedure. Let's find out how we go about this.
Gather Drawing Material
How do you draw a fossil step by step? The first procedure is to gather needful material. These include;
· Graphite pencils
· Paper or drawing platform could be a piece of wood
· Erasers
However, these three form the basic requirements; however, other materials may be necessary for an advanced portrait that involves coloration. These include;
· Crayons and pastel pencils
· Charcoal sticks
· Graphite sticks
· Inks, dip pens, dip brushes
· Craft knife and so on
Draw the Outline
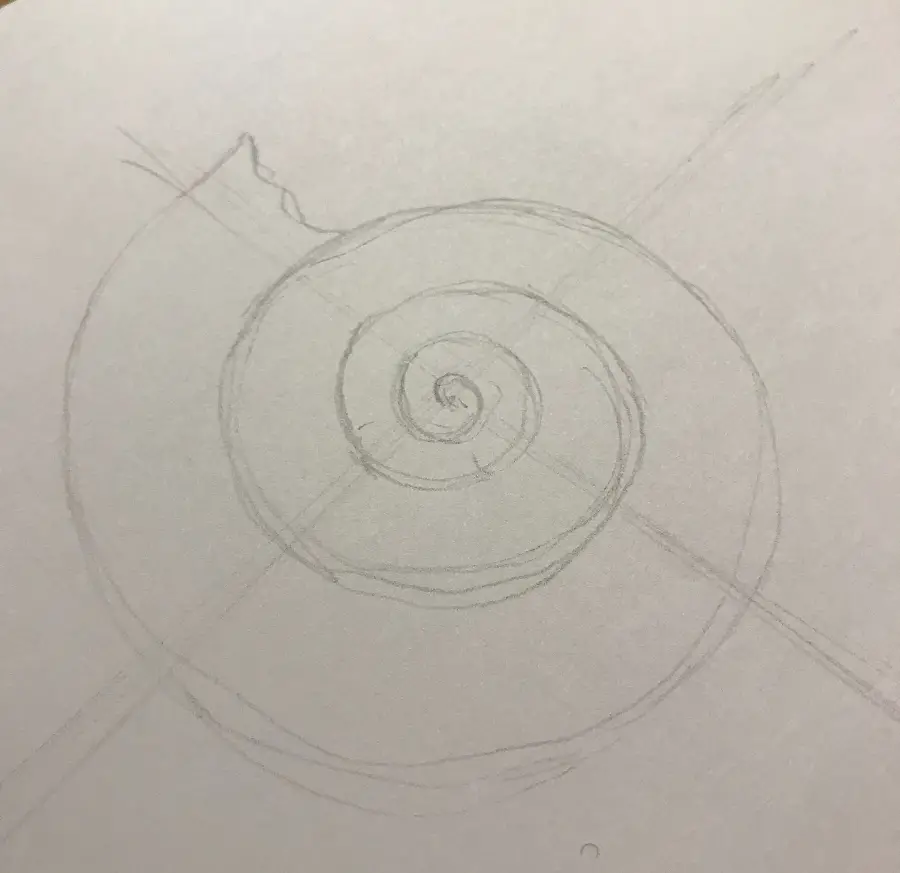
Once you are ready with the above materials, you can right immediately indulge in the drawing. First, you would want to start with the outline, herein specific, the animal's shell. It forms the central part of the animal, as seen in various animal fossil pictures/ images.
The shell comes out as a spiral kind of in shape with various curves forming its multiple components. After the overall outline, including the eye, a small circle at its head section is shown below.
Next, and still on the outline, add the tentacles, coming from the head and spreading outwards. Ensure they appear as natural as possible to make the image appear more realistic.
Draw the Segments
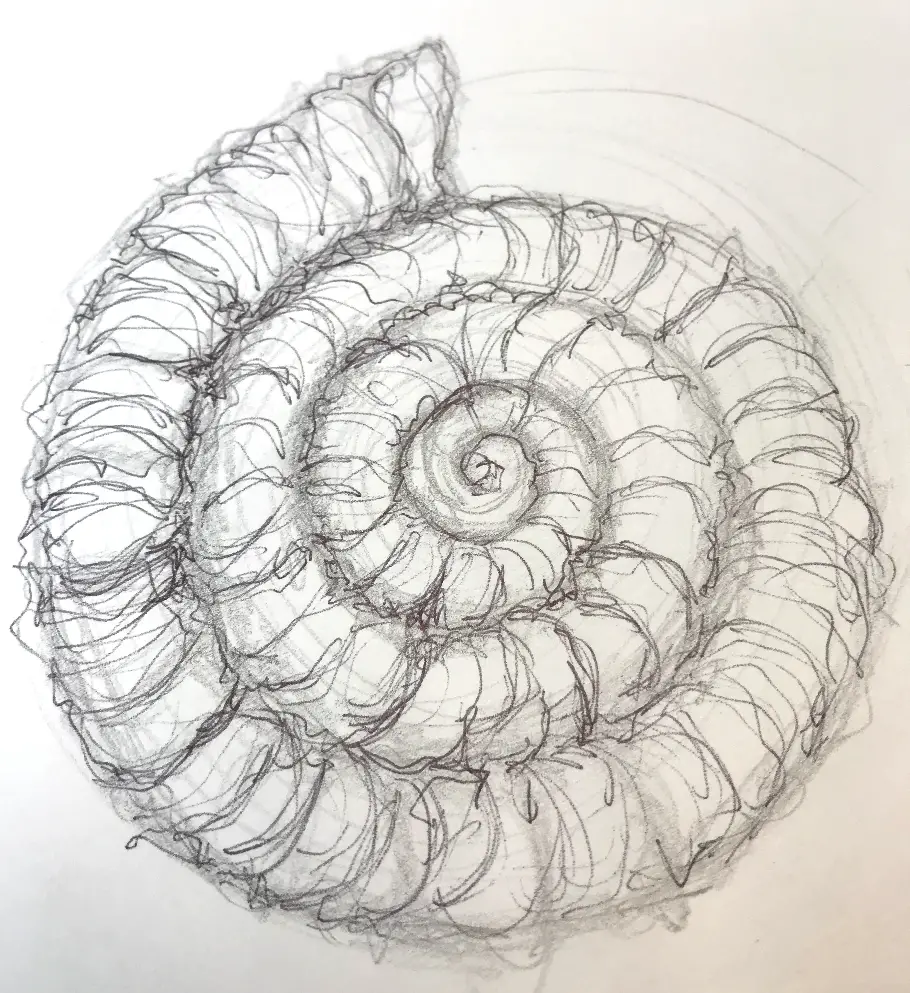
Now that you have your outline, it is time to add the segmented section to look even more real. Here you will have to flex your hand a little bit. Try as much as possible to make smooth medium thick curves all across the body of the animal. Unlike the segment curves in arthropods, these emanate from a centralized location spreading outwards. The spread is always across the body, as shown in the image below.
Among many sketches, a typical mistake often occurs in drawing the segments. Note, the curves do not face one direction, at least not in all sections. Depending on the point of view you chose for your drawing, these segments curve in their appearance, sometimes in alternating orientations. When finishing up on this procedure, ensure to show peaked sections between sections on the outward outline. This tip will add more reality to your drawing.
Introduce a Slight Shading to Show Dimension
3D drawings are more appealing and meaningful in their appearance – you can embrace this in your image. Shading is one fundamental way to go about this. Various sections from your point of view of the animal should appear either lighter or darker. Typically, the inner and hidden areas would suit the darker color indicating less light while the outward lighter. Check out how you can effectively draw a 3D sketch [https://www.wikihow.com/Draw-3D-Shapes] using a pencil. You might engage your eraser to correct some of the mistakes you earlier made at this stage, i.e., drawing thicker lines instead of a light one.
TIP: The animal's central region where the segmentations emanate should always appear darker than the rest of the sections.
Make Tentacles Appear Realistic
While earlier you might have sketched the tentacles, now will be the time to make them much more ideal. Overly, these structures appear more like tendons, long and flexible in reality. Drawing an ammonite the best way must always include these key features.
With highly flexible hand moves, draw extending and curving relatively thick extensions to mark the tentacles. You clearly show how these structures curve, twist, and overly appear in their natural existence for a more realistic appearance. Usually, you will have them relatively thin at the tip and thickening at the base. However, not all will meet up this overall structure; two are usually longer and thicker at both the tip and the base.
Typically, an ammonite is said to have a total of 10 tentacles. Eight among these are often shorter than the rest of the two, which are more useful in food grasping. You might therefore want to make this as accurate as possible by taking care of these numbers.
Add Suction Cup Features to the Tentacles
After drawing the tentacles, next is to make them appear more authentic. An essential step in this is adding the features of suction cups. Here they should appear like minor circular points on the inner sides of the tentacles. Having more prominent spots towards the base often makes the tentacles even more real.
Next, you may want to add a little more shading on specific sections of the tentacles hidden from the light. All these will be an attempt to bring out the realistic nature of the tentacles.
Finish Up
In this step, all you have to do is work on the final touches. Add a little pump here and there within the image to draw in the native appearance. Other things you might want to do are add more shading, erase those unwanted sections while making everything smooth and as organic as possible. All these will be details enough to grant your final image more reality in its meaning and appearance.
Last Thoughts
Maybe something you should know, the reason it is called ammonite is that it was like Rama God for Amron kingdom's people. The animal's shape looks like the Rama horns. Even as we wind this up, you must note all the guidelines mentioned above in this text.
HOW TO SKETCH AN AMMONITE is manageable to all those who may fall interested and hence adds a little more devotion. However, the best way to get it to stick in you is practice – always do a lot of it. Use as many guidelines as possible if you have to – this, however, puts it in the simplest way you can comprehend.
