When it comes to drawing fruit, an apple is a great place to start. They're simple enough that even beginner artists can create a convincing rendition, but still have enough detail to be interesting. In this tutorial, we'll show you how to draw an apple step by step. We'll also share a few tips on shading and adding highlights for extra realism. So whether you're new to drawing or just want to improve your skills, follow along with us and learn how to draw an apple.
How To Start An Apple Drawing
Creating an apple drawing that looks realistic is more straightforward once you understand the steps involved. Drawing an applied is easy; drawing an apple that is realistic looking while also interesting that’s quite a bit harder.
While art is all about spontaneity and being creative, you can still do both things while taking a logical approach to your drawing. By learning a step-by-step method of drawing an apple, you can take what you learn and apply a similar process to everything else that you draw. Maybe you’re happy drawing apples, and if so, great!
But, if you want to move on to more challenging subjects, then the lessons you learn when drawing an apple can provide you with invaluable experience.
Equipment List
When it comes to picking out the right equipment to use in your drawing, what you use is up to you and your personal preferences. If you are comfortable with oil paints, then use them. Feel like sticking to graphite?
That’s not a problem either. You should use whatever you are comfortable with that will give you the best chance of being happy with your work’s end result.
With that being said, there are two things you should keep in mind. First, no matter your medium of choice, make sure you’re prepared.
That means having a suitable surface and the right materials before starting your drawing. Second, working with what you’re comfortable with is an easier path to success, but it might also limit you and prevent you from discovering new skills.
Begin With A Light Contour Outline Line Drawing
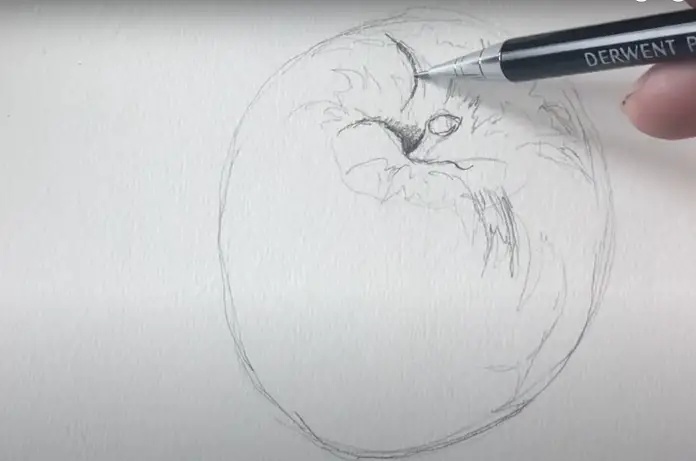
Whether you’re drawing a portrait, a car, a landscape, or even an apple, you should always start every drawing with a light contour sketch.
This is your opportunity to get the rough shape of the apple down, which you can then refine later and follow up by rending in shadows and highlights.
The initial light sketch is the foundation upon that everything else is built.
Check the Basic Shapes And Basic Outline
Once your contour line drawing is finished, you can start to refine it. Apples are relatively simple, but what you need to do here is to challenge yourself. You don’t want your drawing to look like an apple.
You want your drawing to look like the apple that you are drawing. While all apples are similar in appearance, each is unique. You need to look at the curves and shape and refine your sketch until it matches what you see perfectly.
Draw The Stem
While the stem of an apple is a minor detail, it’s a detail nonetheless. Make sure that you don’t draw it as a simple line when you draw the stem. It has volume, so you need to draw it like a curved tube.
Having the initial sketch of the stem right will make things easier on you when it comes time to start rending in shadows and highlights.
Draw The Leaf
Does your apple have a leaf? If so, then you should draw it as a triangle to start, then refine it as needed until you get the shape just right. An apple leaf is rounded, but the overall shape is a triangle.
So, start with a triangle, then round the edges off. After that, start adding the veins and other details until you have a good image of a leaf. Even if your apple doesn’t have a leaf, you might want to consider using an artistic license to add one since it can make your drawing more interesting.
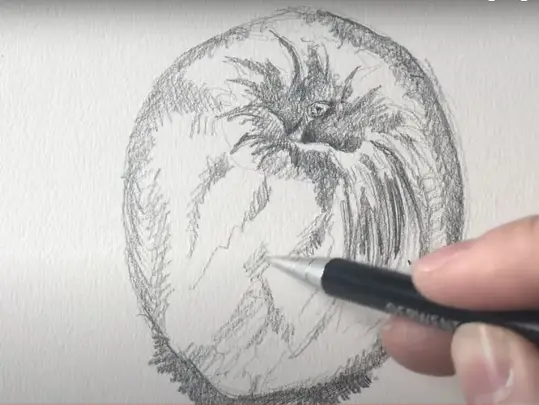
Study The Surface Of The Apple
Once it’s time to draw the surface of the apple, you’ve reached the point where you’re ready to start rendering. This is exciting because it means that the foundation is finished, and pretty soon, you’ll be able to start seeing the hard work you put in pay off. Apples vary in color, but most are red or green.
While this describes the overall color of an apple. You also have to keep in mind that there are variations in apple skin color, and there are variations in textures. Make sure that you are careful to depict these accurately since doing so will add another level of realism to your drawing.
How Do You Draw And Shade An Apple Step By Step?

The first step in drawing and shading an apple is to finish the sketch. What you do next depends on the medium that you’re working in. For the purposes of this discussion, let’s assume you’re working with graphite.
In this case, you’d want to render out the texture of the skin of the apple. After you’ve established a base value, you can use a kneaded eraser to go through and start removing graphite from areas where you want there to be lighter values.
Add Darker Areas Of Value
The darker areas of value in any drawing are essential to depict well if you want a drawing with depth. Start by adding slightly darker values than the base value, then continue to add an ever-increasing darker range of values.
By the end, you should have the darkest values accounted for. Never be afraid to go very dark if the values are present in your subject. Then they need to be present in your drawing.
Alternative Ideas:
Draw An Apple As Part Of A Still Life
If the idea of drawing a solitary apple seems dull to you, why not add that apple to composition and create a still life to draw instead?
A still life gives you many objects to draw, which will add to the variety of your drawing. It will also let you play around with light and shadow more, which will give you the ability to create a more interesting drawing.
Draw An Apple With Coloring Pencils
If color is more of your thing than black and white, then you might want to add color to your drawing. But, what can you use to create a colored image of an apple that isn’t going to be incredibly labor-intensive?
Oil paints take a long time to dry, and the setup is very time-consuming. Watercolor? Watercolor can be quite beautiful, but it does take time to master and can be unpredictable. What about colored pencils?
Colored pencils are a favorite of many artists due to their ability to create highly saturated colors while still allowing for the type of control you usually only get with graphite.
If drawing an apple in color is preferable to black and white for you, then colored pencils may be the way to go.