Do Copic Markers Work on Shrinky Dinks.
Some of you may be familiar with Copic makers and shrinky dinks as well, but if you are new to the art world, don't stress, we got you.
Copic markers are good quality markers made in Japan. These markers contain alcohol-based ink with vibrant colors. The makers are the right choice for professional purposes. I believe you have heard of the hype around Copic markers, and to the best of my knowledge, most of it is true. They are considered the Holy Grail' of coloring by artists and illustrators. When the adult coloring was trending, their demand exponentially rose to the point
that its supply could not meet it as previously thought of as children's toys.
One thing about them, however, is that they are shockingly quite expensive. Therefore, it is advisable to research which type to purchase and whether or not they are worth your investment.
The great thing is you can buy refill bottles of ink for the used-up makers. The makers are available in different tip shapes and sizes. Some of those are; brush tips, chisel tips, bullet tips, and the replacing tips. The available tip shapes are; round, brush, soft broad, standard broad, calligraphy, semi broad, superfine, and standard fine. The wide range allows you to color and maneuver easily on the designs.
Recent Relevant Posts:
- How to Choose the Best Drawing Paper for Graphite
- How to Draw with a Pencil on Canvas
- 20 Ways to Draw a Sunset
- How to Draw Smiling Male Lips in 12 Steps
These Copic Markers are Just Exactly What Every Artist Needs.
Shrinky dinks are plastic sheets that you can draw on or trace and cut out with scissors' help. When subjected to heat, the cut-out shapes experience two notable changes.
Their thickness increases up to about nine times their original size, and the vertical and horizontal measurements reduce by two-thirds of the original. This results in a hard-flat object which retains its original color. Initially, the shapes are mostly happy designs' meant for kids, such as ice cream cones, cars, fish, and cake. Oily or waxy crayons and pencils are not recommended as they melt in high heat.
Which brings us to the main question on whether Copic makers work on shrinky dinks? Yes, they work correctly, and you should try it out if you have not yet. The article will guide you on exactly how to get it done step by step;
- a) Create a design
- b) Draw onto a shrinky dink plastic sheet
- c) You can trace or draw directly onto the plastic sheet
- d) Coloring
- e) Cutting
- f) Place onto aluminum sheet
- g) Heat in the oven and shrinking
- h) Sealing
Drawing Designs on Shrinky Dinks
The design's choice is entirely up to you as you can choose to draw your own personal design to get designs available on the internet. The designs can be drawn directly on the shrinky dink paper, or you can decide to print out the designs and trace them on the shrinky dink paper. When tracing, you can make use of a pencil, paint pen, or a sharpie.
The shrinky dink paper has two sides a rough and a smooth side. The side you decide to trace the image on will affect the outcome after baking. For the 3d effect, tracing is recommended on the smooth side. An outline on the smooth side will be reflected on the smooth side after baking, while an outline on the rough side will be observed on both sides after baking.
Applying Coloring a Shrinky Dink
When it comes to coloring, some artists believe in working before heating the designs as it will make the colors pop. Others prefer to color after the designs are out of the oven. Both ways work equally the same, so choose what you are comfortable with and follow that. Coloring should be done on the rough side.
As previously outlined, oil-based paints, crayons, or cheap coloring pencils are highly discouraged. The shrinky dinks will be subjected to heat, and as a result, the oil will melt and end up ruining your piece of art. Copic markers are best placed for this job, and its only perk is how pricey they are. They have a vast color range of 348 colors; I bet you didn't even know there is that much color in the world.
No other marker comes anything close to this range. When coloring application of the first layer appears lighter, and that's alright, you can repeat to add another color coat. When choosing a color, you should note that heating makes the initial color more intense; that is, pink will look like red and purple more blue or black. To be on the safe side, I recommend bright colors.
Cutting Your Design
After you have decided on the design and the coloring, the next step is cutting out your design. Since the material is made entirely of some plastic, cutting it out will only require regular paper scissors. In some cases, the design has more details as in adult artists, here it is advisable to use smaller scissors to get to the nooks and crannies. If a die-cutter machine is available, e.g., a circuit, it can also be a good option. However, should you choose to use a circuit, cut it out before decorating, not ruin the finishing details?
When cutting, also try and keep the corners rounded in key holder's designs and necklaces. A hole needs to be punched before heating due to the material's hard nature. Considering that the horizontal dimensions of the material shrink to a third of its original size, a regular quarter-inch hole should be punched; anything less would result in the hole shrinking too much.
How to Bake your Shrinky Dink
Various heat sources can be used in this step, including a heating gun, conventional oven, or easy to bake oven. An easy to bake oven is more straightforward and much more energy-saving than the rest.
First, preheat the oven before placing anything in it. Line a baking sheet/ cookie sheet with foil or parchment paper and place your designs, spacing them considerably to avoid them sticking to each other. Check the manufacturer's baking instructions, although they generally require to bake at 325 degrees Fahrenheit for 2-4 minutes.
When subjected to heat, the shrinky dinks will curl up then eventually flatten. Sometimes some refuse to flatten, do not panic on this occasion, open the oven and, with the help of an oven-mint, uncurl the designs. Keep a close eye on the designs as they shrink quickly.
Once they all uncurl and flatten out, wait for thirty more seconds before removing them from the oven. If the designs refuse to completely flatten, remove them and place them on a flat surface, put a piece of paper on top of them, and place a heavy book on top to aid in flattening it. Apply some force on the book too.
Sealing a Shrinky Dink
Once the shrink dinks have eventually cooled, you need to seal them so that the colored pencil doesn't rub off. Place a glass on top of the crafts to ensure the edges retain the wanted shape. If Copic markers were used, then there is no need for this step as they are permanent markers. If you want to add some extra sparkle, use glitter glue on the side that is smooth on your finished design. Mini rhinestones can be added for a special touch; after all, art has no limit.
The above laid out procedure is a do it yourself and the required tools being; scissors, sheets of shrink plastic, pencils, designs, Copic makers, oven, heat gun or source of heat, and glass.
Making crafts with Shrinky dinks and Copic makers' use is not necessarily meant for children; adults too can enjoy this form of art. You can also do this with your kids for fun. The shrinky dinks can be manipulated into various designs for many purposes. Inspiration on the designs to make using the shrink plastic and Copic makers can come from anything.
As long as you can imagine and draw it, then you can most definitely make it okay. You can practically make anything you think of. Use of the shrinky dinks craft is useful in DIY projects you can try out. The DIY projects include;
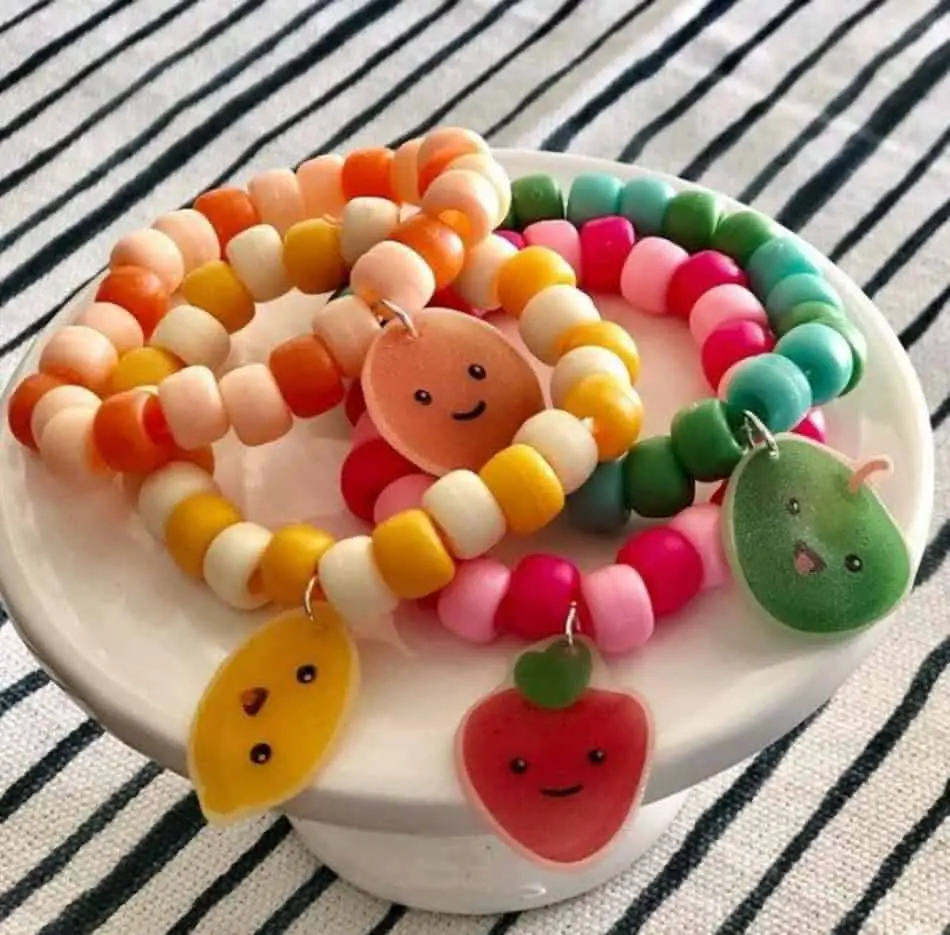
- · Shrinky dink pendants
- · Bracelets
- · Key chains
- · Necklaces
- · Dog tags
- · Shrinky dinks rings
- · Earrings
- · 3D jewelry
- · Pet ID tags
- · Photo shrinky dinks
- · And other embellishments
The reflective practice of making beautiful crafts with the use of shrink plastic and Copic makers carries on. The fun part is that the necessary material or equipment is readily available and affordable. Indulging in such activities is an excellent way of passing time, such as group projects and individual projects.
The crafts made can be used for personal purposes, or you can either decide to sell as well.
Getting to decorate the designs made is therapeutic as you apply skill and creativity and watch out how that plays out well. Use shrinky dinks and Copic makers to make some super cool and cute charms.