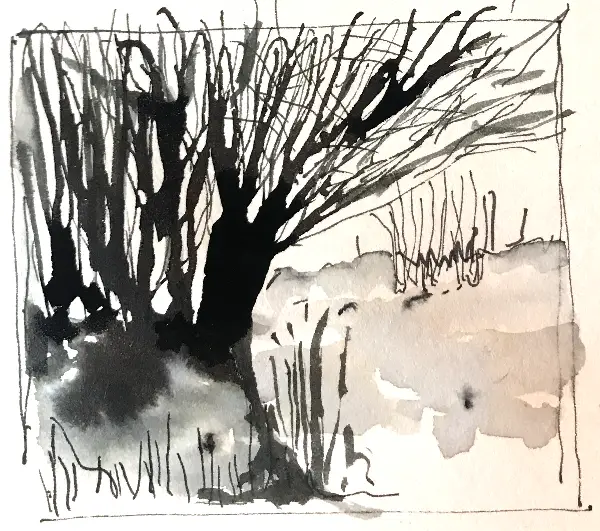
The creativity behind CREATING PEN AND INK DRAWINGS does not require all that professionalism you imagine. Whatever you need most are simple artistic skills, most of which you learn by constant practice. Any drawing you make through these mediums should always depict high levels of value, texture, and color for even a better appreciation.
How these process works are simple. The trick is always to exploit all the quality characteristics of these materials; pen, watercolor washes. Pen and ink still share precise applications;
- Bringing up the Shape of Whatever you are Drawing
· Improving the quality of the image by developing its texture through loose shading and imposing textural marks
The use of watercolor washes comes later when all the ink has completely dried up. When you finish up this procedure and let everything dry up, you will have your beautiful image ready.
As we consider details in this topic, our core intention will be to focus on the critical FAQs towards achieving the best in this path. Keep reading for more information.
Related Posts:
- What Are the Basics of Sketching?
- How to Sketch: A Complete Guide
- How to Sketch Loosely
- Sketching vs. Drawing: What’s the Difference?
- Why Do I Draw So Slow? With Fixes
Do you Ink Before or After Watercolor?
Whether you should ink before or after adding the Watercolor remains up to the artist – they all have their preferences. So why before? The fact is a fine-liner/pen tends to glide more efficiently smooth on an unpainted surface, in this case, a paper. Other reason on in support of this includes;
· Most people find this a common approach towards any illustrative styles
· Some find it easier to paint inside the lines than the opposite
· It is easier to erase ink marks than Watercolor
· Ink before save time, waiting for the paint to dry takes some time
· It is neater
Why Some Artist Prefer Ink After Watercolor:
· Preference to have the paint define directions of the lines rather than the other way around
· The drawn lines tend to appear darker and more vivid on the top than underneath any watercolor
· When they cannot access waterproof/water-resistant pen
Whether before or after, whatever matters is the result. For the newbies who are still mastering and exploring these techniques, it is always highly advisable to try both to find which one works best for your artwork style.
TIP: Applying the paint first would be the best idea if dealing with a water-soluble pen which mainly causes line bleeding. The ink should, however, come later when the Watercolor on the image is all dry.
PEN AND INK DRAWINGS WITH WATERCOLOR WASHES goes with your creative imaginations. Quality color combinations and shadings give you the perfect imagery you want.
Line and Wash Drawings?
Ink wash drawings or paintings are all similar to watercolor paintings. Both use the black India ink as the vital medium to create greyscale artworks. For those who may be new to drawing, the best juncture to always start from is learning the different color gradations and mixing them to pull-out the quality shades intended.
Ink wash drawing is a more illustrative process you can easily follow. First, you may want to master these three phases;
1. Practicing Color Variations
2. Experimenting with Lines and Techniques
Each of these leads you into the proper steps to handle all the ink drawing strategies you wish.
Phase 1: Practicing Color Variations
This part consists of 5 significant steps.
STEP 1 – GATHERING THE REQUIRED MATERIALS.
Before beginning this process, here is a list of items you need.
· Paper (watercolor paper works better)
· Palette
· Brushes
· India ink
· Water (in a cup)
· Scissors
· Pencil
· Ruler
· Paper towels for clean up or spills
STEP 2 – PREPARE YOUR PALETTE.
Learning and understanding color gradation is critical before jumping into the ink wash painting process. The initial step here is usually to prepare a gradient palette. A brush will help you adds a bit of ink into the first section of the palette.
Next will be the same dub brush in the water cup, transferring an amount of diluted ink into the adjacent next pocket. While doing this, ensure not to over rinse your brush. Repeat the last procedure of dabbing for the subsequent third, fourth up to the sixth pocket.
STEP 3 – GET YOUR PAPER READY.
This step only continues the color gradation procedure. Here you will need two paper strips of dimensions, 3 inches by 6 inches each. Using a ruler, draw lines at spacings of about one inch on one of the paper strips. These pencils-drawn lines should run from top to bottom of the papers.
STEP 4 – SHADE IN THE VARIOUS COLOR GRADATIONS ON THE STRIP
At this point, practice the gradation to form a reference base. Apply the different color grades to each strip, drawn from the darkest to the lightest. Put the papers aside to dry.
STEP 5 – SOFTEN THE GRADUAL GRADATIONS.
Using the other unlined paper strip, try softening the various color grades. The procedure will involve adding more water onto the pockets for dilution and stretching out the color edges.
Phase 2: Experimenting with Lines and Techniques
STEP 1: PRACTICE BALANCING THE WEIGHT/ PRESSURE
You need to learn or master the different pressure levels you can exert on your brush while drawing. Some sections of your sketch/ painting may not require all that high pressure and vice versa. Lots of pressure or weight tend to create thicker or darker lines. Alternatively, if you will be drawing a faint line, then less pressure level is necessary.
STEP 2: EXPERIMENT CROSS-HATCHING
You can always use lines to add a tone of dimensions within your in drawings. For instance, several lines are drawn near, introducing a shading effect, and their intensity will always differ. Cross-hatching is a crucial strategy that you use to draw in various picturing effects of the realistic appearance.
STEP 3: TRY OUT YOUR STIPPLE OR SPLATTER.
This step will help you know how better to insert details like dots in your drawing.
Phase 3: Creating an Ink Painting
Here are the critical steps on how to create an ink painting with Watercolor [https://www.wikihow.com/Ink-and-Watercolor] .
Step 1: Make your image sketch with a pencil.
Step 2: Use the light washes to color your image
Step 3: Use slightly darker tones to add dimension
Step 4: Use water to smooth out transitions
Step 5: Finish with your darkest lines and allow the drawing to dry.
Producing PEN AND INK DRAWINGS, all carry similar workout procedures. The best way to bring the best out of it is practice.
Can You Mix Ink and Watercolor?
If you are looking for a unique color variation in your drawing, mixing these two pretty gives you the results. However, as literal as it may sound, still, embracing quality painting skills need to be part of you. Here are tremendous versions of inks as well as watercolors that you can use. While each can be used independently, there is always an option to mix them.
From previous artistic work, mixing these two mediums has always proved to create that perfect dramatic effect. Inks come in different versions, acrylic and water-based; fortunately, either can form an ideal solution with watercolors to add a tone of exquisite touch to a drawing.
How you get these mixed is easy. The best toll always is an ink dropper. You will therefore suck a substantial amount of ink then add it in drops to the watercolor palettes. Using your brush, mix the two to form a uniform solution. Lots of these mixtures are appropriate in the making of a background. Quality color choosing, therefore, will always add value to your paintings.
What Pen Do You Use with Watercolor?
Before you even think of pulling-out a quality sketch or a paint, finding the necessary tools is always paramount. What does it take to find a quality or at least the most desirable pen for watercolor drawings [https://artfulhaven.com/pens-and-ink-for-watercolor/]? Well, the following are among the key features to consider;
1. It should be waterproof – this will ensure no bleeding
2. Not Water-soluble: Some people will prefer water-soluble pens, especially on particular drawings. Otherwise, if you want to avoid running your pens, a non-water-soluble pen will remain the best option.
3. The pen should have in pigments – this confirms that it is non-water-soluble. Details of these are available online if you may not be sure about a particular product.
4. The time it takes to dry: Typically, most ink dry after a period of 12-hours. The best pen, therefore, may not accept this long – the shorter, the better.
Final Word
Art is all about creativity which every artist supposedly has. Producing PEN AND INK DRAWINGS WITH WATERCOLOR WASHES is only a speck into the dealings of art. The above-explained procedures give you a quick insight into what you should expect to create that luxurious image you imagine.
Note: You always need the proper tools to get things to work out well. Look into the latest and best pens, inch and even drawing boards, you can use to make better your watercolor drawings.
