How Do You Make a Ripped Paper Collage?
You might think that making a collage is easy to put down any piece of paper onto your main background paper to create an image. The reality is more in-depth and requires some critical planning, but aside from that, it's a process that will be an unorthodox method of thinking outside the box for your artistic effort.
Creating a mixed media paper collage requires a series of tcechniques and equipment and it can be difficult to do the research to figure out exactly what to buy depending upon your budget.
I’ve created a complete guide to exactly which techniques and equipment you need. Here it is.
.
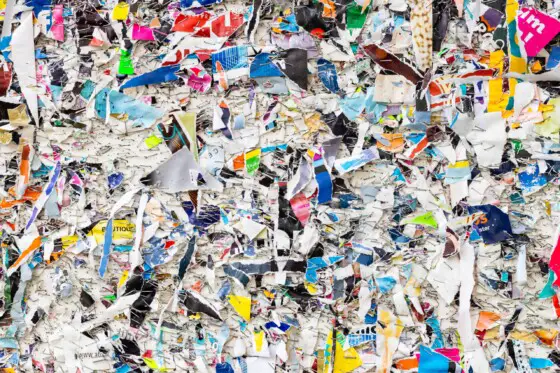
Collecting a Variety of Papers
In all my years of making art and creating art projects, I can tell you that it pays to never throw out scraps of paper, no matter how unusable they may seem to be. You might also think this is being a packrat, but this is where you can optimize your scrap paper collection. This collection is usually kept in a box full of leftover scraps and pieces that are still good for something. And this is you'll find your best collage scraps without any trouble.
Here is how to create a landscape collage using a technique not too many artists know about. It's straightforward to do, and you'll impress other artists who will likely want to recreate this method for themselves. Don't say I didn't tell you; it's not that big a secret once everyone knows after that.
• Color Paper
Color paper can be anything that includes regular construction paper, paper leftover from previous coloring projects, or paper that is naturally colored, such as parchment paper. You can also get a lot of use out of business cards and fliers that come in the mail colored paper. You can't beat business card stock since it's thicker than regular paper and can include colors that simulate all sorts of organic and natural materials.
A great resource to find the free paper that you don't need to buy is searching various outlets where paper samples are free. Painting supply stores, libraries, and even copy and printer shops will all have leftover scraps considered garbage. You can ask to take leftover scraps that can add volumes to your colored collection.
• Textured Torn Paper
The textured paper includes paper with a surface texture that stands out, and the raised surface can be seen and felt. It's not limited to paper with a mixture of paper particles that give it a textured appearance. These can include paper stock that resembles a rock, stone, marble, and mixed compositions. I highly recommend asking for sample paper from print shops that have textured paper.
Another great place is going to smaller home improvement stores or redecorating centers with wallpaper that includes textured paper from leftover rolls too small to sell. You can also have further luck going to floral shops with textured paper scraps that they would throw out if the pieces are too small to use in floral arrangements.
• Newsprint
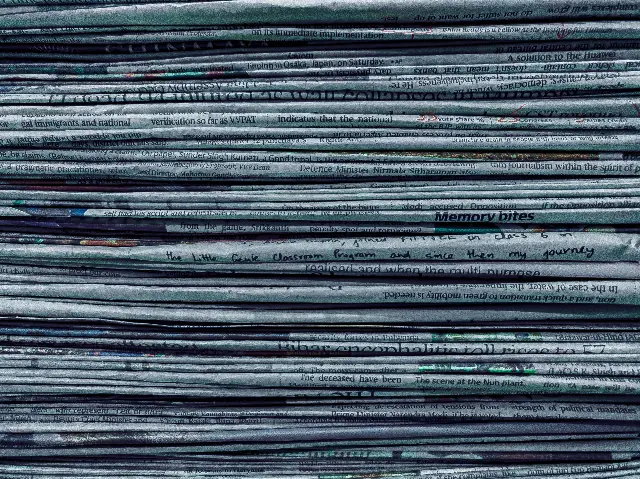
Old newspapers and magazines are a good choice if you like paper that is unconventional and chaotic. Anything with printed words has a quality that will add hidden meaning in your collage besides adding line texture. While you can see the printed words up close, standing back, these words form shapes that are very helpful when creating straight line texture in a landscape.
The only problem with magazine print is that the paper is shiny and might need to be dulled with matt spray if you don't like the shine. Newsprint is always matt, but you have to be careful with the glue you use; it can wet out the paper and make the other side show through. This is why you need to use different glue for the newspaper to remedy this common problem. PVA glue or Mod Podge is a good alternative.
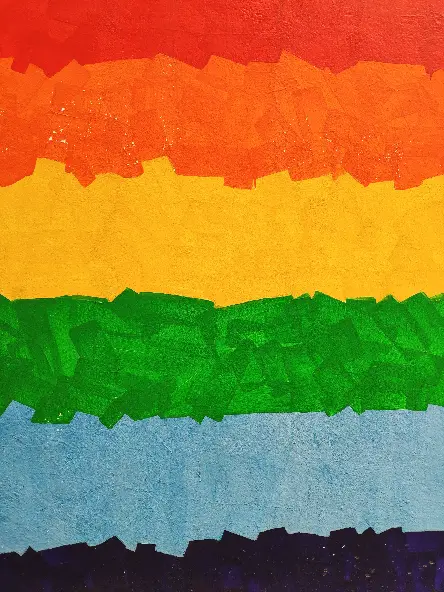
• Prepared Torn Paper
If you have a paper specially prepared with your own colors or tints, these can be used for your landscape collage. Flecks of watercolor, ink and even acrylic paint can cover your regular paper and cut it up to make all sorts of colored textures and details. You can grade colors to get shadow effects and add all sorts of accents on a big sheet of paper to pick and choose what suits your needs.
Sometimes, this is better if you pick out specific colors you want to use, so the torn pieces provide more of a picturesque scene than simply random patches. Almost like a jigsaw puzzle, you can prepare an image loosely stitched together to get even more dramatic effects. Or take older landscape drawings that match what you like and tear them up to insert onto your picture.
This can always help you create the perfect scene if you've taken the time to make premade insert pieces that will add multiple layers in different shades to bring out more dimensional quality.
• Torn Edges
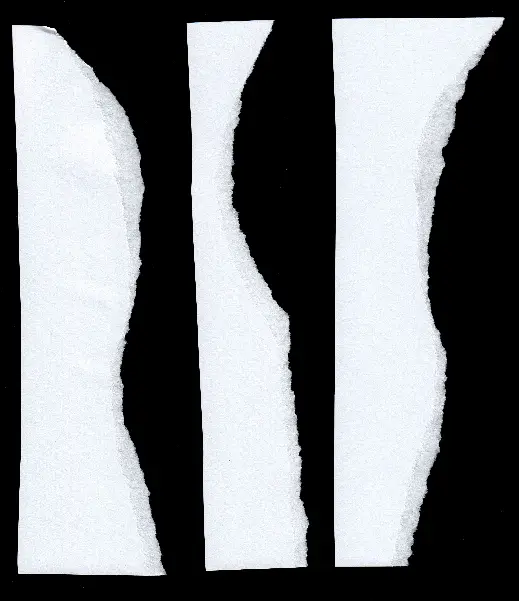
I learned a secret for tearing that never gets old and gives you a clean edge along with each piece. Simply use your forefinger and thumb on both sides of the paper and tear the paper downward from either hand. This leaves the ripped line behind your colored image or paper and helps create a smoother blending edge. This way, anything placed on top of each piece is a smooth transition.
If you do the tearing toward you (with either hand), the tear line is over the top of your color, and you get exposed paper that will show that torn line. This is OK for colored paper, but the white will show through for pre-colored paper with paint on it. Some artists may not like how this looks and ruins the seamless quality of your collage.
Related Posts:
- How to Create Texture in a Drawing?
- How to Create Mixed Media Art?
- Easy Contour Drawing Ideas
- Creating Textured Drawings
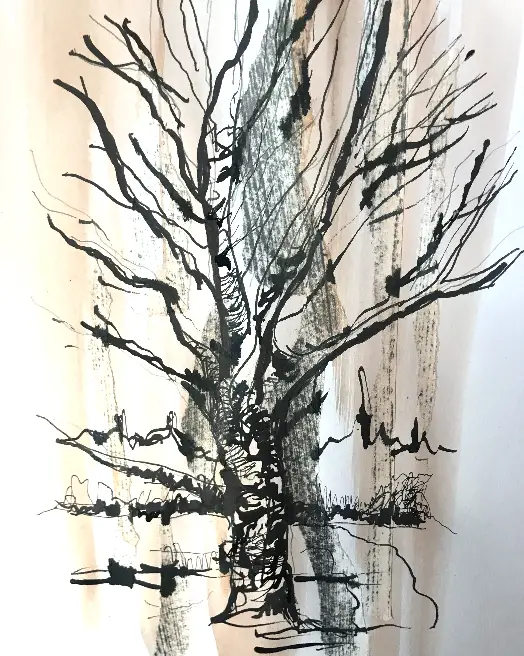
How Do I Make a Landscape Collage?

A collage isn't supposed to be a thumbnail, but more or less, thumbnail-sized pieces of paper are all put together to make a picture. Choose a size that is fitting to be seen at a distance. Using A4 paper just isn't going to cut it, so go big! Try 24-inches by 24-inches at the smallest to get the best effect. Even bigger is you, like making something awe-inspiring. But the biggest issue is going to be your composition, and that's where you'll learn some essential rules.
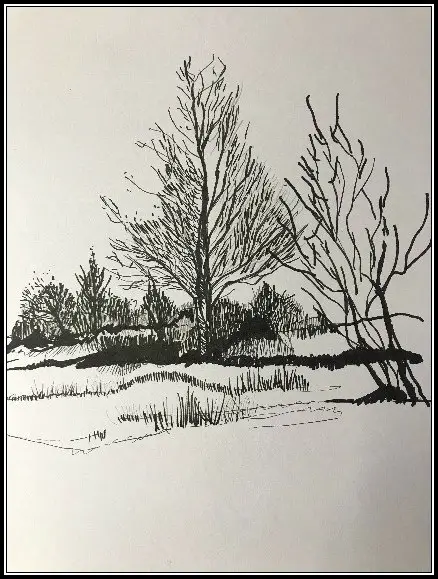
• Preliminary sketching
No matter what kind of landscape you want to draw, you need to start with a basic outline. Much like a movie script, an outline is the basic idea of a script and has a simple premise. This premise includes: Who, What, Where, and When. It's as simple as that, with no exceptions and no need to explain anything else. From this info, you can establish: Where your landscape is, what time of day it is, and what time of the year it happened.
The Who in this picture is obviously you, but others will see it that will share this event. That's why a simple sketch of your ideas is needed to get the basic thoughts on paper before you start your collage. Are you standing on a ridge looking down into a valley, or are you looking up toward a mountain range? Find your vantage point first and move onto the time of day and the time of year.
Don't worry; it doesn't need to be too detailed, so primary rough lines will give you a rough picture of what you can see in your head. Don't add details just yet; just get the basic ideas as quickly as you can. The following steps will fill in the rest of what you're looking to create.
• Taking photos on location
If you've been taking photos of a spot that you like, you already have reference material to use right away. But if that doesn't suit your mood and you want to make it more dramatic with a sunset or time of year, you'll need to use updated pictures. Go to your location if it's close to you. If not, collect photos online of that spot if it's a famous landscape. Luckily, more and more of these are found online at all times of the year than you think.
But if we're talking about specific colors, you remember, you'll have to go there and get plenty of photos using your best camera. Most smartphones have cameras matching the quality of professional ones, as long as you can get the image that appears natural without a flash. Preserve as much of the natural light, so you can use this later when constructing a landscape collage.
Drawing Out Your Landscape on Paper
Once you have photos of your scene that you can work with right away, you need to get them printed out on paper. The largest size that you can print at home will be perfect, or go to a copy center and ask for 4 large color copies in a size that appeals to you. This will make sense later since I don't want you to get lost with this info along the way. But you'll have to trust me since this is an excellent way to arrange things how you like later.
• Foreground
Once you have your big printed pictures, take a small pair of scissors and start to cut out everything in the foreground of your photo one at a time. Use stick glue to tack them down onto a piece of paper about the size of the college you're going to draw. Use cuticle scissors if you have them with you. This makes little details easier to cut out. Only cut out the foreground pieces that are directly in front of you and closest to you.
Save as much of this color print by not cutting it up into smaller pieces. This is part of a very selective process that'll save you time and effort later.
Now place all these foreground pieces onto that blank piece of paper and arrange them how you like. You might be getting some ideas already since this may look too empty and will need added foreground items later.

• Mid-ground
Now onto your second photo print, you start to cut out everything somewhere in the middle of your picture. You want to make a layered image to create depth, so only items that help make that layered effect. Just like Disney movies used to be done, they separated each background and foreground layer to create a multiplane effect [https://www.waltdisney.org/sites/default/files/MultiplaneGuideCurriculumPacket_Final.pdf]. Modern CGI is done this way, but it lacks the same charm that this animation style allowed.
If you have gaps of foreground objects covering your image, do what you can to preserve that mid-ground image, it can be filled in later. Just get these images onto the second piece of paper and tack them down where you like temporarily. Don't lose any pieces, so tack down everything once you've cut it out as a basic form.
• Background
Now you jump onto your background, which is going to be a pain in the neck. It's already missing so many spots that you'll feel this won't come together. Relax, I've got the answer already, and you'll be amazed at how it all works. Now place your background pieces where you want them to go as if everything was cut out like a cookie cutter on each layered sheet. When you're done, this is where you can start to fill in your missing pieces.
The background stays the same, so you can already see the details of what you have. Take the two other pieces used for the foreground and mid-ground and use the leftover background to fill in your missing gaps. It's not cheating; it's a photo reference! To use as your guide for the actual background, you make with your landscape collage. It gives you a chance to create a clean background plate to start with.
Since this is your most vital piece to fill in, take time to get it looking how you want. The rest of the missing pieces from the other prints can be used to fill in gaps in the mid-ground and foreground as you like after that.
• Main features and details
The foreground and mid-ground are the meat and potatoes of this collage. The background is what sets the mood, and that's why it needs to be completed first. You'll be using this background to craft your collage and match colored paper to the final collage- accordingly. This is why I recommend that you go big to capture details that you just can't get with smaller pieces of paper.
As for the meat and potatoes portion of your foreground and mid-ground detail, that's going to be up to you. How do you like to put food on your plate? If you're hungry, it doesn't matter, but to make it look attractive and exciting, you have to arrange these layers, so they complement each other. The background isn't going anywhere, so your foreground and mid-ground have to make a careful dance around each other.
To get an idea of how this will look. Sandwich these two pieces over each other. Look at them with a light table or up against a daylight window. Do these images look like they belong near each other, or do they need more tweaking to arrange them like your original picture? Arrange them as needed after this, carefully peeling up the pieces and placing them where you like.
Sketch in similar colors using colored pencils where you want added details on each piece of paper. These are now your roadmaps for each step of your collage. They are also your color reference guides to get the right shades as close as you can. Start backward and move forward to the foreground, layering as you go.
Pasting and Gluing Torn Paper
Beginning with your background, start looking for all the colors from top to bottom. Tear bits of paper according to colors and put them in graded shade piles. It's easier to start with darks to overlap with lighter colors to get a better blend. Backgrounds go pretty quick since they're usually one continual line of dark, then medium, and then light. Draw a light sketch where these graded light colors are going onto your paper, so it's easier.
• Arranging colors
Your main collage paper should be a thicker paper or perhaps a cardstock that's in the size you want to glue everything onto. Sketch the lines of your background using your finger or a ruler to get a rough scale. Then start finding your colors one color at a time and tear the pieces, so they fit onto your page. Don't worry if they overlap the edge; you can trim these off later with a razor knife or a pair of good scissors.
• Arranging Torn Textures
Once you complete your backdrope, start from the bottom all the way to the top. Look at it from a distance. If you need to add anything, this is the time to do it. You'll want to seal this collage with a couple of layers of Mod Podge or Elmer's glue to fill in gaps leftover. This will make it easier to layer the mid-ground layers and make your picture appear less lumpy-bumpy with all the layers you've added.
Let it dry totally before you continue anything. Now you can start with your mid-ground picture and select paper that has texture to bring out dimensional details. Sketch in where these items are going based on how they look on your separated sheets. You may need to adjust slightly because of your back ground or personal liking. These textures don't need to be as heavy as the foreground ones will need to be.
• Comparing shapes and edges
Since you've separated the foreground and mid-ground, you can immediately tear pieces according to the size of your object. This will be an ongoing task for most of your college, so get used to customizing each piece to get it to fit. Since you're sketching a light outline onto the backdrop, use these lines to get the correct scale of your mid-ground and foreground objects.
The foreground will be more critical than the mid-ground depending on how detailed and accurate you get. Once again, once you finish the mid-ground how you like, take a few steps back and see if anything is missing for shading and composition. This is when you once again seal your layers with Mod Podge or Elmer's glue to keep the layers of paper from being too obvious. Let it dry to a total clear before adding the final foreground.
Completing Your Collage
With so many layers of sealing glue to keep your page flatter in appearance, use thin layers at first, so you don't get buckling. This is another excellent reason to use thicker card stock to prevent warping as it dries. If not, you have to put silicone parchment paper or wax paper on top after the initial layer has dried and then placing something flat over the entire top to prevent any extra buckles or warped spots.
The final layer is the most critical, so placement of everything must have a calculated dance within these previous two layers. Arrange your sketched lines using the foreground layer sample as your guide. The start to collect your torn paper pieces as a separate element added precisely where you want it to go. Take your time at this point and allow the pieces to fit in according to the texture you use.
Heavier textures work best since they show up at the front of your frame and look more realistic. Try to keep the grain and overall texture shapes as natural as possible. When you have everything glued down, stand away from the picture to see if you can add to this or not. Once you're done, you don't need to add a fill-in layer of glue over the top of this unless you want to.
And that's all there is to know how to create a landscape collage that looks better than other collage methods you may have heard about.
Create Art With My Favourite Drawing Resources
General Drawing Courses. I like Udemy if you want to develop your knowledge of drawing techniques. Udemy is an excellent choice due to its wide range of creative courses and excellent refund policy. They often have monthly discounts for new customers, which you can check here. Use my link.
Sketching and Collage. Take a look at this sketching resource I have created. Use this link.
Proko. Is one of my favorite teachers who surpasses in the teaching of Anatomy and Figure drawing. Prokos course breaks down the drawing of the human body into easy-to-follow components aiding the beginner to make rapid progress. For this, I really like Proko.
Art Easels. One of my favorite ways to draw is by using a drawing easel, which develops the skill of drawing on a vertical surface. The H frame easel is an excellent vertical way to add variety to the style and type of marks you create when using a drawing board.
To see all of my most up-to-date recommendations, check out this resource I made for you.