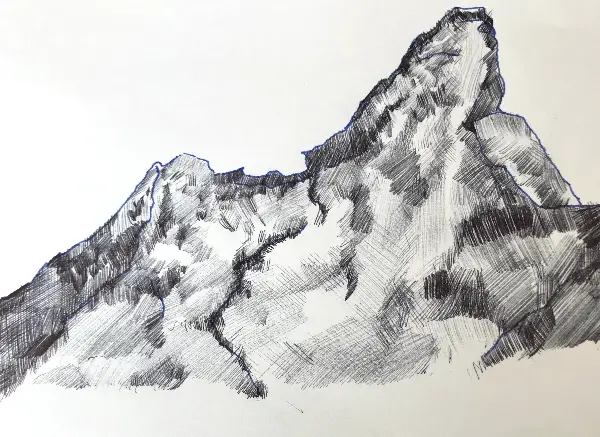
PEN AND INK MOUNTAINS
When it comes to artistry basics, mountains are some of the earliest things that painters draw in their early stages of learning the craft. Most artists learn how to draw using a pencil or water-based colorants before drawing with pen and ink.
However, they have to master drawing using other writing tools for diversification purposes. Before they learn how to draw elaborately using paintbrushes, it is critical to know how to make basic sketches using a pen and ink.
In most cases, it seems like an easy task, especially for those who are conversant with using water-based pens. But, using pen and ink is a bit tricky, considering that the techniques are different. Take a look at some of the easy steps you can follow if you want to learn to draw mountains in pen and ink.
SKETCHING MOUNTAINS WITH PEN
There are plenty of methods that you can use to draw mountains. These techniques heavily depend on the simplicity or complexity of the art you want to create. The landscape you want to portray also comes into play when you're sketching a mountain.
How you shade the mountains to gain the best texture determines the results you get. You can either achieve this by contouring or using a variety of lines. And regardless of the option you take, it is essential to capture the features that make the mountain appear realistic. Herein are some of the top ways you can use pen and ink to outline mountains in your art.
* DETERMINE WHERE YOU WANT TO HAVE THE HORIZON
The horizon is the space where the sky and the earth meet. You can either have your horizon on the top of your paper, the middle, or either side of the page. Once you find the right spot for the horizon, you can sketch your mountains below it.
Draw several or a few of these drafts with peaks overlapping one another to make the image look realistic. Keep the peaks distant from one another, so you don't have a hard time filling in the details. When you put the peaks too close to each other, you may end up with a very busy image, especially if you are still learning how to do this and have limited drawing space.
* CREATE THE CONTRAST
You want to create a contrast between the plains on the front and those at the back. This helps to accentuate the layers you've created. Whether you use horizontal or vertical lines, ensure that the plains at the front are more conspicuous than those at the back.
The idea is to space the lines less so that the mountains in front appear to have more color than those behind them. Space the next plains even more so that you can achieve that contrast. If you have more than two or three layers, alternate between dark and light for the same effect.
* ADD A TOUCH OF TEXTURE
The rule is always to give the most details to the front row mountains. Make sure your audience doesn't have to struggle to find out what's on the painting. Whether you want to add trees, birds, or water bodies to the image, use a texture that will make it believable.
Use the most elaborate contour on any features you want to include on the forefront. As you move to the back, make the contour much lighter. This creates a smooth transition between the features. In addition to achieving believability, you avoid having a sketch that's too busy.
* ADD IN THE DETAILS
Mountains have trees, and some mountains are near large or small water bodies. Add in the extra details to make the image look believable. Remember to use fewer lines or, rather, increase the space between the lines when you're mapping out the sky and reflections so that you can attain the contrast between the sharp angles of the hills and other items on your painting.
RENDERING THE SURFACE
Rendering is one of the ways you can use to create surfaces on your painting. Considering that you're using pen and ink, you will have limited choices that allow rendering the surface, and these are:
LINE QUALITY
You can imply shadows simply by creating darker lines on the drawing. Start by darkening the most important sections of the image where you want the attention to go.
Where the horizon is, you may want to use thicker strokes, especially if you want to indicate that there's a light source around there. Use thicker lines on the forefront objects to give them value and character.
SLINKY
A slinky comes in handy when you want to create sloppy effects. You have to make zigzag lines that are very close to one another. Start from surfaces that have value and move outwards to those that don't. Remember to stroke lightly to avoid blotting the paper since you're using ink rather than a pencil. Once you give value to your main subjects, reduce the lines' frequency so that you can create a contrast.
CROSSHATCHING
If you choose this technique, opt for oil-based ink. Water-based ones might ruin the paper since this method requires you to apply a significant amount of pressure on certain image areas. You will have to apply pressure on the most valuable areas of your drawing. Allow the ink to dry out, then overlap the sections where you applied pressure to create an even darker effect. Reduce the overlap as you move out to spots that are far from your light source.
STIPPLING
If you opt to use stippling as a technique to render surfaces, you'll have to create dots all over the spot you want to highlight. Start by making heavy dots on the objects that have much greater value. For example, you can dot half the mountain starting from the tips.
Make heavy blotches, then reduce the dots' intensity as you move towards the middle to create a fade. Stipple heavily at the peaks so that you don't have a hard time fading out.
HATCHING
When you chose this option, you only have to apply pressure on the drawing's valuable points using closely-knit lines. Make the lines darker where you want to stress the importance of an object, then reduce the intensity as you move towards the less important spots. The good thing about using this method is that you can shade your painting to face any direction.
LINEAR
This option is almost the same as hatching, only that the lines are less sharp. The direction you'll draw towards also differs from hatching. If you use linear shading, you have to shade on a horizontal scale.
DRAWING SHADOWS IN PEN AND INK
If you want to create a shadow [https://willkempartschool.com/how-to-shade-a-drawing-light-shadow-part-2/] or reflection in your drawing, you can use any of these techniques mentioned above to create one. However, you have to consider the source of light and its position if you want to shade effectively. The ideal approach would be to draw the image first and then use them to create a befitting shadow. Map your shadow first, then fill in the necessities later.
BENEFITS OF INK DRAWING
Most people would argue that it is better to draw using a pencil instead of using pen and ink for obvious reasons. Nevertheless, artists still benefit from using a pen and ink to sketch mountains. Some of these reasons include:
A more defined drawing: You do not have to put too much pressure to achieve darker lines. The ink flows directly from the pen, meaning that you'll only have to stroke a certain spot a few times before you attain the results you seek.
Permanency: Using pen and ink to draw needs a keen person, one who has been drawing for years because you can't erase an error. However, this same property enables you to draw an image that will last without yielding to external environmental conditions.
Efficiency: When a pencil becomes blunt, you have to take the time to sharpen it until you achieve the same grain that will match up to the texture you want. Using a pen and ink, however, is quite simple. If you realize the ink is drying up, you only have to refill the pen and continue using it normally. There is no need to attain any level of perfection since you are the one who will regulate how many colors you want on the art.
Versatility – Pen and ink mountain drawing gives you plenty of color options to pick from, unlike using pencils. More so, you can mix two or three colors that you have to get something close to what you need when you run out of a particular shade of ink.
Environmentally friendly – Unfortunately, pencils are a by-product of trees. With the current global warming crisis, the last thing we want is to cut down another tree. Pen and ink mountain drawing allow you to enjoy your craft without causing any detriment to the eco-system.
WRAP UP
The ink drawing mountains technique requires an expert who knows how to control the liquid to get consistent results. Even so, you need to use high-grade paper and pens to succeed. And while these tools can limit your drawing techniques, you can use the available options to achieve great results.
Remember, when adding texture to rocks, use pressure. Heavy marking enables you to get a grainy texture that resonates well with such objects.
REFERENCES