Drawing clouds is a technique that might sound very tricky to draw, but using charcoal makes it easier. This DIY guide will give you plenty of instructional ideas on how to create clouds on paper. You can also learn about how to refine your cloud drawing skills using these pro tips and tricks. Even if you aren't used to drawing clouds in your pictures, this guide is an excellent introduction to how the cloud can be drawn in charcoal in a fast and easy method.
Drawing Clouds with Charcoal
Related Posts:
- How to Draw Realistic Rain
- How to Draw a Forest Background
- How to Draw a Night Sky
- How to Draw a Tree in Watercolor Pencils
How to Draw a Sky with Charcoal
Getting started is all a matter of having the right drawing materials. It will enhance how your sky looks and add dramatic value. But the most important part is using charcoal that is easy to work with. Having the right tools is essential for how to draw clouds with charcoal. Learn to create realistic landscape drawings with this in-depth drawing course on Udemy. How to Draw From Beginner to Master
• Using a Charcoal Stick
The first two things that you'll want to choose are the paper and the choice of charcoal. Not all charcoal sticks will blend the way you want them to. You also want to have a variety of charcoal shades so you can get subtle hues and lighter spots. As for paper, you want to have a type that has more bite. The right choice is heavier 60 to 90Lb that is textured.
• How to Hold the Charcoal
There is no proper way to hold charcoal, and you don't need to hold it like a pencil. Small pieces can be held by pinching two fingers and running the charcoal in a paper's light pattern. This is to get the main shape, and then you can go back and use a sharper edge to create darker lines. The rest is spent blending and erasing spots to create highlights.
• Plotting your Clouds
Where should your clouds go in the sky is always going to be the big question. The first thing you want to ask yourself is how much of the sky is part of your story. Make your clouds into a character or make them have a character by their presence. They must play a vital role in your drawing to help tell a story. This will give you a better direction by thinking this way.
• Where is the Light Source?
Light is always going to be a concern when drawing a cloudy sky. This means that the sun will be affected by clouds as well. If you've seen pictures where the sunbeams break through clouds, it makes a picture look more dramatic or godlike.
How to Sketch Clouds with Charcoal
• Your First Step
Set up your charcoal according to the shades you want to use. Also, have your blender tools close-by, along with your eraser or eraser gum. If you have a large piece of paper, have different size pieces of charcoal you can grip. Basic shapes should be sketched out with two pinched fingers and run along with the paper.
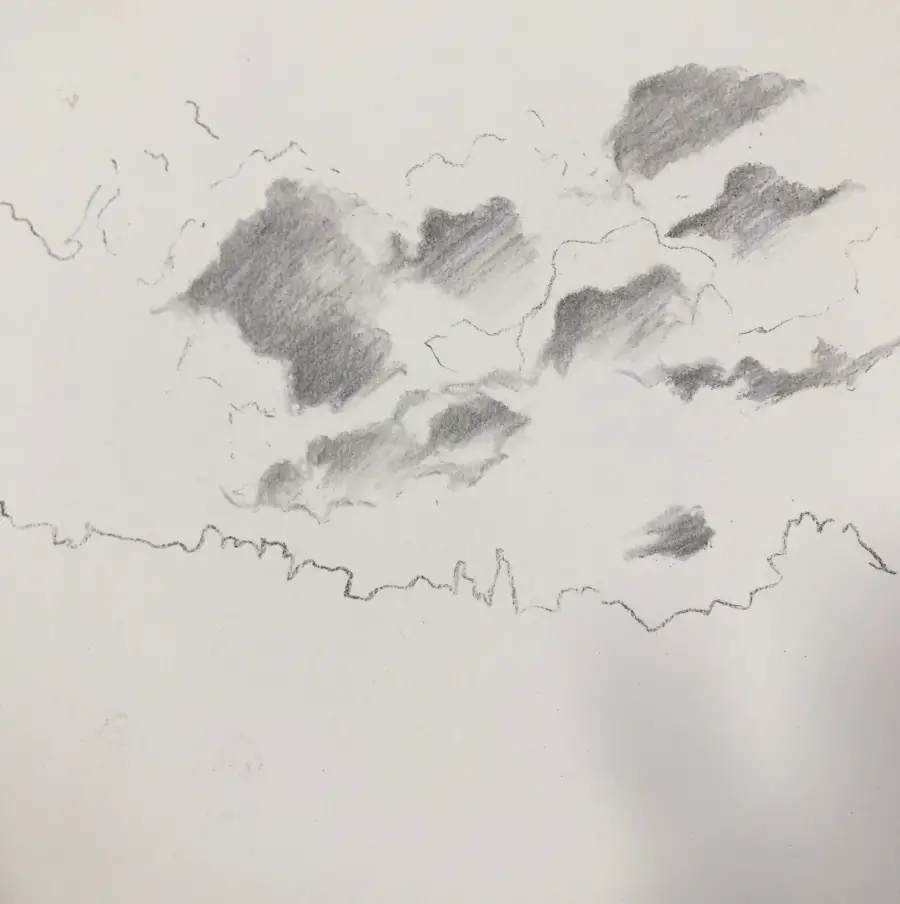
• Keep in Mind You're Drawing Backward
This exercise starts with drawing a dark shape in reverse. This means that you are drawing a dark oval-shaped pattern and the cloud itself is inside that circle. Large flat pieces are basically scrubbed onto the paper using random patterns. Later, you can go back and use the sharper edge of the charcoal stick to add rim details.
• Use your Fingers or Blending tools
Some people like using their fingers when drawing charcoal since this gets you closer to your art. You can also keep your hands clean by using simple blending tools. This will include paper towels, blender stumps, and even rolled-up newspapers. Anything that can smudge and spread the charcoal where you want helps feather harsh edges.
• Choose Loose Shapes that Resemble Objects
You might look into the sky and see clouds that resemble all sorts of things. Animals, food, and anything you can imagine are commonly seen floating in the sky. You might want to add these mental cues in your drawing to add more to a visual story. It might merely be your choice to add something that you want others to see as well.
Drawing Shadows
Shadows are going to appear at the very bottom of your cloud. Since the light from your sky is often from above. To add these shadow spots is a matter of understanding how shadows work. Since clouds are collections of water vapor, they have depth. To draw this depth means sketching-in darker lines at the base of your clouds. These can be lighter or heavier, depending on the type of cloud you are drawing.
Drawing a Variety of Lines
Don't settle for a single dark line under the cloud, so add at least 2 or 3 lines that intersect at the bottom representing layers. Leave the top half of your cloud alone, so you have more highlights. Inner shadows should also weave their way upward from the bottom of your cloud-like roots. The angles and patterns you choose should flow softly and be drawn with a soft charcoal edge.
Your darkest shadow should not be more than twice the shade of your cloud outline. Giving the darker shadow edge can blend into what is already there. Don't go outside the edge of the cloud itself since you don't want to ruin this highlight and shadow effect.
Blending Charcoal
You already know about using erasers, eraser gum, and blender sticks. Did you know that a single page of newspaper rolled up will make an excellent wide blender stick? It doesn't need to be rolled up tight, and the end of the stick can be cut-off with scissors. As soon as you start rubbing it on your drawing paper, the charcoal will softly blend-out. It can also be easier to get wide coverage if you have many clouds to blend in.
If you use your finger, this works as well, but you'll have to clean off your finger after this. Any part of your paper that you touch will deposit fingerprints. I recommend using a cheap diaper wet-wipe to clean your fingers. This way, you don't have to remove smudges from your fingers. You can further blend finer spots on your cloud with a blender stick. You want to make a nice clean blend before you go back to create any highlights.
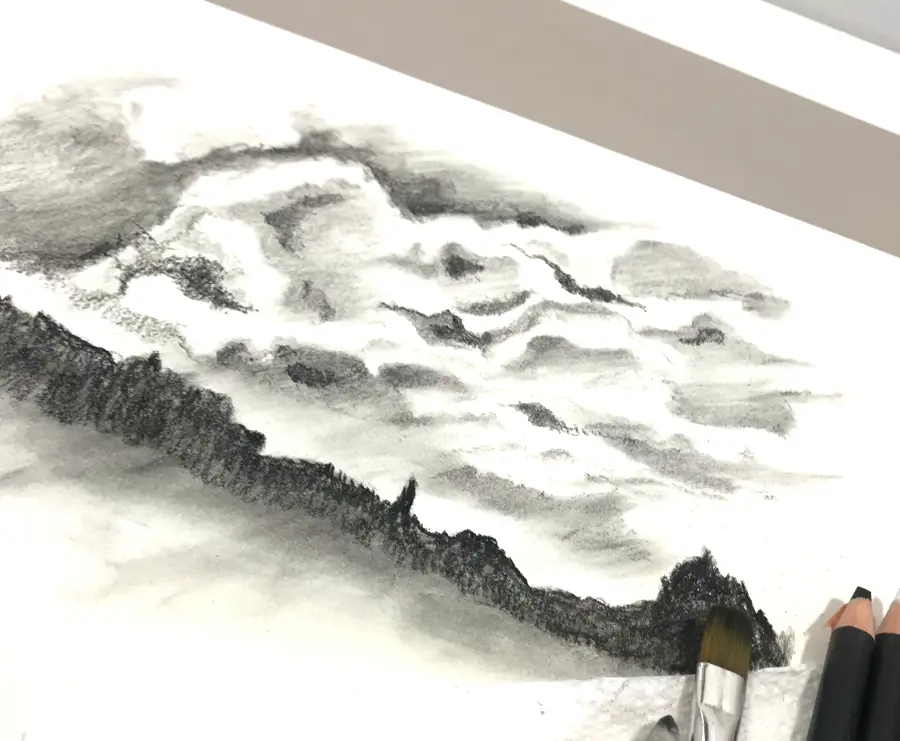
Drawing the Edges of the Clouds
Depending on the type of cloud you want to make, edges make your cloud look more realistic. Some edges should be sharper while others softly billow away. Perhaps there is a drifting cloud where the edges are trailing away. You need to understand how clouds look in real life, and that starts with having many pictures of clouds. Cut them out from magazines or print them from the internet.
Have something that you can glue down on paper, like a mixed-media collage to use as a direct reference. This will also help you to highlight the edges of your clouds using an eraser. This will make edges appear sharper and have light reflection coming from above. While learning how to sketch clouds, these picture collages will be incredibly useful.
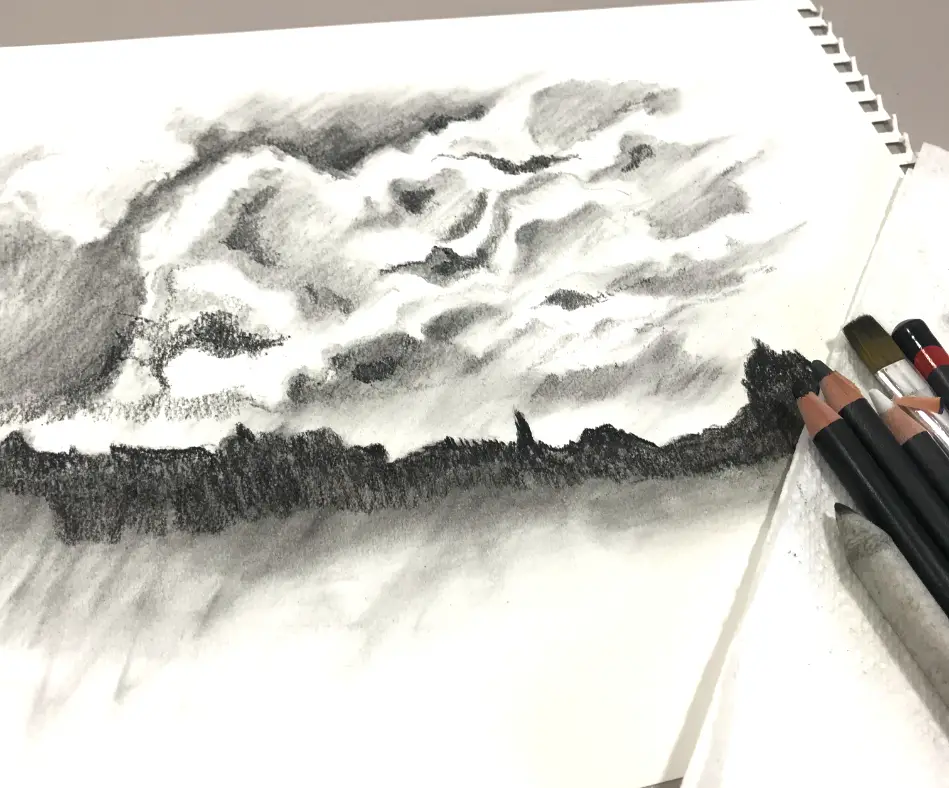
Drawing the Sky Around the Clouds
Obviously, you will be using charcoal to draw your clouds in reverse, so the sky will be represented as a darker shade of gray. Across the entire sky will be a varied shade of gray that has clouds. One cool effect is to add this shading all the way to the top of the page. Below the clouds down to the horizon line can then be lighter to near white. You can use your eraser to add wispier clouds toward the horizon line.
As long as you have a horizon line, this gives the appearance of a sky that will mimic a natural setting. Going back to your reference photos, the closer you make your clouds look similar to real photos of clouds is vital. This is another great tip on how to draw a sky with a pencil too.
Creating Depth in Your charcoal Drawing
You can make a charcoal drawing look more three dimensional by adding a certain amount of detail onto your cloud. Proper blending is also going to make your sky have even shading. Adding chicken scratches while using your eraser on the cloud itself will give. These need to be rounded and follow the shape of your cloud along with the corners. You can also erase sections in the darker areas to give the appearance of more depth.
The direction of light will look more convincing when clouds all follow where the light is coming from. As long as this follows the sun's direction, your clouds will appear how they look in real life.
My Conclusion
Hopefully, these tips will help lead the way to draw more realistic clouds that fill your pictures. Depending on what else you put into your picture, your clouds will directly give the perfect amount of emotion. As far as practice clouds, the better you get at drawing them quickly, it will be essential for later sketches. I hope these suggestions are helpful for your next cloud sketching session.