If you want to grow as an artist when your subject of choice is the human form, then you must learn how to practice drawing anatomy.
There's no getting around this. You need to understand how the human body is put together and how the muscles and bones move to draw realistic figure drawing.
Drawing the human form is not without its challenges, and one of the chief among them is being able to draw figures that appear life-like. With a solid understanding of anatomy, your figures look strong and lifeless.
The following Anatomy Drawing Course offers beginners a comprehensive system for drawing the human form from start to finish. Click here for additional information.
Anatomy Drawing Practice
Looking back at some old masters, you can see that they understood anatomy well. Leonard da Vinci, one of the greatest and most influential historical artists, was renowned for his anatomy study.
The old masters studied anatomy because they understood the importance of knowing how the body worked so that they could reproduce the body in their artwork.
If you want to create drawings, paintings, or sculptures that look life-like, then you need to learn how to practice drawing anatomy. If you are looking for easy ways to draw a human figure, check out the ideas in this blog post.
Drawing the Proportions of the Human Body
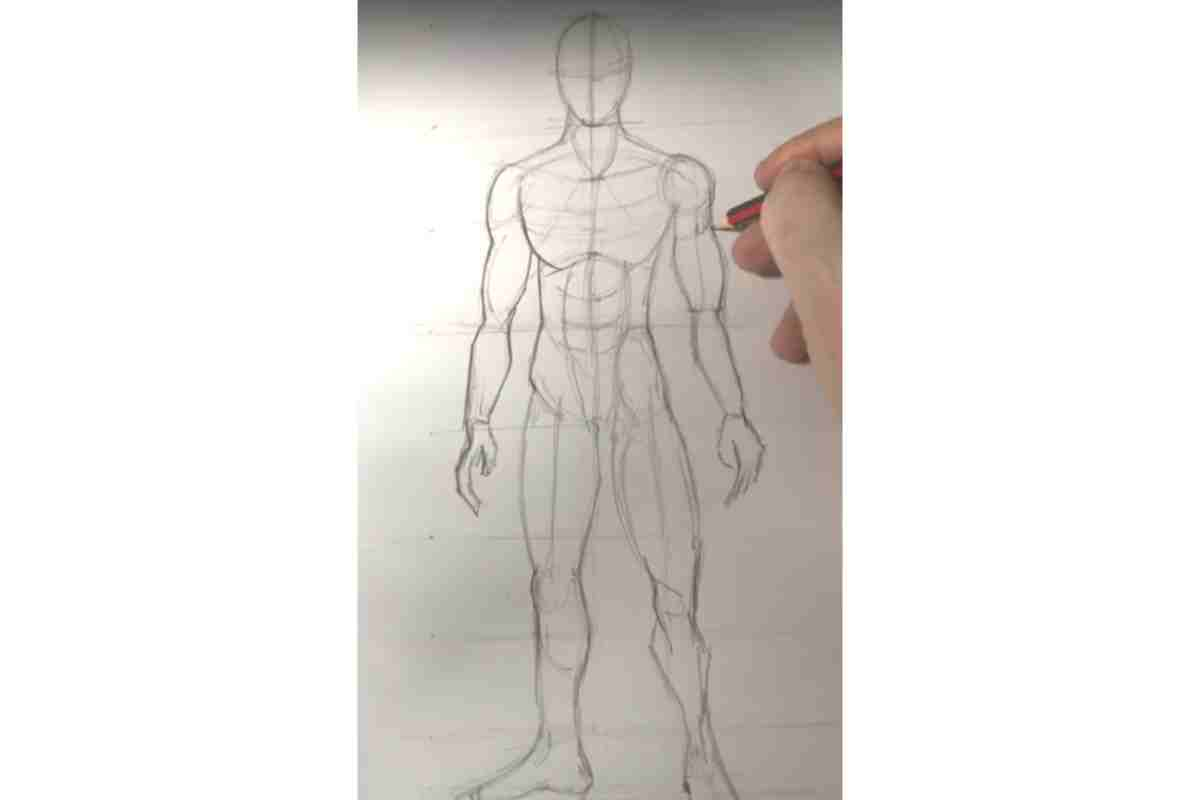
The human form is complex. When drawing it, you have to draw a head, neck, torso, arms, legs, and hands. There are many different areas you must focus on, and you have to make sure they are all drawn proportionately.
If the proportions are incorrect, the drawing will not look right when you are drawing a portrait or figure. How do you get better at drawing the human figure proportionately? You practice. A lot.
- You should always start with a light sketch when starting out a new drawing.
- Trying to draw in detail too soon will almost always cause problems.
- You need to start with a light sketch to establish proportions when drawing.
- Make sure you keep your arms loose and draw with your arm, not your wrist. You want light strokes that will help to convey a sense of motion to the piece when it's finished.
- To draw realistically, you need to use a model for reference.
- The model can be a live model or a photo. Live models are preferable, but photos are more convenient to work from. When sketching your model, pay attention to how different body parts relate.
- The size and shape of various body parts and facial features are similar in all people, but there are slight differences.
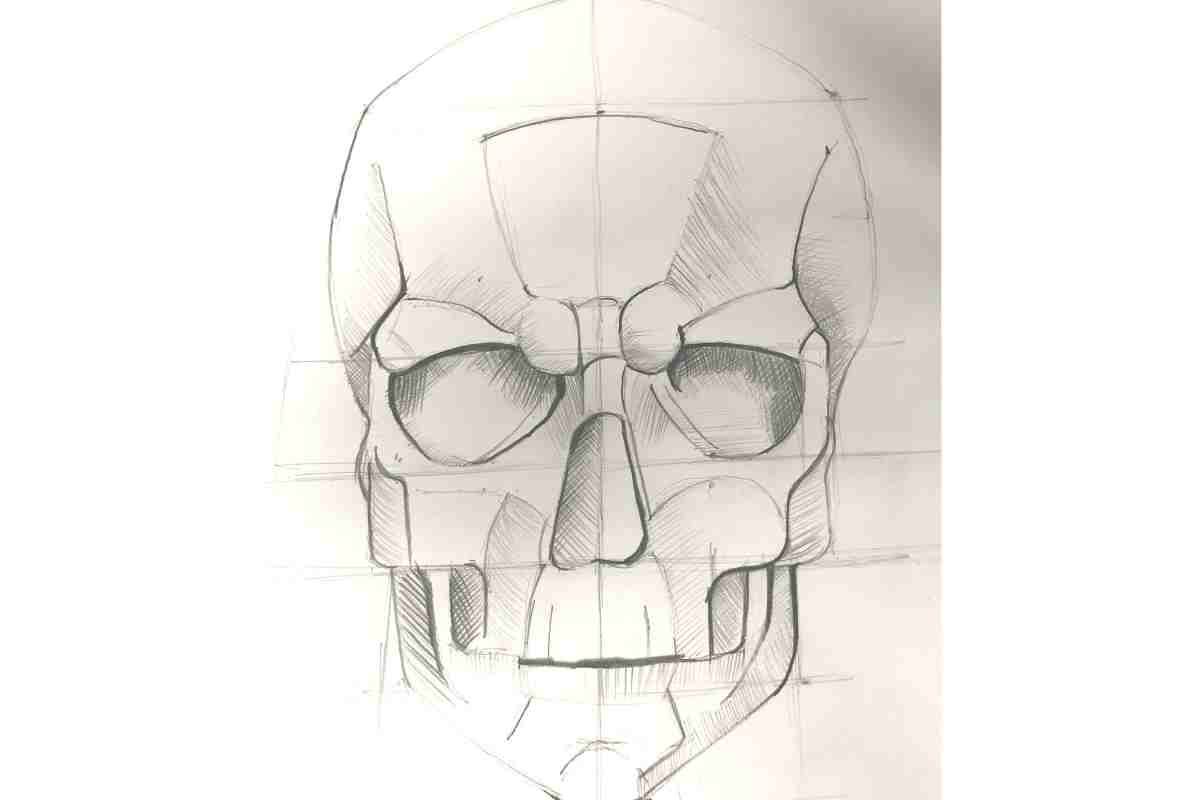
- These differences are what make us all unique. When trying to capture a good likeness of a model, getting everything in the right proportions is essential. To learn how to draw the skull step by step by reading this blog post.
Drawing the Head and Neck
When drawing the anatomical forms, getting everything in proportion is essential, but it's even more important when dealing with the head. The human face is the most recognizable thing in the world, and a mistake made when drawing the face, head, or neck will be easily recognizable.
So, how do you avoid making mistakes when drawing the head?
First, start your drawing with a light sketch made with loose strokes. Any drawing should start with a solid foundation, and the first step in creating that foundation is with a light and loose sketch.
Don't focus on details with this sketch that will come later. Instead, get the basic shape of your figure down, along with the posture you want your figure in.
It helps to break down the different parts of a person into simpler forms when drawing the figure. When drawing the neck, it's a cylinder, and the head is shaped like an oval.
These are oversimplified explanations, but these are the basic shapes. They will differ from person to person, so look at your reference and adjust your sketch accordingly.
- After you have your basic shapes for the head and neck laid out, you can add other basic shapes to begin to turn your sketch into something that resembles a person.
- Start drawing a very light line down the center of the face. This is where you are going to draw the nose of your model.
- Take care to place this line in the right place based on the angle of the face.
- Next, draw a light line indicating where the eyes will be on your drawing. Look at your reference and see where they sit on your model's face, then draw the line there.
- Then draw a third line under the eyes indicating where the bottom of the nose will be, then a fourth one for the mouth. In each case, ensure that you measure your model and place the lines where their features are.
- The last part of your basic sketch is the ear. For most people, the top of the ear is right around the eyes in terms of location on the face, so sketch in an oval shape indicating where your ear will be placed.
- After you have your foundation in place, you can add some features and details.
- Start to sketch the basic shapes of the face and neck using the guidelines you have already laid out.
- Make sure to keep your sketch light; you are still mapping out features, so going too dark too soon would be a mistake.
- This is the planning stage, so plan things out and build a solid foundation for the rest of your drawing.
- Now that you have your basic sketch down add darker lines and finalize your features.
- Once they are done, it's time to add shading and highlights. Shading and highlights are extremely important when drawing the head and neck.
- If done correctly, they can give your drawing a three-dimensional look. If not done correctly, they will make your drawing look artificial.
- To draw shadows realistically, you need to understand where the light source in your drawing is and how that light source will affect the head and neck of your model.
- The nose is the highest point on the face, and light will cause shadows to be cast from it. For the sake of this example, let's say that the light source for your drawing is directly above your model.
What will the shadows look like?
First, the eyes of your model will be in a shadow. Light will be blocked by the forehead and brow, casting a shadow on the eyes.
There will also be a shadow under the nose since the nose will block light. The upper lip will be slightly darkened when the light source is directly Abell.
The last significant shadow will be on the neck, under the head, and in a shadow.
What about highlights?
In this example, the light would strike the bridge of the nose. As well as the forehead, cheeks, and chin. There will also be a highlight on the lower lip.
- When drawing shadows, make sure that you account for your light source.
- For example, if the light source is above and to the right. The shadows on the head and neck will be cast down to the left.
- Always pay attention to how light affects your subject's face and body. When done well, lighting can turn a flat image into a work of art that appears three-dimensional.
The next component for drawing the head and neck is adding hair.
Many artists struggle when drawing hair, so if you have trouble with this, don't let that bother you. Just keep practicing, and you will get better at it.
- When drawing hair, you can draw individual strands.
- You also want to avoid shading in the hair since that will look flat. What you need to do is find a happy medium here.
- First, remember that hair, like everything else, is affected by light and shadow.
- When drawing hair, including eyebrows or facial hair, ensure that your account for the light source.
- One of the more straightforward methods for drawing hair is to add a base color, then work from there.
- If you are drawing with graphite, blend in a gray layer of graphite. Then go through and add darker areas and use an eraser to remove areas for highlights.
- Then, after you establish e the highlights, mid-tones, and shadows, you can go in and start to render the hair.
- Add some indications of strands of hair, but don't go overboard.
- The eye of the viewer of your drawing will not pick up on all of the minute details anyway, so indicate that there is hair there, and that should be enough.
One of the most challenging aspects of drawing the head is drawing eyes that look real and life-like. Let's start with the basics here.
- Eyes are roughly almond-shaped and have an upper and lower lid.
- So sketch in the basic shape. Next, draw in the inner corner of the tear duct, then add the iris and pupil.
- Now the trick is to look at how light affects the eyes. Eyes will typically be in shadows, but they are highly reflective, so you also render those reflections.
- Like you do when drawing hair, you can draw only some details.
- Just indicating shadows and highlights is enough to get the viewer of your work to recognize that you have drawn an eye.
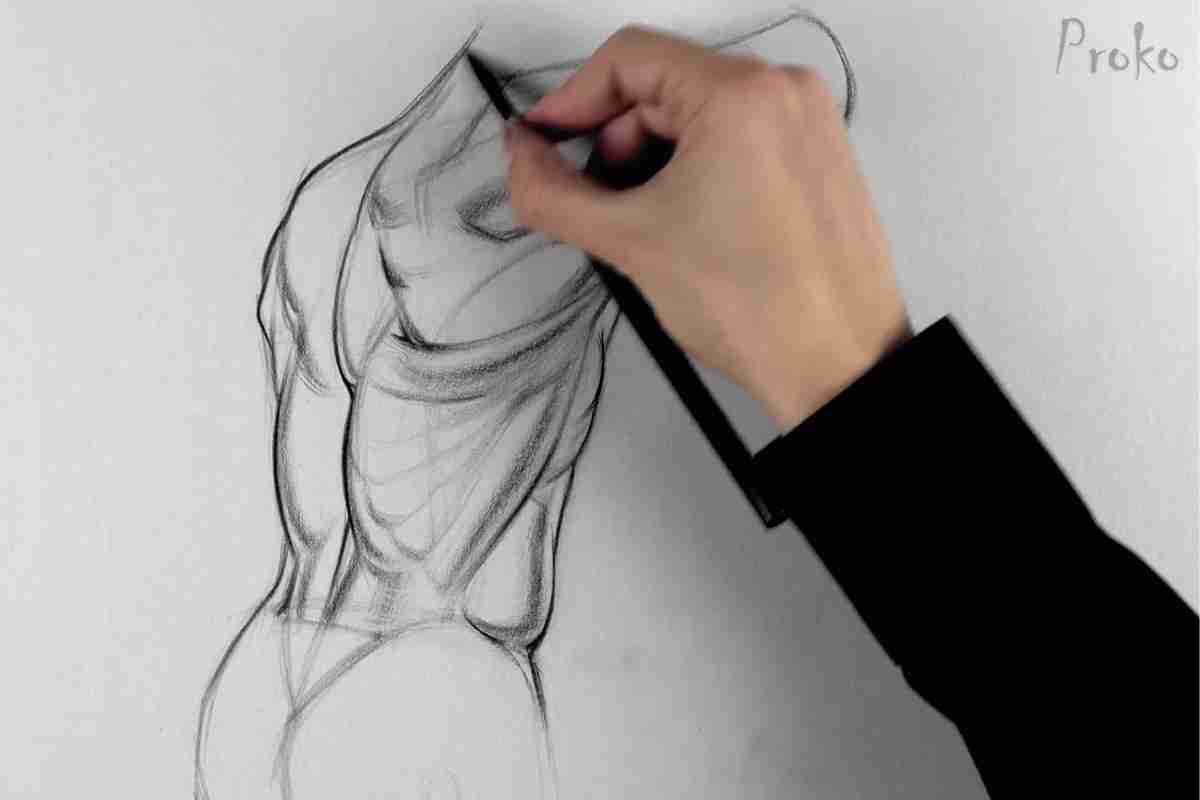
Drawing the Torso
When drawing the torso, it helps to think of the basic shapes involved. The human torso is roughly rectangularly shaped, with the top wider than most people's bottom level.
So, start by sketching in this basic shape. Having a solid knowledge of anatomy is essential here.
Understanding how bones and muscles move can mean the difference between drawing something that looks flat and drawing something that looks like a three-dimensional human body.
When drawing in the major muscle groups, you must leave them out. You should only outline your figures if you are drawing comic books.
Just sketch in shape, look at your light source, and allow light and shadow to indicate the placement of muscle and fat.
Drawing the Arm
- When drawing the arm, try to picture an elongated cylinder. Arms are generally round, with me sharp angles around the wrist and elbow.
- There are also a lot of muscles and veins to contend with when drawing an arm, so understanding anatomy is essential.
- The main muscles to be concerned with are the biceps, triceps, and shoulder. These are major muscle groups whose shape changes depending on the angle of the arm.
- When rendering an arm, ensure that your account for the light source and add appropriate shading and highlights.
Drawing The Legs
- Legs are similar in arms to their primary shape but are more substantial.
- The thigh also tends to be larger than the lower leg.
- When drawing, the muscles in the leg focus on drawing the general shape of the quadriceps, the calves, and the kneecap.
- Remember to look for how light creates shadows and highlights, as well.
Drawing and Sketching the Hands and Feet
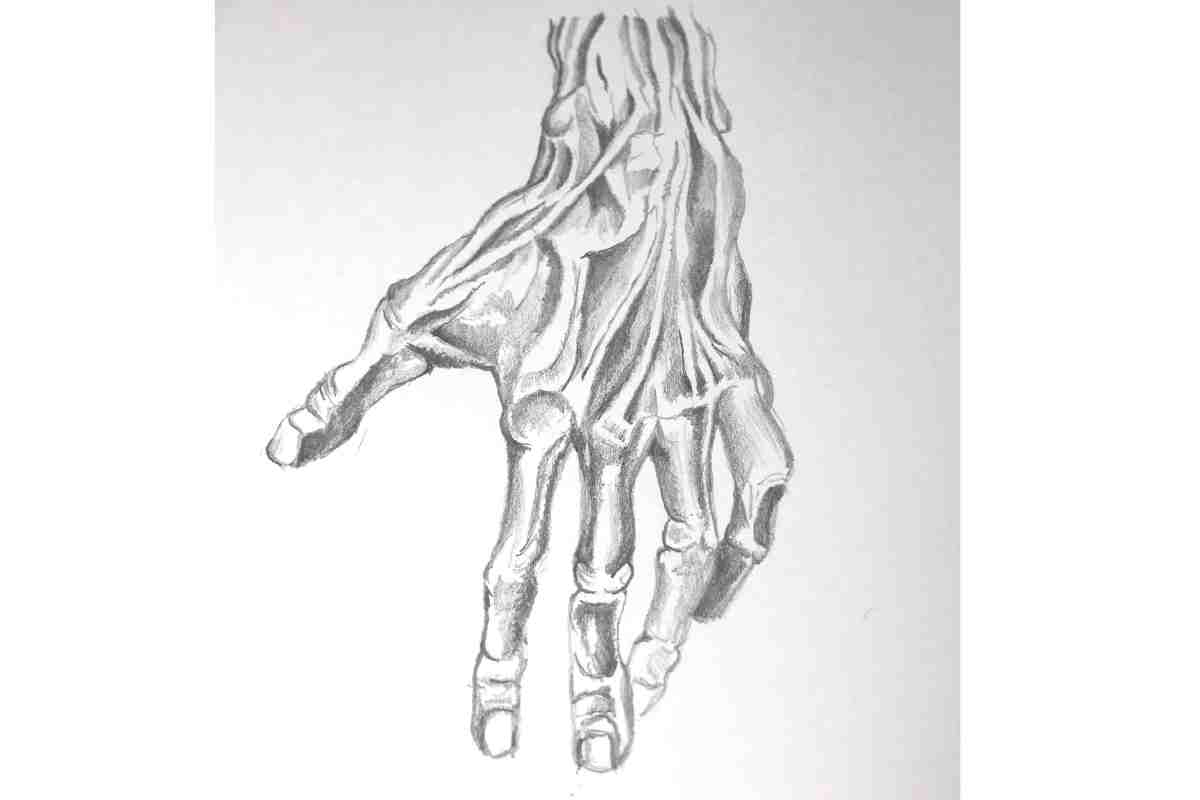
Drawings hands and feet is a challenge for many artists, even artists that have been training and practicing for years. Hands, in particular, are challenging to draw. There's the hand, four fingers with three joints each, and then a thumb with two joints.
That's a lot of moving parts. Remember veins, too. They are present in most hands and must be drawn in.
As with every other part of the human body, when drawing hands and feet, start by drawing their basic forms, then move forward with more details. Learn how to draw hands spread out by reading this blog post.
The best way to think of fingers and toes is to picture tubes that have joints.
These joints move to change the shape of the fingers and toes. But each segment of these tubes remains the shape size regardless of how the joint bends.
So, when drawing hands or feet. Focus on the position of each segment of the finger or toe. Concerning the angle at which you are viewing your subject.
Just draw each segment, focus on each section simultaneously, and then make sure they line up. While this approach to drawing fingers and toes simplifies things, it will still take a lot of practice before you can master drawing them well.
Learning to Draw the Human Anatomy
To learn how to practice drawing anatomy, you must learn how to draw the human skeleton. Why?
Because the skeleton is the framework on which the rest of the human body is built. You need to understand how the joints connect and move so you can realistically depict human figures in your artwork.
You don't need to focus on creating detailed shadows and highlights when drawing the skeleton. Unless, of course, you are planning to draw a skeleton as a finished piece of art.
Instead, focus on getting the simple shapes down. Does this mean you can ignore shadows and highlights? You could, but anytime you can practice accounting for a light source when drawing, you should take it.
When drawing a skeleton, you could draw it in ink. If you are drawing to study anatomy and not to create finished artwork, drawing with a pen can be a lot of fun. Ink lets you get shapes down quickly and facilitates quick sketching.
No matter what medium you choose to draw your skeleton in, make sure that you pay attention to the size and shape of the bones and how they all connect.
How to Draw the Ecorche
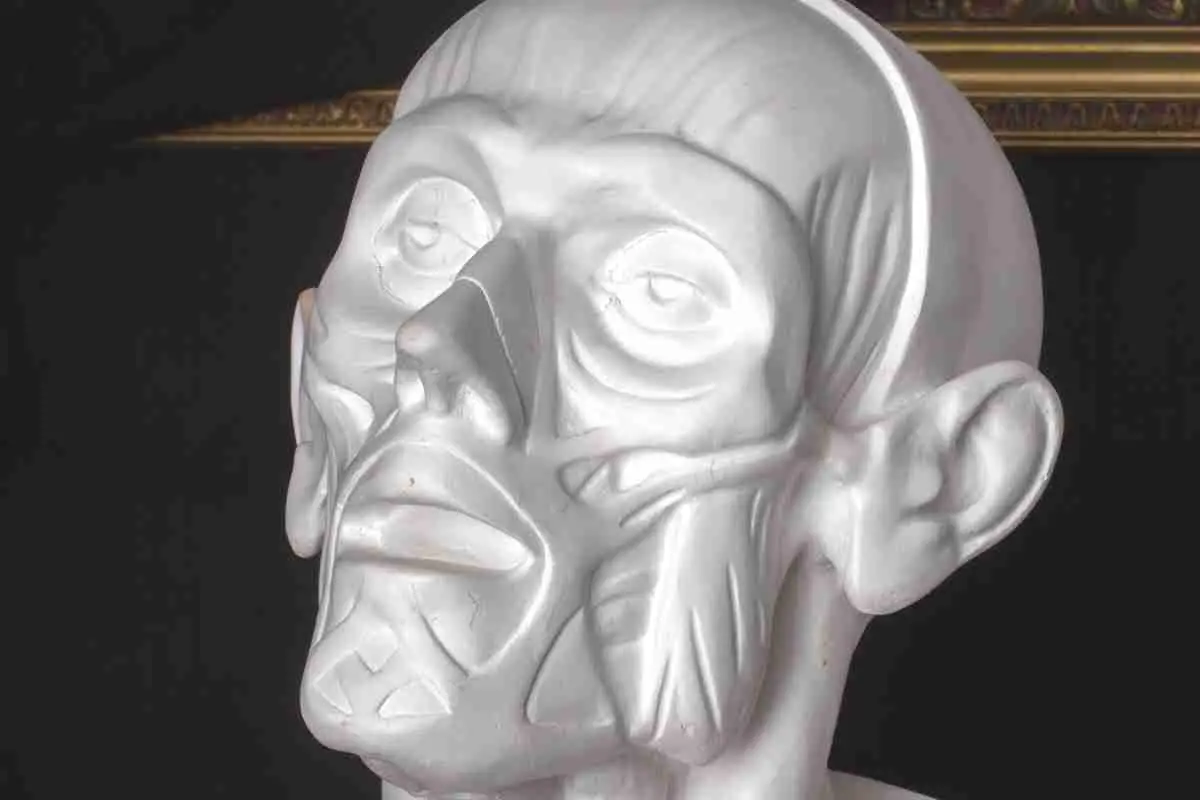
Have you ever wondered how to draw the Ecorche? Have you ever wondered what an Ecorche even is? Ecorche describes an anatomical depiction of a body minus the skin.
Before you allow yourself to feel disgusted, keep in mind that artists have drawn the Ecorche for centuries.
Why is Drawing the Ecorche so Important?
Because it helps you to get familiar with anatomy. The best thing you can do as a figure artist is to draw the Ecorche in as many different positions as possible.
You don't just want to draw it standing there; you want to draw it in motion. This will help you see how the muscles move, which is essential when depicting a realistic-looking person.
Drawing the Facial Expressions
Facial expressions are a challenge even for seasoned artists. Why is that? Because facial expressions are so intricate.
Facial expression depicts emotions, so getting them right is essential if you are trying to create a certain mood in a drawing.
For example, if you are drawing a somber scene, the last thing you want is to draw a face on your figure that appears joyful.
How do you get better at drawing facial expressions? By practicing. Before drawing facial expressions, ensure you can draw facial features proportionately to each other.
There's no sense in trying to run here before you can walk. Practice drawing different faces over and over again. Then do anatomical studies, and do a lot of them.
Then, look at photos of people making different faces. Or, better yet, look at a live model making different faces. Then you will have a decent foundation to build on, giving you the insight you need to create realistic expressions.
You should also spend time people-watching. Watching how people act daily helps you understand how facial expressions convey emotions.
Anatomy Drawing Tips: Draw From A Real Physical Model Or Body
Have you ever seen an artist's mannequin? Of course, you have. If you are an artist, you have undoubtedly seen an artist's mannequin.
They are fantastic tools for giving an artist a visual reference to see how limbs look at different angles and also how light interacts with those limbs at different angles.
But is an artist mannequin a substitute for a live model or even a photograph? No. Not at all. A mannequin is a piece of wood with joints so you can pose them in different positions.
A live model, or a photo, is a real human figure that you can look at for reference. There really is no comparison.
Why would you use an artist mannequin?
If you lack access to a model or a photo for reference, an artist mannequin can be used as a stand-in. It won't be as good as a model or photo, but it beats having nothing.
Another possible use would be for shadow reference for a figure you have a photo of. Let's say you have a picture of a model in a pose that is perfect for the drawing you are doing. But the light source needs to be corrected? What do you do? You get your trusted artist mannequin and use it to visualize where the shadows should be. This saves you the effort of mentally picturing where shadows should be, giving you a visual reference that can help you create a more realistic drawing.
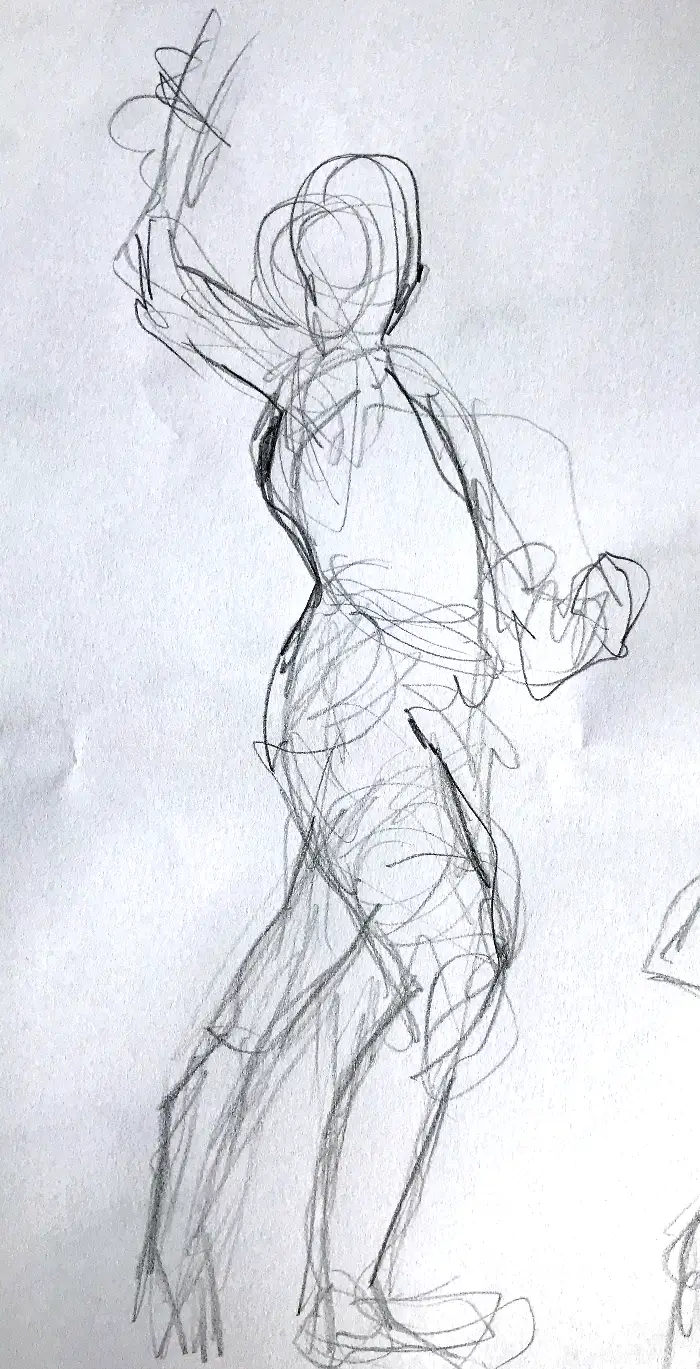
Gesture Drawing ‘Drawing Figures On The Hoof'
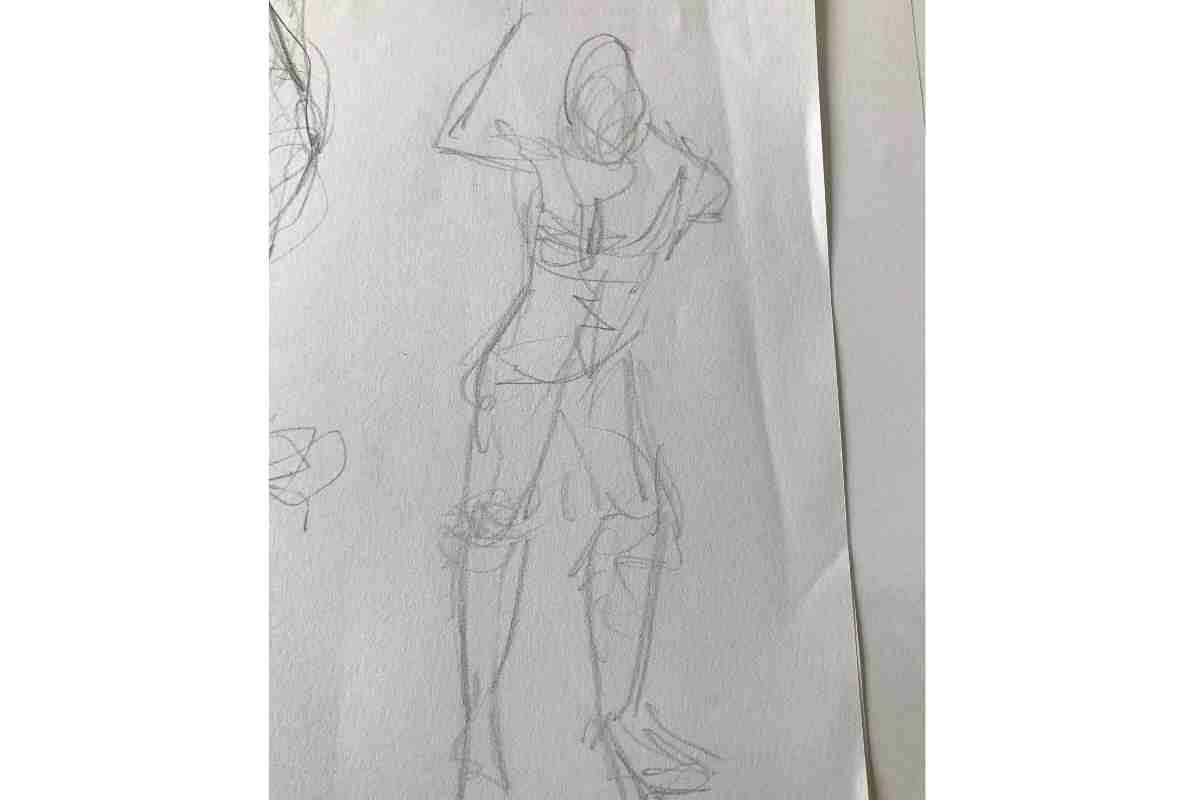
The human body is constantly in motion. Even sitting in an idle position, our chest moves with each breath, our eyes blink, our stomach moves in and out, etc.
To learn how to Draw a Pose Reference read this blog post.
The point here is that since the human body is always in motion, even when it appears to be in a state of rest, you need to learn how to draw figures that convey a sense of movement. How do you do that?
You do it by drawing figures on the hoof. What does that mean? Gesture Drawing It merely means that you are drawing quickly and instinctively.
You are okay with getting everything perfect. You are just trying to get your ideas down on paper as quickly as possible.
When drawing like this, don't draw with your wrist. I'll repeat that, don't draw with your wrist. Draw with your entire arm. Make big strokes, and don't worry about the details!
Drawing figures on the hoof will allow you to draw a figure quickly. That means you can draw another one more quickly than another. When you master the skill of drawing the hoof, you'll be able to draw dozens of figures an hour.
Why is that important? Because it lets you get in much-needed practice. How do you get better at drawing the human form? By drawing it as much as possible.
When drawing the hoof, you can do this as practice or as a precursor to a finished drawing. If you are doing this as a precursor to a final drawing, ensure that you keep your sketch quick and light.
When you draw in this manner, your final artwork will often have more life and convey a greater sense of motion.
So, how should drawing on the hoof be used to create a finished drawing?
First, either choose a photo for reference or find your model. Next, start a light sketch of your figure using quick strokes. No details are necessary at this point. Sketch your figure quickly, paying attention to the pose and posture.
Then, after you have this quick sketch done, go ahead and finish the drawing however you usually would.
The Efficiency of Line: Drawing Figures With A Few Simple Lines and Basic Shapes
Are incredibly intricate human form drawings with tight details and correctly rendered shadows and highlights amazing?
Absolutely. Is this the only way to draw a human figure? No. However, if you choose to develop your style, consider the possibility of drawing simpler figures using fewer lines.
Many artists have mastered the ability to not only draw with minimal lines but to do so while still capturing the essence of their subject.
When you draw in this manner, you have to use great care. With a more sophisticated line drawing, a few things may be noticed. With a simpler line drawing, any mistakes you make will be magnified. You can draw figures using fewer lines and a simpler approach as a sketch or as a finished piece.
Drawing The Human Form Is Very Challenging And Rewarding
For many artists, the ultimate achievement is drawing a human form realistically. Many of us first discovered our love for art by looking at paintings by old masters.
How did they do that? How did they create something so amazing and so life-like? It was this sense of wonder that drove many of us to explore our own artistic talents.
The human form is complex but can be mastered if willing to work. There needs to be a quick solution here. You either put in the time or fail. Try to break down the human form into simpler shapes to build the foundation of your artwork.
Use light, gestural drawings to help establish the composition and convey a sense of movement. Always pay attention to the light source and how it casts shadows and creates highlights.
You also need to develop a style of your own. You could draw in a highly rendered manner, with a simple line approach, or some mix of the two. Above all else, have fun, don't get discouraged, and keep working on mastering drawing the human form.
It takes time to master the human form, so be patient with yourself as you progress along your artistic journey.
Create Art With My Favourite Drawing Resources
General Drawing Courses. I like Udemy if you want to develop your knowledge of drawing techniques. Udemy is an excellent choice due to its wide range of creative courses and excellent refund policy. They often have monthly discounts for new customers, which you can check here. Use my link.
Sketching and Collage. Take a look at this sketching resource I have created. Use this link.
Proko. Is one of my favorite teachers who surpasses in the teaching of Anatomy and Figure drawing. Prokos course breaks down the drawing of the human body into easy-to-follow components aiding the beginner to make rapid progress. For this, I really like Proko.
Art Easels. One of my favorite ways to draw is by using a drawing easel, which develops the skill of drawing on a vertical surface. The H frame easel is an excellent vertical way to add variety to the style and type of marks you create when using a drawing board.
To see all of my most up-to-date recommendations, check out this resource I made for you.
