How To Create Movement In A Drawing
Figuring out how to create movement in a drawing is one of the biggest challenges that artists at all experience levels will face. The very idea that you can create motion drawings while drawing or painting a static image might seem strange, but it's something that artists have figured out how to do.
Since other artists have had success with motion drawings, there's no reason you can't have success. Creating motion in a drawing is a lot like creating depth in that you aren't creating actual motion; instead, you are creating the illusion of motion.
When creating depth, you use highlights and shadows, but what do you use when creating motion?
To create the illusion of motion in a drawing or painting, there are many different techniques that you can employ. The first step that you can take is to create a dynamic composition.
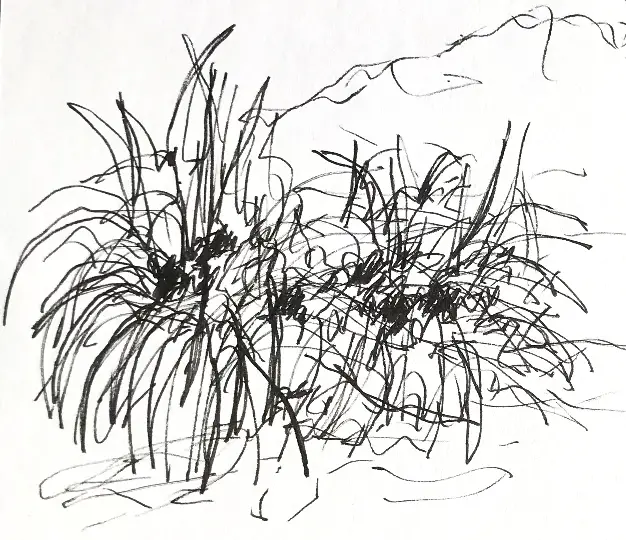
Using triangular patterns in your drawing will help draw the viewer's eye to different areas in the image, helping to create a sense of motion. You can also use line variation and color.
One of the most critical steps that you can take is to create your initial sketch quickly and instinctively, trusting your training and experience to guide you.
By moving quickly, you can create a more spontaneous sketch, which will help the final drawing have more motion and life.
What Is Movement In Drawing?
A drawing is a static image, so how can it possibly have movement? Technically, it can't. But what it can have is the illusion of motion. If a drawing appears flat, lifeless, and lacks a sense of motion, it will often end up looking dull.
When a drawing is dull, people won't pay attention to it, which means you won't attract much of an audience for your work. This is why movement is so important. Movement in drawing describes the illusion that something is moving, has energy, and is pleasing for viewers to look at.
How Do You Indicate Movement In A Drawing?
Indicating movement in a drawing is all about using varying lines, composition, color, and value to present to the viewer of your work that there is actual motion when there is not.
It's something that takes a good deal of time and practice to master, so if you're struggling with it, don't be too hard on yourself. Always remember the best way to improve as an artist is to practice. Since you enjoy creating art, practicing is a good thing!
Can it be frustrating? Sure, but that's true with everything in life. Start combining different techniques together to see what works. Doing this may help you to develop a distinct style all your own.
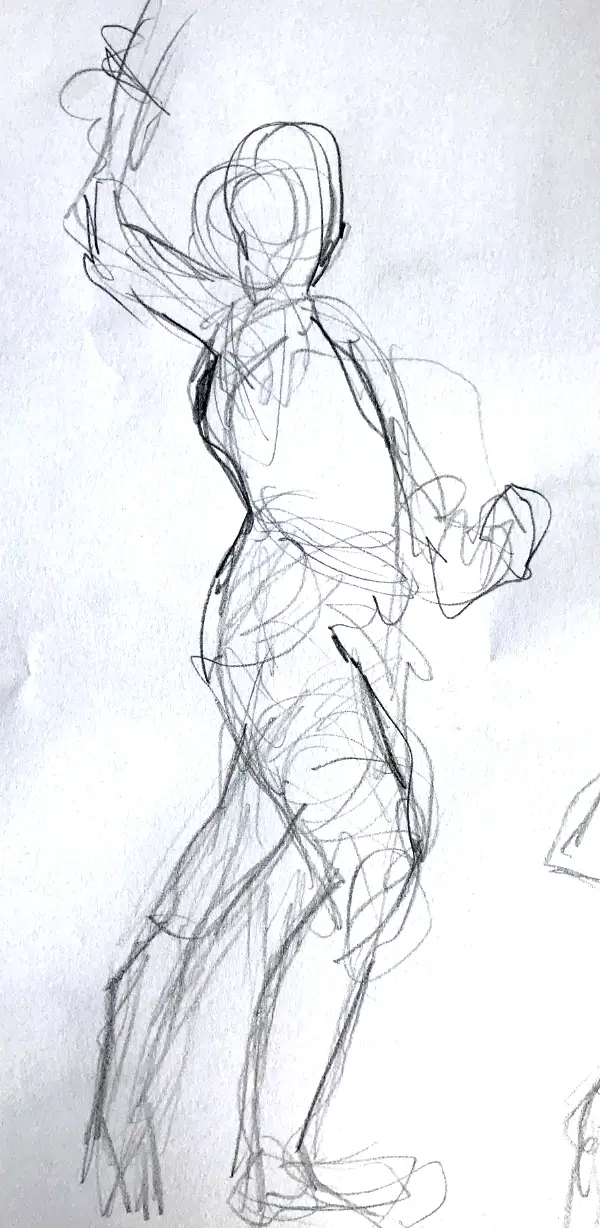
Drawing Lines Of Action
What are lines of action? In simplest terms, they are curved lines. Not just any curved lines. However, they are curved lines that you use in your drawings to convey the appearance of movement.
You can draw curved lines all over your drawing, but if they don't work together to create the illusion of motion, then they are only curved lines.
On the other hand, if you use them to show motion in a figure or an object, they become lines of action. If you're feeling confused, don't worry, this isn't the most straightforward concept to understand, but that just means you'll have to work a little harder to wrap your head around how all of this works.
Drawing lines of action is one of the most critical aspects of creating motion drawings, so it's something that you'll have to master.
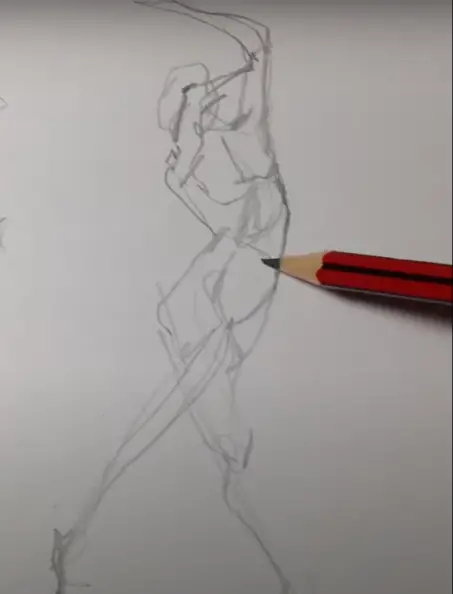
The best way to illustrate how drawing lines of action works is to use an example, in this case, a figure. When a person is in motion, the general direction of their body points typically in one way, and their limbs usually work in a coordinated fashion to help them complete whatever motion they are attempting.
When you look at a figure in motion, one line of action starts at the head and ends at the midsection. Other lines of action start at the should and end at hand, start at the hip, and end at the foot. Each of these lines of action indicates motion.
When these lines of action are straight, and you're trying to depict a human being in motion, your drawing will look stiff and unnatural.
On the other hand, if your lines of action are curved and work together to show the correct motion, your drawing will look lively and exciting.
Related Posts:
- Drawing Dynamic Figures: A Detailed Guide
- How to Practice Drawing Anatomy
- How to Draw People
- Human Figure Drawing Made Easy
- How to Draw a Pose Reference
Contrast Straights And Curves
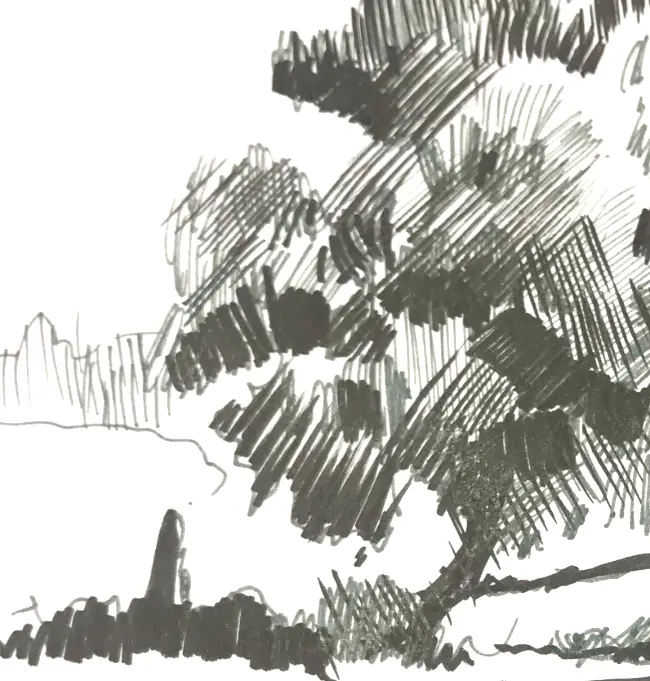
While drawing curved lines is essential to show motion in a drawing, if all of the lines in a drawing are curved, they can have the unintended effect of making the drawing look crowded and messy. How can you prevent this from happening? That's simple.
You need to use a combination of straight lines and curved lines. Using too many lines leads to a static image. Too many curved ones lead to a messy image. The solution is to find a balance between the two.
The key to making this work is to use straight lines in parts of the drawing where you don't necessarily want a sense of motion. For example, backgrounds or parts of your composition that are stationary should use more straight lines.
When you get to figures and other objects in motion, utilize more curved lines to give the viewer a sense of motion.
The contrast between the straight and curved lines will add a dynamic element to your work, making it visually exciting to view.
Use Markers Or Paint To Draw Confident Lines
One great way to ensure that your drawings have a sense of motion is to work quickly and not worry about making mistakes. Developing the ability to sketch quickly is a great starting point, and just getting to that point takes time.
But, what helps many artists is knowing that the sketch will eventually be covered up by something else, be it charcoal, graphite, paint, or whatever medium you choose to work in.
The finished drawing should maintain some energy as long as the underlying sketch is done quickly, using big motions and loose forms.
But what if you didn't do an initial sketch that you planned to cover-up? What if the bold, confident lines you draw or paint quickly become a part of the finished piece that everyone will see?
Developing the confidence to work this way will take quite a bit more effort, but once you get there, your work will have more energy and life than you could have imagined.
Can you go back and cover up markers or paint lines? You can, but it's significantly more difficult than trying to draw over a line sketched in charcoal or graphite. Just as importantly, you shouldn't try to go back and cover them up. You want those bold, confident lines in your drawing or painting. Is it always going to work?
No. Will you fail a lot when you first start working this way? Probably. But, in the end, will it be worth it? Absolutely.
Sketching On Location And Make Speed Drawings
You may have picked up by now that one of the keys to having motion in a drawing is to work quickly. When you are slow and methodical, your work will end up looking flat and stiff.
So finding ways to push yourself out of your comfort zone to work more quickly should be a focal point for you. One way to do that is to work on location.
What happens when you work in your studio? You have control over the setup of your subject. You can control the lighting.
You even control time since you can spend as long working on a drawing as you want to since you don't have to worry about conditions changing. But, when you work on the location, you lose that control.
The light will only stay a certain way for so long. You can only stay at that location for so long before you have to call it a day. There may be other obstacles, such as people, cars, the weather, and anything else that you can think of that could be a problem for you while you work.
What do all of these things have in common? They push you out of your comfort zone and force you to work quickly.
Another approach you should try is to try doing speed drawings. This can be harder to do since, once again, you're going to be in a controlled environment. So, you'll need to create a means to force yourself to move quickly.
What about setting up a 5-minute timer? Or an hour timer? Or whatever length of time you think you'll need for your subject. But, don't give yourself too much time.
Think about how long a detailed sketch should take you, then cut that by 10% and get to work.
This will force you to move with a purpose, make quick decisions, and, most importantly, work instinctively and move quickly.
Drawing The Human Figure
Drawing the figure is something that many artists aspire to do, and it can be both challenging and rewarding. For the context we're discussing here, let's stick to drawing the figure in motion. It's essential to use various techniques like any other subject you are drawing where you want to convey motion.
The most important are action lines and a variation between curved and straight lines. It's also vital that you move quickly. You have to sketch loosely, quickly, and with urgency.
If you are slow and methodical, your work will suffer.
Even if you plan to cover up the initial sketch, a loose sketch full of energy and motion is an ideal foundation to build the rest of a drawing or painting.
Learn How To Draw Figures
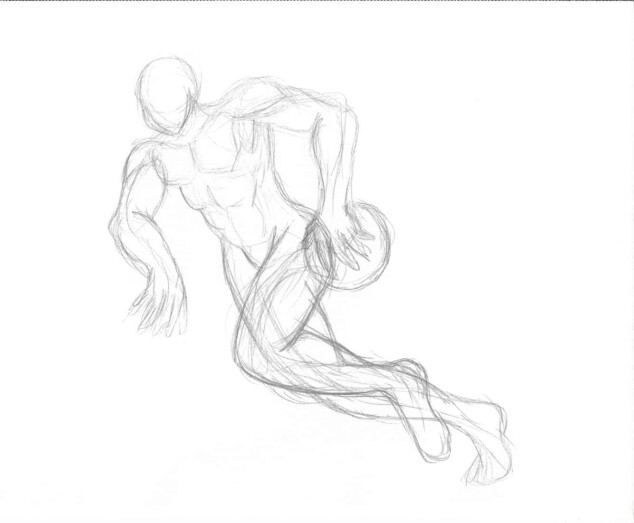
If you want to learn how to draw figures, start by understanding that figures, like everything else, are built from simple shapes. Consider following drawing lesson online as will help you develop these skills when studying the subject of human anatomy.
A head is a sphere, the nose, a half triangle sitting on that sphere. A torso is a cube, arms and legs are tubes, etc.
When you build a figure using simple shapes, it breaks the process down, it makes it something you can more easily grasp, and it gives you a better level of confidence when sketching out a figure.
Now that you have the basic idea of using shapes when you look at a figure and start sketching how those shapes connect.
Look for ways to make limbs and the torso follow curved action lines. This more simplified approach has helped many artists who have struggled with drawing figures to develop a higher comfort level when drawing them.
These principles can be studied and developed by taking life drawing lesson either online or locally.
How Do You Draw A Body Movement?
How do you draw a body that is in motion? You do it by understanding anatomy. You need to understand how the human body is put together. Plus, how each part works together with the rest to propel a body in motion.
Unless someone is falling uncontrollably, every part of their body works together each time they move. For example, if someone is reaching up, their arm moves, but so does their shoulder, their neck rotates, the angle of their head changes as they look where they are reaching, their torso twists, and their hips and legs do as well.
All of these body parts move for something as simple as reaching over their head. When drawing the human figure, you must always keep anatomy and movement in mind.
If you draw a figure with poor anatomy, your drawing will never look right to anyone that views it.
What Drawing Captures Movement?
What kind of drawings captures movement? Specifically, that's called gesture drawing. On a more general level, a drawing that captures movement can be anything you draw when you use the proper techniques to convey a sense of motion.
As long as you use color, lines of action, value, and contrasting straight and curved lines, anything you draw should capture motion and look visually stimulating to the viewer.
Gesture Drawing
What is gesture drawing? A gesture drawing is a drawing that is done quickly, lacks detail, and instead focuses on overall composition and movement. It's not a drawing as much as a sketch. How long should a drawing take to complete?
Anywhere from a few seconds to a half-hour is a good rule of thumb. One of the main benefits of motion drawing is that it lets you work quickly, giving you a lot of practice.
Another benefit is that you can keep your gesture drawings, and one of them may serve as inspiration for a more finished, polished piece in the future.
When completing gesture drawings, don't worry about details. Work quickly and try to capture the motion and essence of what you are drawing.
a good way to develop and practice this skill is to following a drawing lesson online or taking a local class.
Drawing Shapes
Is drawing shapes exciting? Not particularly for most artists. But, it's a necessary evil. Everything that you see around you can be broken down into simpler shapes.
These simpler shapes are easier to understand.
If you can learn how to render shadows on a sphere, then you're on your way to understanding how shadows work on something more complex, like a human head.
You may not like sketching shapes, but practicing drawing them quickly and trying to find ways to use lines of action to give them a sense of motion will benefit your work in the long run.
Create Art With My Favourite Drawing Resources
General Drawing Courses. I like Udemy if you want to develop your knowledge of drawing techniques. Udemy is an excellent choice due to its wide range of creative courses and excellent refund policy. They often have monthly discounts for new customers, which you can check here. Use my link.
Sketching and Collage. Take a look at this sketching resource I have created. Use this link.
Proko. Is one of my favorite teachers who surpasses in the teaching of Anatomy and Figure drawing. Prokos course breaks down the drawing of the human body into easy-to-follow components aiding the beginner to make rapid progress. For this, I really like Proko.
Art Easels. One of my favorite ways to draw is by using a drawing easel, which develops the skill of drawing on a vertical surface. The H frame easel is an excellent vertical way to add variety to the style and type of marks you create when using a drawing board.
To see all of my most up-to-date recommendations, check out this resource I made for you.