The wonders of the human form are one of the most impressive and complicated organic creations we've ever known. Because the human figure is so celebrated, the continual practice of drawing anatomy parts is one drawing skill you might enjoy drawing as well.
What is Figure Drawing?
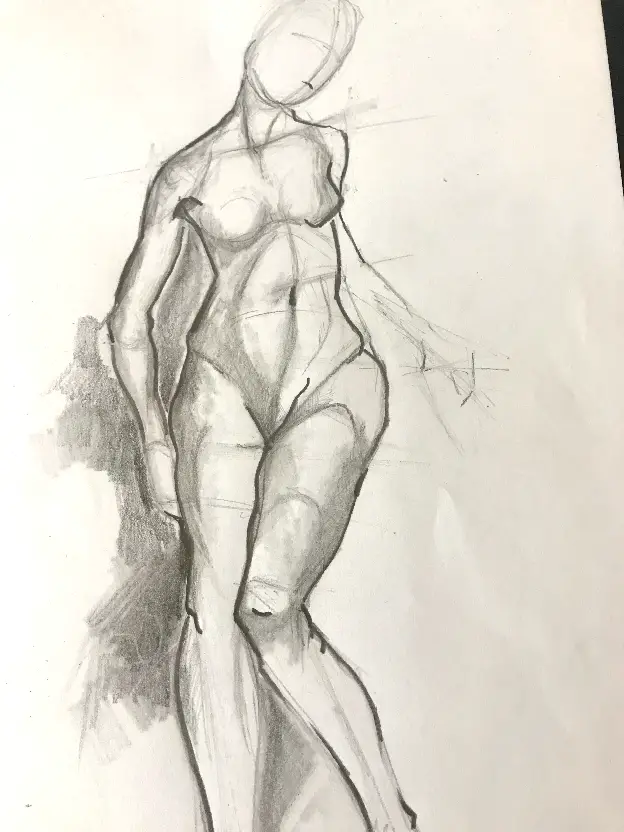
In a nutshell, figure drawing is the practice of sketching and drawing a live model. In any sense of the notion, most figures are nude to see the model without being hindered by clothing or hidden detail of their body.
It might seem uncomfortable at first, but the whole point of figure drawing is to practice getting anatomy right. And believe me when I say it's an intimate affair at first, but you get used to this quickly like everything else.
Just like doctors, they're trained to see the human body inside and out. Getting used to seeing parts of the human body that most people feel are intimate or private is part of the training you need for figure drawing. It also allows you to see a wide range of body types that I'll say give you a glimpse of the good, bad, and sometimes ugly. It's also a practice that's been around for a lot longer than you can imagine -which is why it's so enduring.
There is also a time limit for standard figure drawing, so you can practice getting different poses in a whole set of drawings. Each of these sessions gives you enough time to concentrate on form, shape, highlights and shadow, and the angle of your model where they stand. It's a practice that gives you a better understanding of the human body while improving your anatomy skills.
You May Also Enjoy:
- An Introduction to Classical Drawing
- How To Practice Drawing Anatomy: The Essential Guide
- How to Draw People: A Detailed Guide
- How to Draw Portraits in Black and White
- What Makes a Good Self-Portrait Drawing?
How to Learn to Draw Figures
There's only one way to draw the human figure quickly, and that's having the opportunity to be there with a live model. While you won't find too many friends that are willing to do the Full Monte, most art schools that center on figure drawing are best. This way, you get a full spectrum of models that you can practice drawing. There are also online art communities that you can join that may offer figure drawing for a small fee.
This usually covers the cost of the model for their time, while art schools work this into their budget from the artists who join a live model study class. Smaller groups of artists will chip in to make smaller groups that have decided on specific models based on a drawing theme.
These can be themed even further to provide poses that a model specializes in practicing. This gives smaller groups of artists more focus on what they want to improve upon.
Everything from classic poses to erotica, sporting stances, natural settings, and even sitting or standing poses are discussed beforehand. Careful lighting is essential to keep these sessions from changing under natural conditions such as sunlight changing shadow positions. This also gives your model some sense of privacy, so people outside a window don't get an unexpected eyeful.
Drawing the Human Form
Let me bring up a topic that most artists always forget when it comes to figuring drawing. This all comes down to anatomy and knowing what's underneath the skin. It's also essential that you understand muscle mass and how muscles create the overall figure we see. It also has a lot to do with the human skeleton and how slight changes between males and females affect your drawing skills.
I recommend that if you only take a course in figure drawing, you're missing the detailed info on why the human body looks the way it does. Essential questions your teacher might ask, such as pointing out specific muscles or bones, might throw you for a loop. So learning these names of muscles and bones will get you closer to being more professional in your detailed drawings of any figure.
Sure, some artists have never studied medical anatomy, just like great musicians who can't read sheet music. It doesn't make you any better not knowing or having a severe lack of knowledge, but it just adds to your skills and gives you the clarification that can come in handy at some point. Take a course in learning about the human skeleton and know how to draw it well. The same will be easier once you know where muscles go after that fact.
.
Human Figures and Their Proportions Made Easy
Some rules are classically trained for artists about the proportions of the human body. Think of these a bit like a recipe for cooking food, the ingredients may change, but the steps are always unchanged. Once you follow these critical steps that help you to construct a natural body form, you'll always know you've hit the mark for getting proportions correctly.
Face and Head
The differences you'll find drawing any face will change between children and adults because the ratios are different. But if you're looking to create a likeness, you need to learn a conversion method to get these details just right. Realistic portraits and drawings need to have more than just a likeness if you want to capture the face of someone famous or simply familiar.
A typical formula to draw a face or head comes from creating a simple principle breaking the shape of the head down into convenient sections. A head seen from the front can be divided into three sections. From the top of the skull to the bottom of the jawline. Each section is equally 1/3 of the next. The width of the head is always two-thirds creating only two sections divided right down the middle.
Anything viewed from the side is slightly different since this is divided into 8 equal sections from the top to the bottom of your head. The lines that are traced vertically will take up seven-eighths. These markers will indicate where facial objects are accurately located, but only to get the correct proportions. The next step is using your skills as an artist to draw in the likeness of your subject.
There are also variations of the graph method that can alternatively divide this imaginary rectangular graph into one-quarter sections that let you know where the eyes, nose, and mouth are placed. Using triangulations in this graph lets you place your nose and the width of the mouth a little better. To get a better idea, this face and head proportion tutorial is a great start.
Drawing the Arms and Hands
If you already might have guessed, yes- the arms and hands also follow a chart for getting the right proportion. Though this method is similar, these are broken down into 1/3rd. Each section of the hand, for example, is one-third. The outreaching tip of fingers to their root is one-third, while the palm represents another third. Compared to the rest of the arm, the hand's length is further divided according to the golden ratio.
This means that the entire hand length starting at the index finger that reaches the wrist represents one section. This measurement is replicated three more times until you reach the shoulder. The second section is divided into half, which then creates the elbow. There are also special rules about how long each finger should be relative to where they're placed on the palm.
Typically, the middle finger is the longest of these fingers, and the shortest is the thumb. Each finger aside from that has additional percentages that are between 20-25% longer according to the length of your thumb. Once again, a great reference to look at these ratios can be found here .
How to Draw Human Back & Shoulders
Because the human spine continually adjusts and allows your model to create an infinite number of posed positions, the back and shoulders will continually change. For this reason, they've always seemed trickier to draw since there is so much going on back there. One thing is evident when drawing shoulders, which is the ratio differing from males to females.
Women have a gentle slope with shoulders that are not as wide as men. While the men are naturally more pronounced and contain more muscle mass. But the simple fact of the matter is starting to draw your spine line. This naturally won't appear straight due to the angle of your model, so this helps determine how you draw each back and shoulders accordingly. You also need to consider where the ribcage is positioned likewise.
Another element, such as the Sacrum, which is the base of the spine, also helps in hip placement. Drawing the shoulder blades allows you to show how the arms are moving and their placement additionally. It takes careful attention to these details, which help define how the shoulders and back work together. This tutorial guide shows helpful information on how the back works in better detail.
How to Draw Human Chests/Upper Body/Torso
Once again, we need to address the importance of knowing about the human skeleton and creating a final built-up form. The chest is more straightforward to draw than the back since many indicators are based on the shoulders and rib cage. The rest is all based on the sex of your model to keep these proportions correct. But more importantly, the building of muscles tells you more about the characteristics of your model too.
Depending on your model's pose, different muscles will contract and expand to hold up a skeleton. This will tell you right away if you're following the anatomy correctly and help translate this to your drawing right away. Since the chest has so many different muscles, it will show how the outer skin is wrinkling or bulging according to what is underneath the skin.
Too many times, many artists will cheat these anatomy rules and create their own altered reality that looks cartoonish or overdone. You can't fake drawing a chest and upper body if you don't have the basics of human anatomy understood. Take a look at this guide that shows more info about creating a torso based on muscle structure.
How to Draw Human Legs & Feet
Drawing legs is only a matter of using a simple formula based on the size of your model's head. With this being said, the legs only need to be 4 heads stacked on top of each other. Creating the proper scale for your drawing. This measurement begins precisely at the hip bone down to the bottom of the feet. This is also called the femur (or the upper leg bone) and is part of the pelvic wedge.
Since this wedge is the basis of how your model is standing. All of the weight distributed throughout the body comes from the stature of the legs and feet. When drawing the torso, the pelvic wedge will undoubtedly help set up this to create a natural-looking balance of your figure. Legs are pretty detailed since the muscles used continually help keep us balanced, so you'll need to pay close attention to how they are placed to create your muscle map.
Another thing to think about with legs and feet is how they relate to each other. Both men and women have considerable differences in foot size, but generally, women's feet are much smaller by comparison. You can see what I'm talking about from this leg tutorial that gives you better info.
How to Draw Human Neck
The neck is perhaps the easiest of all the parts of the human body, depending on the age of your model. As you know, this part of the anatomy will age significantly and begin to droop just like a turkey neck over time. The aging of the spine also plays a significant role in what is happening here since the spine will shrink and become bent due to bad habits like slouching. Yet, the neck bones play a large part in how the head is positioned.
There isn't much of a ratio for the human neck apart from the length that varies between races. Women can have long skinny necks, while some men can have short and thick necks. It all depends on your model. You will have better luck drawing the neck by learning about the neck bones and the muscles covering them. This will give the definition that makes this part of the body appear natural instead of eyeballing the shape.
The neck will also appear different due to muscle mass, age, and which sex you're drawing. So try to keep these bits in mind when drawing a model based on their age. Even the slightest of positioning for a neck also affects how the head sits at the top. Some placements may appear unnatural if the anatomy is off. Here's one site that goes into extreme detail about how the neck is working.
How to Draw Female Figures
Since the oldest accounts of art history, drawing the female figure has been as popular as you can imagine. There is something magical about the female form that is amazing and spectacular. Perhaps it's how women have been placed at the top of admiration due to their beauty and grace.
Drawing a female figure can also be tricky since the skeletal structure is quite different than men.
The female skeleton goes through many changes in pelvic angles and will be obviously wider as women mature. You should also know that the center of gravity for women is at the hip bone because they're built for bearing children. This is why women have better abilities for balance than men do. The center of gravity is not as well defined for most men, so women excel better at gymnastics and tumbling.
If you're going to take up drawing women as a study figure, you'll need to know all about their skeletal structure first. This is a topic that most college and university campuses usually discourage. But to get a better idea of what the female figure can do, you'll also need to know about muscles and where body fat is distributed.
Drawing Male Figures
Male figures are still as popular as females due to the masculine qualities often shown in drawing of men. Since the early Greek era, the male form was the embodiment of beauty and obviously is shows. We view the male form as a strong force in this universe with endless muscle power. This is also an excellent opportunity to see how the male figure can be shown with the definition of these muscles accordingly.
As opposed to female figures, you also should take more care to create the muscle map that helps define what makes a male figure appear manly. The well-kept and chiseled look that many bodybuilders work to achieve frequently reminds us that the human body is quite a machine. But don't discount either that there are many types of male bodies that are less likely to be on your top list to draw.
Practicing drawing all types of male bodies will be harsh work but keep in mind that not everybody will show their best side. Try to make the most of what you can highlight and bring out as reality in your drawing. How to Draw the Male Body.
How to Draw Figures in Landscapes
If you've already been practicing your drawing skills with landscapes, putting a human figure into them is easier than you think. It's all a matter of combining both of these images in the same drawing and scaled accordingly, so they fit just right. The obvious thing that you'll need to do when putting a figure into a landscape is allowing you to block out a figure that you've already drawn onto a landscape surface.
Keep this area where your figure needs to go untouched to add detail to your landscape first. After this is completed, you can now go and put in details of your human figure. You don't want to start and finish your figure first just because you need to add background detail that follows perspective and other lines that may go over your figure. Just like you would treat this as a cut and paste job in photoshop.
It's better to make your landscape first so you can adjust your human figure to meet the perspective and angle more appropriately. Not the other way around.
Create Art With My Favourite Drawing Resources
General Drawing Courses. I like Udemy if you want to develop your knowledge of drawing techniques. Udemy is an excellent choice due to its wide range of creative courses and excellent refund policy. They often have monthly discounts for new customers, which you can check here. Use my link.
Sketching and Collage. Take a look at this sketching resource I have created. Use this link.
Proko. Is one of my favorite teachers who surpasses in the teaching of Anatomy and Figure drawing. Prokos course breaks down the drawing of the human body into easy-to-follow components aiding the beginner to make rapid progress. For this, I really like Proko.
Art Easels. One of my favorite ways to draw is by using a drawing easel, which develops the skill of drawing on a vertical surface. The H frame easel is an excellent vertical way to add variety to the style and type of marks you create when using a drawing board.
To see all of my most up-to-date recommendations, check out this resource I made for you.