Artists use this expression to express their finished drawing that includes all the final details added. This is what is known as a tight sketch. But it goes much deeper than that since many factors determine what goes into a tight sketch. In fact, the art of tight sketching is somewhat similar to telling a story. It also relates to storyboarding in a way. Here are the basics of a tight sketch.
• Start with a Thumbnail
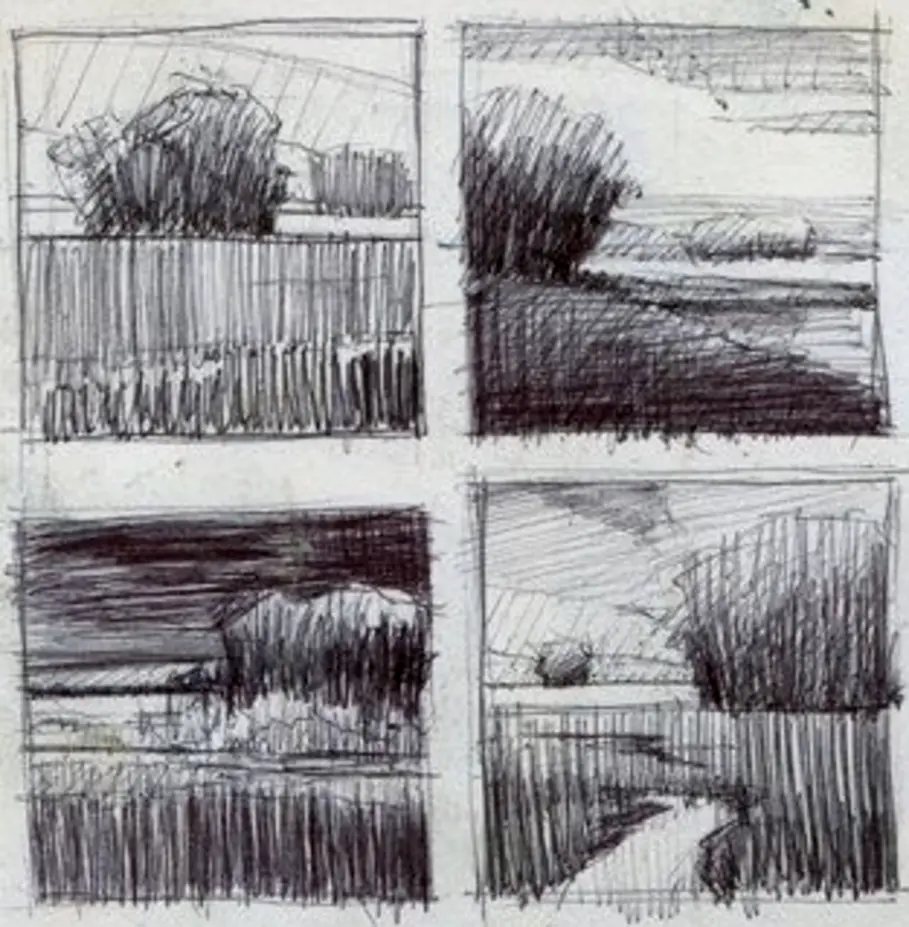
Don't jump in with both feet until you've gotten around to doing some simple thumbnails first. A thumbnail is a small sketch that is postcard-sized at best. They're simple to make, and you can crank out a few of these to start off. These sketches are called thumbnails for a reason since they give you a preview of what your final picture may look like. It's also due to these sketches' size that makes them appear like a thumbnail image on your PC.
• Get out Your Ideas
You might go through dozens of thumbnail sketches, but in actuality, it's best to do at least 5 quick sketches at first. They don't have to be too defined and just give basic outlines of your ideas at first. Once you have 5 thumbnails, place these in front of you and start picking and choosing elements from each sketch that you like. You can also add ideas as you go seeing what works and what doesn't work.
Don't forget to add side notes pointing out areas where more ideas can be inserted. This adds a bit of storyboarding to your sketch. A storyboard is a simple sketch used in film productions to help the Director of Photography (DP) help guide the action of a scene. These have notes added on the side of each drawing and use dimensional arrows to show where motion or the camera view is heading.
You can add similar notes to your sketches as you go, as a reminder of what to add or what should be changed. These notes can also help you later with finer details such as expressions or gestures. This will help you develop more ideas as you go, so don't be shy about getting your ideas on paper. You might end up with more than a dozen thumbnails using this method as you begin the sketching process.
• Try Different Versions
Whatever you add to your sketch, don't settle on just one version or pose. If you happen to draw figures, change the position of your character. If this is an object, try and find the best possible angle that makes it look more dynamic. This is especially helpful if you're drawing a spaceship or gadget. Your sketch is putting a visual story together, so you want to tell the viewer what's happening.
The second reason that you want to make several versions of thumbnails is to pick and choose from all of these versions. You want to have more opportunities when it comes to composition. You also want to have plenty of choices that portray the best example that each sketch has to offer. Even if it's a small detail that you like from one sketch, it can greatly impact the final drawing you make.
• Finalize your Finished Sketch
Now comes the big step where you start to piece together all of your ideas in your tight sketch. It should include elements that are roughly and loosely sketched-in at first. Once all the best elements are added to this larger sketch, take your time to capture objects or characters' right pose or position. If something isn't looking right, you can still change things around if your original composition isn't working.
When all of your rough lines are laid down, you can start to tighten them up, so they become more defined and clear to see. Just like the focusing ring on a camera, your sketch will become a clear picture of everything you have in mind.
Related Posts:
- What Are the Basics of Sketching?
- How to Sketch: A Complete Guide
- Sketching vs. Drawing: What’s the Difference?
- How to Sketch Loosely
What are Tight Drawings?
Now that I've covered what a tight sketch is, it's time to move onto what goes into making a tight sketch. But you have to ask yourself, what is the difference between the two? This section will cover all the most important points that further define elements and tips you should consider. Sketches and drawings are very similar, but it does come down to the principle of how they are drawn. In a nutshell, a drawing is a finalized version of a sketch.
• Lots of Research
Know what you're representing first of all. You don't want to draw anything that you aren't familiar with. You wouldn't start to sketch an engine or airplane if you didn't understand what each of the parts does. So go ahead and put in the time to research what you want to draw. Learn about the history of these items so you can get further inspiration. This is how you'll have a further appreciation of your drawing, knowing you did your homework.
• Refine and Define
To get a good picture, you always start with outlining and sketching in the basic shape. Use a style of sketching you're comfortable with. Also, use a good pencil to make light lines that you can erase quickly if the shape isn't looking quite right. I recommend using an unsharpened pencil for roughing out a beginning sketch. Having a rounded tip works in your favor rather than a freshly sharpened pencil.
• Tight Rough Sketch
Once you have your rough lines laid down, now you can go back in with a sharp pencil and get the focus into your drawing. You want to make sharp lines that follow along the lighter sketched lines. This process will take longer than the actual sketching takes, and you want to take your time. Making a tight drawing always starts with a steady hand, and to get clean lines, you just don't want to rush. Just take your time when it comes to the details.
• Final Drawing Completion
Let your lines have sharp contrast and observe the natural light that gives a tight drawing more believability. Areas where light is the strongest should follow highlight and shadow rules. That doesn't mean that you can add white pencil lines later for highlighting. When you lay down each line, draw a light defining line and then follow-up with a stronger defined line. Just be lighter on all spots where the direction of light is coming from.
Ideas For Tight Sketches
Where do you start when it comes to making the ultimate tight sketch? I know that every drawing deserves plenty of enthusiasm before you start. I also like to add a message that helps viewers find meaning within a drawing. But before I start anything, I'll put in a certain amount of background reference to have confidence in what I'm drawing. If you're looking for some pro drawing tips, here's what you should know.
• Research
Dedicate yourself to getting enlightened on the subject of your drawing. You want to know as much as you can if not a good refresher course on the most important points. The more information you have on a character or an object is going to work in your favor. If you are using the internet, you can copy pictures from websites of animals, people, and objects for better reference. But reading info and facts is extremely helpful too.
• Pushing the Limits
As I mentioned before, do your thumbnail sketches before you start to gather all the best ideas. Just like a mixed collage, you can take bits and pieces of each sketch and put them together. There will be adjustments you need to consider, so not every element you take will look good in your drawing. It doesn't hurt to push your limit to see what you can achieve visually. As an artist, you should always feel compelled to push yourself to do something impressive.
• What is your Message?
Every drawing needs to have a well-placed message somewhere into the context of what is seen in your picture. This is how many traditional paintings by the masters could tell a story based on real history or ancient myths. Your drawing can include a similar message to convey simple concepts as emotions up to a partial story. It makes your drawings more impressive when the details tell others more about what you've drawn.
• Consider the Final Colors
The very last touch is coloration which is always a dicey area for most artists. I recommend scanning your drawing and printing high-definition copies so you can experiment with the final colors and shades. It also gives you the practice to add highlight and shadow if you want to make your tight drawing more realistic. These practice copies will make it easier for you to fully colorize your real drawing.
