There are several shell types that wash up on the shore, and a significant number of them have a spiral pattern. Drawing one of these can be a strenuous task, even if you are an experienced artist. However, a few basics can make your work less demanding and more enjoyable.
If you start out as an artist, then learning how to sketch a seashell spiral would be your go-to move before attempting to draw anything complicated. However, if you already have significant expertise as an artist, you can use more sophisticated techniques to achieve smooth and better results.
Take a look at the piece below for insight on how both novice and established artists can go about drawing a seashell spiral.
Drawing a Sea Shell
Before you can begin the process of drawing a seashell spiral you will need to find a shell to draw. Shells can be found in different ways, firstly you can purchase one from Amazon. In fact this is an excellent way to source different types of shells of various interesting shapes and sizes. Click here to view shells on Amazon.
Second, you can find shells by visiting and walking on the coastline. However, this may not be advisable if the local authorities object due to environmental rules or conditions.
Thirdly you can draw a shell from a secondary source image such as a digital photograph or short video taken with your iPhone.
The last method is not ideal as you will be unable to move you to touch the subject or draw from direct observation.
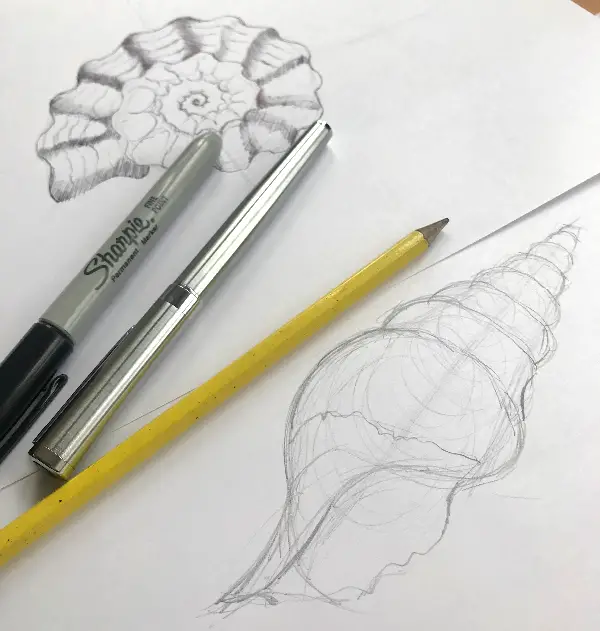
The Materials You Need
Before you start drawing your shell, you have to know which materials are right for the job. However, what you but depends on the type of drawing you’ll want to sketch. Some of the critical drawing supplies you have to get include:
· PEN
Water and oil-based pens will work fine if you are drawing a simple shell, considering that you’ll sketch the edges and offer a few details around the edges. The type of pen you buy is determined by the kind of paper you have. Water-based pens require heavier paper, say about 300gsm or more.
· PAPER
If you are going to draw using water-based pens, buy 300gsm paper. These absorb the ink and keep it from blotting over the sheet. Consequently, you’ll achieve clean work. If you’re planning on using graphite pencils to draw, opt for smoother sheets.
Avoid using polished paper, as you will have to do a lot of shading before you attain admirable results. 120gsm paper or anything thicker will work perfectly for such sketches. Opt for the heavier paper if you know you’ll consistently be using an eraser throughout the sketch.
· ERASERS
Use any eraser of your choice as long as it does not stain the paper. Look for a high-grade brush, fine tip, or regular erasers.
· PENCILS
Graphite pencils create believable results because you can always vary the pressure to attain believable contours. Avoid the pre-sharpened ones since they come with very fine tips. These can make it hard for you to shade evenly, especially when you want to add detail to your drawing.
· COTTON OR CLOTH
These come in handy when you want to shade the drawing paper to create a background. They are also useful in creating smooth edges on your image. Therefore, use smooth cotton cloths or high-grade cotton wool.
· CLIP PAD
If you use very rough or hard surfaces as support for your paper, a clip pad helps to smoothen the surface, therefore giving you ample time as you draw. However, you can skip this supply if you are using drawing books that have hardcovers.
Besides these supplies, you will have to learn a few or several shading techniques useful in creating various landscapes. Assuming that you want to emulate a beachside landscape since you are drawing shells, you may want to learn how to stipple to draw sand grains around the shell.
How to Draw a Simple Shell Spiral
It is critical to note that most seashell spirals take the form of a teardrop almond or circle. More so, when you want to draw an elongated or curved shell spiral, you have to use metrics to restrict your shell’s size. Therefore, the first step would be to draw a square or rectangle that would fit your perfect spiral.
Create a Simple Spiral Shell
Once you have your boundaries set, chose one of the three shapes and draw it in the boundary you’ve set. Ensure that it fits within the allocated space to not have to worry about erasing any unwanted markings that may spill out of your set space once you start adding in the details.
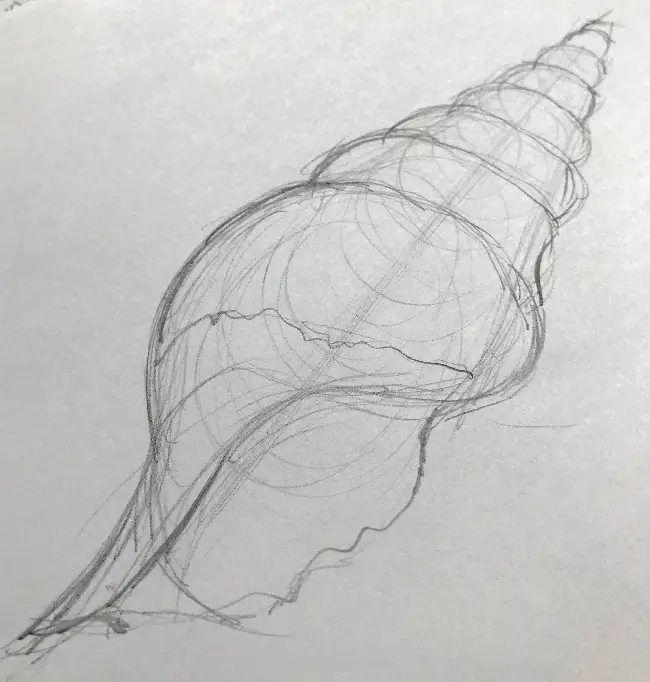
The next step is to create the spiral shapes that bring the shell to life. Say, for example, you want to draw a cockle-shell; you’ll want to sketch a teardrop as its basic shape because these shells have a pointed tip and a curved end. Create ribbed edges to provide a believable illusion.
Next, sketch some curved horizontal lines in the teardrop you’ve drawn. Space them well to avoid an overcrowded scenario. Start from the pointed tip to the curved area so that you know how to balance the drawing effortlessly.
Starting from the wide curved end, draw curvilinear lines vertically over the horizontal ones you’d sketched initially. Use light strokes, especially since you are aiming for simplicity. You can equally use thick strokes for a more defined image.
How to Draw a Realistic Seashell Spiral
Once you have all the basics in place, it is time to learn how to sketch more complicated shell images. Start by shading the background. To get that soft, even color for the background, take a graphite pencil and rub it vigorously over a clean white sheet of paper.
Apply Detail to Your Shell Spiral
When you feel that you’ve shaded the paper enough, take a light piece of cloth or cotton ball and rub it over the graphite shading. The cloth will pick up some of the colors, which you will then use to shade your drawing paper.
Repeat this process until you achieve light covering on the drawing paper. Remember, you are only shading the outskirts of the paper, not the middle sections. If you want to shade the entire sheet, use light strokes on the center.
You could even create a silhouette of the type of shell you want to draw using graphite shading. Use a variety of textures to provide that contrasting texture that will make the picture look realistic. To achieve this technique, you can use a variation of hard and soft brushes on the sketching sheet.
Considering that you want to make the image realistic, determine which side you’ll cast a shadow of the actual image. Now use your eraser to shade in the image over the graphite shading. Ensure that the eraser creates believable, even strokes over the shading.
Use a pencil to create light shadows on the seashell. Make sure that you use even pressure when creating the shadows so that you can achieve uniformity. The same case applies to your eraser. Your aim is to make the shell look curved. Once you have the shape in place, use an eraser to create the ribs.
The most important thing you will do is to get the direction of the vertical lines correctly. This you will attain by spacing them evenly. Use the bottom of the peak-end of the shell as your center of focus. This means that you will erase from the wide-angle to the narrow end.
Begin with thin, light strokes and increase them as you go. Stop when you see that you’ve attained that wavy, balanced appearance on your shell. After this, use a pencil to highlight the values in between the light and dark shading.
Use the cotton cloth to even out the sharp edges and make the piece smoother. Determine where the sun’s rays are coming from so that you know which side to shade more. Create less conspicuous shading on the area where the sun is shining from, and make darker shading on the area that’s furthest from the sun’s rays.
Add more detail to the shell that will make it resonate with reality. For instance, you can use the strippling technique to create a sand residue on the shell. You can also use your eraser horizontally to create scratches.
Suppose you opt for sand, stripple small patches of sand over the top side of the shell. Create a fading illusion to provide a visual contrast of areas that have less sand and those that have chunks of it. However, do not allow this to overpower the shell.
If you chose to create scratches, ensure that you also create shadows for each scratch. Using a pencil, create a firm but smooth edge. Use light strokes until you achieve your desired results. Look out for the sun’s direction so that you do not mess up the lighting. Finally, create a shadow for the entire shell. Shade heavily on the sand that’s nearer to the shell and reduce the pressure as you move further outwards.
Final Take
When creating a seashell spiral, consider the type of shell you want to draw. When drawing a simple shell, you do not have to use intricate strokes and equipment. A pencil or pen, paper, and eraser will do. You only have to draw the lines correctly and shade lightly to get your desired results.
Realistic shells, on the other hand, require much more detail. As such, you may have to acquaint yourself with a variety of shading techniques before you try this type of sketching. Casting shadows is also an essential aspect of this drawing technique, so you need to learn how to vary the pressure between the pencil and erasers to create a smooth and balanced image.