Learning How To Draw People
Learning to draw people is deemed by many to be one of the more challenging subjects to master.
If you enjoy drawing and look forward to drawing people. In this article, I'll share with you everything you need to get started.
Actually, drawing people isn't easy. It demands some individual skills to draw directly from the human face, muscles, flesh tone, color, and skin texture. If you are looking for a detailed drawing course. That tackles all of the fundamentals of the Anatomy of the Human Body. Click Here
.
How to Draw the Human Body
How do you feel when you come across a fantastic sketch of an individual? Actually, you may think that drawing people is difficult. Well, it might be difficult, but remember, nothing is impossible. You only need to follow a few basics to get everything in order.
Learning the basics is crucial, but the art of practicing and developing your drawing skills is even more critical.
You can learn something a thousand times, but if you don't practice, you'll be doing nothing. So how do you draw the human form? Below are the sure tips:
Learn to Draw People from Direct Observation
- The first and most crucial skill needed to learn how to draw people is observation. Actually, it's close to impossible if you can draw a person without first looking at it.
- Observational drawing directly from life is an excellent way to expose all shapes, tones, colors, and textures in the human form.
- Through observation, you can distinguish all these elements and analyze a record them in the form of a drawing.
When drawing from observation, it is always advisable to spend more time looking, observing, and analyzing your subject rather than drawing it. This will help you develop your visual awareness.
.
.
Quality and Strenght of Line
- Another aspect to successfully studying the human physique is your drawing technique. Linear drawing is one of the simplest and most basic ways to research and draw the human figure.
- When creating a linear drawing of the human body from observation, always be aware of the strength and quality of the line you are drawing with.
- Faintly drawn lines are always best when starting a new drawing and working out the basic proportions.
- Basically, three types of lines are used to render objects, i.e., Straight lines, diagonal lines, and irregular curved lines. You first need to draw and practice these lines individually and then move them to draw simple objects.
Proportion and Perspective
- Composition and viewpoint are critical when learning how to draw a person.
- It is essential to consider the viewpoint and the overall position of the body, and how you want to represent it before drawing.
- Using this method helps you to draw more visually, more accurately, and much more realistically. You must learn these techniques to progress onto more advanced techniques.
How to Draw a Person Step by Step for Beginners
- You will agree with me that understanding how to draw the figure of the human body is a daunting possibility.
- For the novice, representing a person is difficult because any minor mistake can ruin the whole work, and I'm not trying to discourage you!
- There are sure ways to guarantee that your work ends well. Just follow the steps below!
- Remember, this is just one of the numerous ways to draw people. There are other methods out there to teach you. This will help keep the figure in proportions, so it's something that beginners are having fun with.
Learn the Proportions of the Human Body
- Drawing people requires someone to maintain the appropriate pose.
- Pro Tip: One meaningful way to keep your drawings in proportion is to hold your pencil and lift it in front of you to align it with your model.
- Hold the pencil's tip at the top of the model's head and use your thumb or index finger to mark where the model's chin is located.
- Place a pencil on the paper and mark these guidelines while holding this measurement.
- Once you have the guidelines, you can draw your head at the appropriate scale and add details now or when the drawing is complete.
Drawing the Feet
This is the next step when drawing the human body.
- Once you have completed drawing the head and checked that it is in proportion. It is now the right time to draw your feet to maintain the rest of your body proportionate.
- This is basically done using the general rule of thumb that states that a person of average size is about seven (including the head) tall.
- In other words, your feet should be placed seven times below your head length.
- To get started, you need to draw a simple oval. Showing the position of the head. Draw another six ovals of similar size, starting from under the head you've already outlined in the center of your page.
- This may seem strange or may seem too tall, but it is very accurate. The bottom of the last oval indicates where the lower part of the entire foot will be placed.
Workout the Dimensions of the rest of the body:
- How that you have established the length of the body. It's now time to focus on other sections of the figure.
- Begin by marking other points, such as the neck, torso, and hips that will assist in outlines the overall shape of the body.
- The third step in drawing a person is finding and emphasizing the limbs (legs and arms), the waist, and the hips.
- You'll follow the same process when it comes to drawing a man or a woman.
- Once the position of the elbow is determined, the rest of the arm can be drawn.
- The lower half of the torso below the waist is where you find the hips and legs can fit below that position.
- Now that the rough outlines of the geometry have been placed in precise proportions, you can go back and add details as needed.
- You can follow the same essential tips to decide how to draw people in a sitting position. The idea is the same as we've discussed.
- However, you can use five ovals instead of using seven of them.
How to Draw the Proportions of the Head and Body
Some people believe that drawing the human head or body isn't simple. You don't need to be talented to draw a superb image. This is because there are rules that are followed when drawing.
You just don't wake up and start drawing. Any image requires calculations and some minor knowledge. Without wasting time, let's begin by explaining the basics of drawing the proportions of the head.
Drawing the Proportions of the Head
There are many ways to draw the human head, but drawing from observation is essential if you are a novice. Drawing the human head requires practice.
Drawing a person's head is one thing you can try to advance in.
Do you know why? It's because there are many people with different looks or expressions. When starting to draw the face of someone, just remember that you're not in competition. Relax and work at your own pace. As long as you're trying, you'll find yourself drawing an excellent image. For further information on drawing a portrait, read my post, Portrait Drawing Tips for Beginners.
Start by Drawing Simplified Shapes
An excellent way to begin your figure drawings is by making your picture as simple as possible. Keep the structure simple by getting rid of unnecessary details.
- Split them into several shapes in a central plane. Practice drawing until you achieve something impressive. You can also try drawing from a mannequin model.
- These are helpful devices as they will support your drawing of the different proportions of the human body from different positions.
- Once you're satisfied with your work, you can progress on to drawing a live model.
- It is essential to use the light source when working from a live model or a cast model.
- When drawing, ensure that the light is casting shadows from above and from the left of your head.
- This is because light leaves a shadow under the eyebrows, upper lip, nose, and chin.
- Pro Tip: Drawing below proper lighting is essential because the shadows cast on the body will delineate the forms of the body correctly.
Learn how to Draw the Planes of the Face
Use the following guidelines to draw the planes of the head and face.
- Subdivide the area from the cheeks up to the jaw into three planes. Apply shading and value to the planes on the opposite side of the light source.
- How the light falls on the plane gives us an idea of the shape of the head. You'll have a dark jaw because it turns away from the light source. The ear can be light because it turns out from the jaw.
- The back and the top of the head must have the same appearance. The top of the head is lighter in value than the rear area. Actually, the head becomes darker as we progress towards the backside.
- Once you understand how to draw the plane of the head and face, try drawing the head in different positions.
How to Illustrate the Proportions of the Body
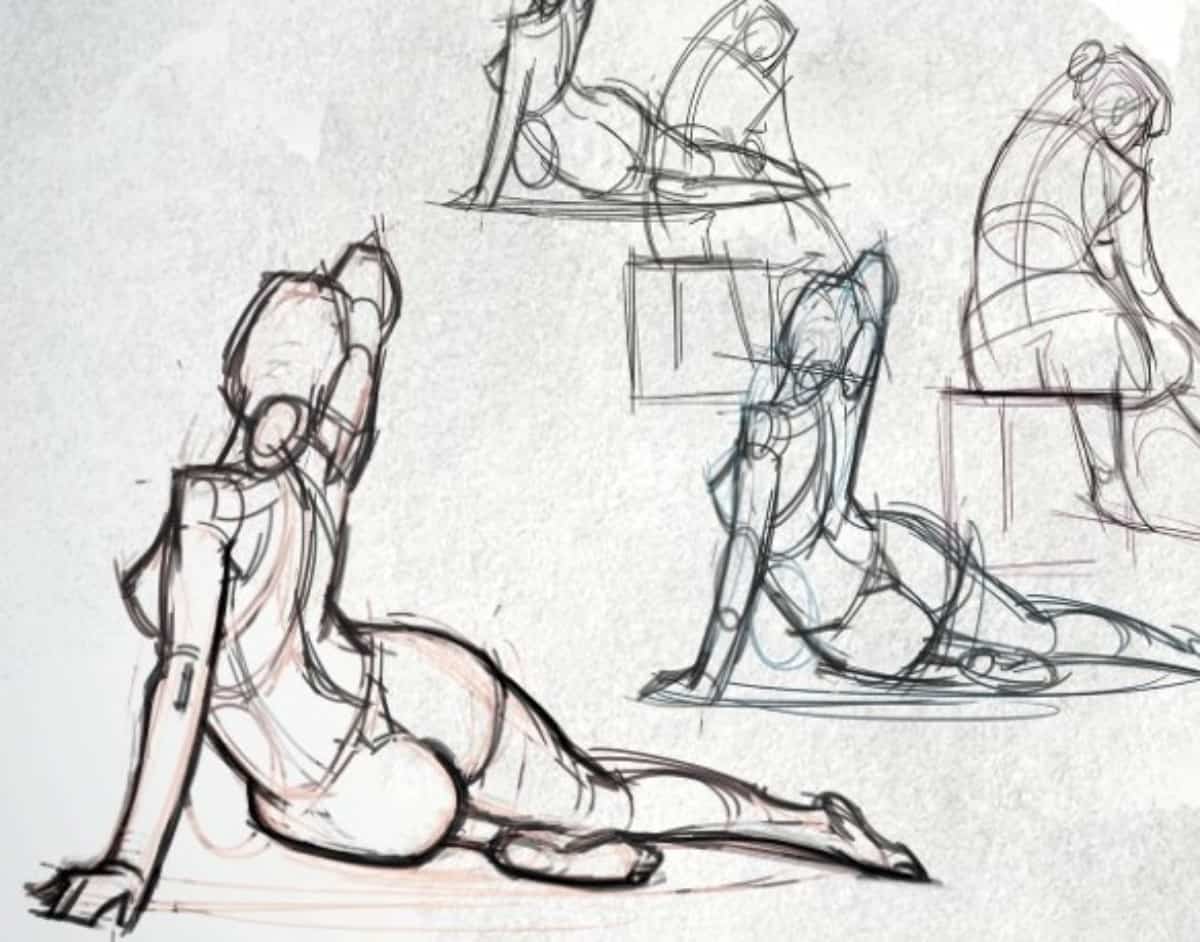
- There are many techniques used to draw the proportions of the human body. Some of the best methods block in and simplify the body into familiar shapes such as blocks, spheres, and cones. Here is how to get started with these two techniques.
- You only need to make around six to twelve different lines on the paper to illustrate the body's shape. The results might not be appealing, but they can be viewed as “the sketch before the sketch.”
- This is a critical method because you don't need to worry about any details. The idea is to get the main body in perfect shape. It can also be done as a thumbnail proportion to avoid the use of many papers while drawing.
- You can try drawing about three or four blocked in thumbnails proportions before feeling confident with your drawing.
- Block-in techniques allow you to have a clear outline of the shape of the body. However, you'll have to start by drawing the line. In another method, using the shapes ends up with a drawing that has more form to it.
- In the shape method, the body is broken into simpler shapes. The head is basically an oval. The arms are drawn as cones that include circles where joints will form.
- The chest is a boxlike shape. The hip is depicted as a circle or horizontal oval shape. Blocking-In in is the best technique when using pencils.
- However, it is essential to try using the shape method when working with softer mediums or pastels like charcoal.
Use the Five Dot Method to Draw the Figure
- Another simple but less used technique is to draw dots to represent the proportions of the human body. It is known as the five dot method. It is basically a straightforward way to draw the human body with five dots and attaching lines.
- It's a fun method, precisely if you make the dots and connect them with another person. One dot is the head in this method, another one is the hand, another for the foot.
- Dawing is created by drawing a line down from the head representing the head and splitting it into two lines about where it connects to the waist. Then extend the two lines to a dot that represents the feet.
- These lines will represent the person's legs. The arms are made by joining the two dots representing the hands and drawing the line between them and the spine.
- This is actually the easiest way to draw the proportions of the body. You only need to practice well, and you'll be able to start drawing the proportions well from any position.
Figure Drawing Step by Step for Beginners
- When drawing any shape connected to the human form, there are many things to keep in mind. In fact, the drawing itself is the second half of the design. You should bear in mind whatever or whoever you want to draw. A perfect drawing is basically all about observation and awareness.
- Drawing tools and materials are fundamental instruments for drawing a beautiful piece of art. Necessary drawing tools aren't expensive at all.
- If you want, you can start with paper and a pencil, but some tools will make better results. It is a daunting task to recommend great drawing tools because many of them produce great drawings.
- It only depends on your preference and needs. For instance, there are those tools that make bold images, and thus, there are people who love such bold images.
- What I'd advise you is to experiment with various papers and pencils. You'll eventually like certain materials more than others. Get a pad of newsprint paper. This is basically a bit affordable and perfect for practice drawings, but I don't expect these drawings to last long.
- They will probably turn yellow over time. We recommend the high-quality paper for permanent drawing. Strathmore is a brand that looks good. It has enough “teeth” to hold a significant amount of medium but is smooth enough to enable detailed work.
- Therefore, try to start using medium textured paper maybe. You're also required to have a perfect-sized drawing board that is flat and smooth for a drawing surface.
- Before you get started, ensure that you have in mind the human body. How does the person look like? Ensure that everything is clear. When you have a clear picture of the person's body, learn more about drawing the body and its proportions.
- There is also a need to know the tendons and muscles and control and direct the body. Surprised! Huh? Actually, I don't mean that you memorize all the tendons, muscles, and bones. Just a basic understanding is enough.
Proportions and Measurements of the Human Form
- Correcting proportions in figure drawings is a considerable concern facing beginners. This is why the unit of measurement was started by the use of the model head.
- Is that clear? It is the distance between the top of the head down to the bottom of the chin. The standard measurement is 7 1/2 to 8 heads that were developed for upright body height.
- The size does differ from one body to another, and therefore, correct adjustments need to be done efficiently to your figure drawing.
- You should understand that the dimensions of the 7 1/2 head correspond when it is upright. If your pose changes, you will need to make adjustments.
- Most people use pencils to measure their head size. Keep an appropriate distance from the subject. Use the pencil from below and use it as if you're holding a hammer. Pull your arm completely towards the target.
- Ensure you're your head remains stationary as much as possible. Ensure that you keep standing in the same place when making any measurement. Close one eye and place the tip of a pencil on the subject's head.
- Place the thumb on a pencil and slide it until it is flush with the subject's chin. This completes the subject's “head” measurement. This serves as a metric for the remaining subject.
Posturing and Positions when Drawing the Human Form
- There are many positions to draw the figure of a human body. Just choose the one that looks real and natural. The best model is to hold the pose for a long time, and it should be comfortable and relaxed.
- Give adequate time to your model before you get settled. The more natural and relaxed pose, the more reliable the final picture will be. If the model isn't comfortable or it's awkward, your image will reflect it as well.
- Different lighting situations can be created for drawing figures. It depends if you'll be working outdoor or indoor. If it's indoors, you should choose if you'll be using artificial lights or natural sunlight.
Consider the Light Source
- You should also know the direction of the lighting source. For a beginner, it is essential to make a lighting effect that creates more shadows by tapping the model from one direction and lighting only partially.
- This makes it possible to draw quickly. You can use more complex lighting effects once you have experience.
- When you get started, don't even try to think of drawing like an expert. Again, don't get too concerned with the outcome. Ensure that you follow the correct detail in your figure. Many beginners fail not because the drawing is complicated because they want to make a perfect drawing in their first trial. When you fall into this trap, you'll always have drawings out of proportion or look wrong.
How to Draw a Girl Anime
- When starting to draw a girl anime, the first step is to copy the picture. Begin with the body and let your pencil flow. When you're done copying the image, the next thing is to draw yours.
- The beauty of drawing is creating your picture. There are many ways to get started, and choosing either is Ok. When drawing a girl anime, you can use a cola bottle or an hourglass if you have one.
- Draw a giant bubble that will represent the head. Don't struggle to make it perfect. The point is having a foundation of what you want to draw.
- Next is to draw the neck and shoulders. The shoulders should be dainty. Now draw the chest and the arms. The way you draw them for a boy is different from that of a girl.
- Position the arms the way you want them to be, depict the torso, next is to draw the legs, and don't forget the hips. Once you have all these on your paper, start on the details like hands, face, and feet.
- The last part of the drawing is the clothes. The clothes help to set up your character. They also help to make the character sexy, shy, or wicked.
- This is why the reflection of a girl anime comes in. You can choose the type of clothes you want for your girl, or if you have no idea of the type of clothes, you can draw the ones in your clothes. I'm pretty sure that if you keep practicing, you'll get better!
Create Art With My Favourite Drawing Resources
General Drawing Courses. I like Udemy if you want to develop your knowledge of drawing techniques. Udemy is an excellent choice due to its wide range of creative courses and excellent refund policy. They often have monthly discounts for new customers, which you can check here. Use my link.
Sketching and Collage. Take a look at this sketching resource I have created. Use this link.
Proko. Is one of my favorite teachers who surpasses in the teaching of Anatomy and Figure drawing. Prokos course breaks down the drawing of the human body into easy-to-follow components aiding the beginner to make rapid progress. For this, I really like Proko.
Art Easels. One of my favorite ways to draw is by using a drawing easel, which develops the skill of drawing on a vertical surface. The H frame easel is an excellent vertical way to add variety to the style and type of marks you create when using a drawing board.
To see all of my most up-to-date recommendations, check out this resource I made for you.
Conclusion
Learning how to draw people is essential. You can learn to do it in your leisure time. Remember that nothing is easy if you want perfect results. For further information on drawing Portraits and the Human Form, Read my review of this drawing course.
Don't assume it! The sure way to get a good job done is practice and practice. Hope you'll always refer to this guide when trying to draw people.
I hope you have enjoyed reading this post; please feel free to leave a comment in the box below. Thank you!