Landscapes aren't just pretty mountains and trees, and a lot of these landscapes include grass and vegetation. Drawing these smaller details gives your drawing rich detail by using various techniques. This info guide will describe how you can get better at drawing grass in pen and ink.
Why Learning to Draw Grass Will Improve Your Landscapes?
Any decent landscape is going to have a wide range of detail that makes your scenery look interesting. One aspect that most people don't ever think about is the grass that's covering fields, groves, mountainsides, and open meadows. Adding detail to grass gives more depth and visual appeal to outdoor pictures drawn with pen and ink. While a Fineline pen can give you the basic outlines, colored inks add rich color that works like watercolor.
Colored ink is a beautiful translucent color added to any drawing that uses an artist drawing pen. Using different colors, you can create everything from green grassy fields in the spring to dry weedy pastures in the fall. The ink colors that you add afterward add further impact. This way, you can convey seasonal changes just by showing what kind of grass you are drawing.
But it all starts with how grass appears in the foreground or off in the distance. Here are some great tips to pull-off drawing grass and improving the quality of your picture.
Related Posts You May Want to Read:
- How to Draw Landscapes in Pen and Ink
- How to Draw Rocks and Cliffs
- How to Draw Clouds with Charcoal
- How to Draw Clouds with Pen
WHAT IS THE PEN AND INK TECHNIQUE?
Let's talk about texture versus sketched lines. Using a pen and ink technique is all about adding detail to a basic shape. These techniques are often used for shading but are not limited to bringing texture to life. Here are some of the most important techniques that you'll want to learn while drawing landscapes.
• Hatching/Cross hatching
This drawing trick is easy to do by drawing lines that are close together. If you are drawing a shadow, you can place more lines in the same direction on the edge where a shadow will go. Cross-hatching has lines that run opposite to lines the run in one direction. These can resemble a ‘+' or ‘x' shape depending on which direction you want to make your hatching and cross-hatching.
• Cross contour
These are lines that follow the basic rounded shape of an object. This shows the roundness of a tree trunk or the curved surface of a rounded rock. It also helps give an illusion that your object has more depth of shape.
• Random lines
These lines don't follow any select route and can follow any direction that suits your mood. While this can give a messy appearance, it has an excellent look for surfaces that often have rough textures like rocks. It's also easy to add shadowing using this technique from adding random scratch lines.
• Doodles
Just like those crazy drawings you would do while talking on a phone, doodles don't follow any shape other than swirls and wiggly lines. It's a chaotic method that is faster than making hatching lines. This will be good if you are doing drawings on location and want to finish up quickly.
• Stippling
There are two versions of this method that are essentially the same. The first is stippling, and the second is making dots. The only difference is that stippling has the appearance that it looks blended. It doesn't always need to have dots and can be tiny lines emerging from all directions.
• Ink Wash
Ink washes are done after an object has been drawn and will help create a softer shadowing if Fineline detail isn't used on an object.
Why is Grass a Vital Part of Pen and Ink Drawing?
Why the grass is a vital part of your pen and ink drawing? If you're sketching anything related to nature, you better know what is found commonly outside. Even at city parks, the most common greenery you'll find is grass, so out in the countryside, it will be even more apparent. Wherever your setting intends to be, you'll see grass showing somewhere in that drawing.
You will need to know what type of grass and show the length that it's growing. Is the grass green and springy, or is it dried out from the hot sun? Here are some excellent samples to think about.
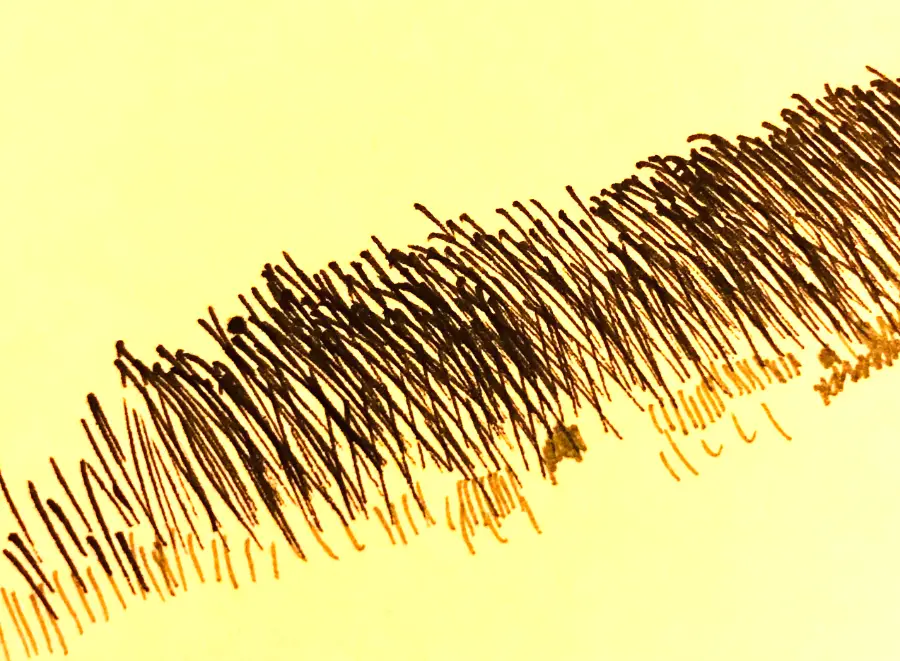
• Shortgrass
In meadows and open fields in the early spring, it will be more common to see shorter blades of grass that grows. Some types of grass are also not very tall, more than 4-5 inches in length. The shapes that emerge are soft and fluffy tufts of emerging lines that come from the ground.
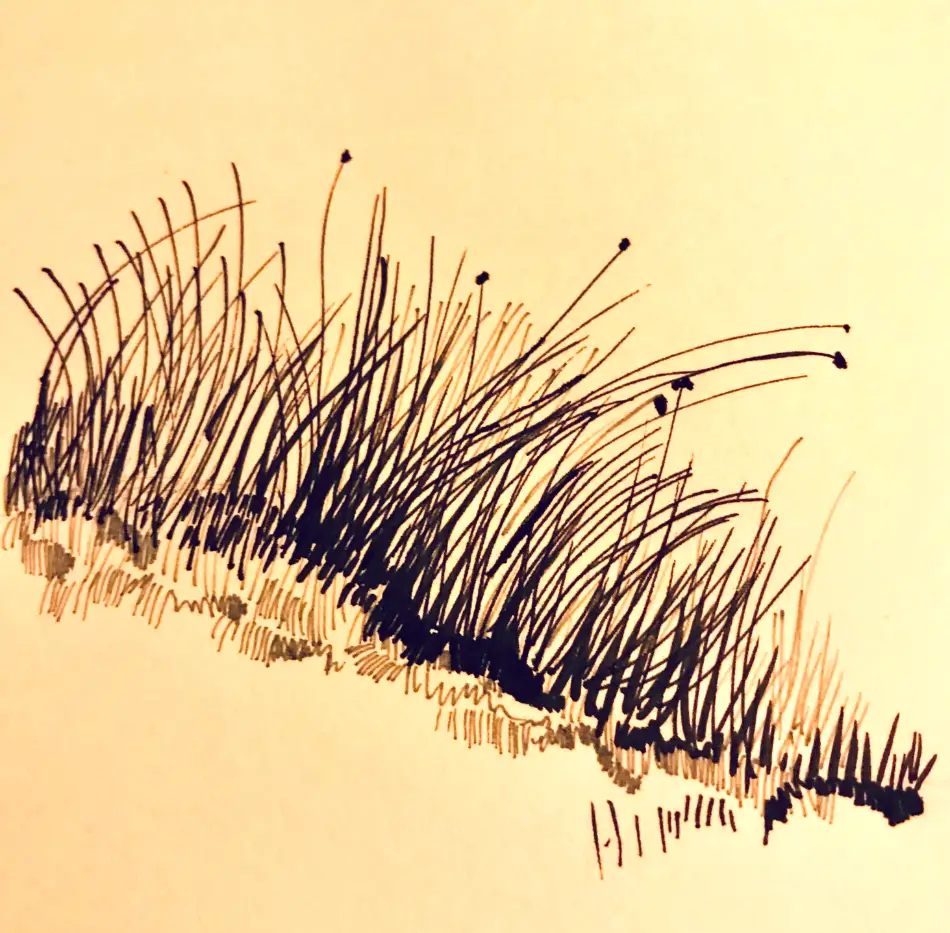
• Tallgrass
Taller grass has more grass strands that shoot up and start to lean over to one side. This type of grass is also affected by wind and will often look like flowing hair to some extent. Aside from the green and yellow ink colors that you add, it could be confused with hair.
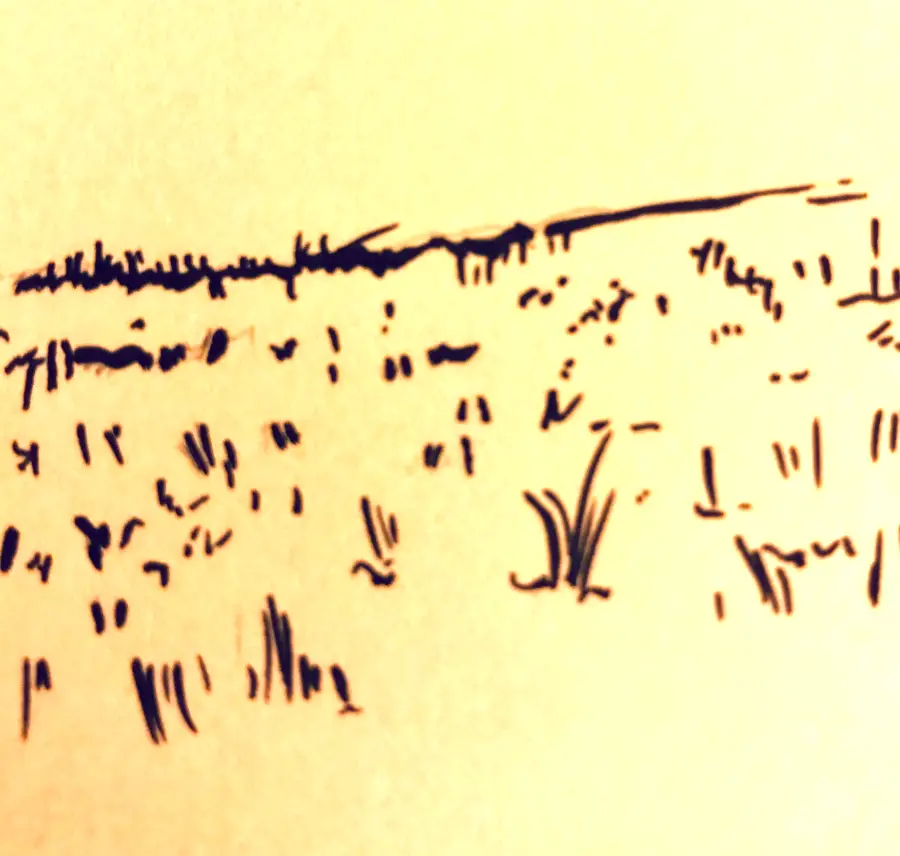
• Dry grass/straw
After grass starts to dry out, the strands are stiff looking and brittle to the touch. It won't be unreasonable that there are broken strands that lean over at odd angles. There may also be trails caused by animals or people walking through dry grass with straws pushed aside.
How to Begin Ink Drawings of Grass and Weeds
This is very simple to pull off when drawing short grass. You are starting from the bottom of a grass strand and swiping the line upward. This is repeated several hundred to thousands of times. Longer grass is nearly the same, except you need to plot out what the overall flow is leaning in sections. Some areas should be leaning to the left, while other sections can lean more to the right.
This variation is which way they lean gives a sense of flow or movement. If all the grass is leaning in one direction is might give the impression there is high wind. For anything in the distance, you also have to reduce the amount of detail. Use less pronounced strokes and light scratches that are decreased in size. You'll need to use a very fine ink pen for this that is perhaps a light gray color rather than black.
Dry weed and straw need to look stiff, with bent fronds peppering an area. Only the final coloring will help give a light tan color that dry grass shows. These can be sparse and lightened to simulate distance using a gray pencil for sections in the distance.
Varieties and Differences in Ground Cover
Take a good look at nature, and you'll notice that different kinds of grasses grow naturally. Some grass next to trees grows longer than meadow grass. There can be patches of grass with different textures due to the varieties of grass that grow there. Collect lots of pictures of locations that you enjoy looking at that contain grass variants. These can be added to inspire your landscape.
If you are drawing a real location, take many pictures so you can draw it at home. If you like drawing in nature, this allows you more time to take in detail you might not have noticed before.
Creating The Illusion of Distance
Put everything that is shown in the foreground in more focus with plenty of detail. Grass that is shown way off in the distance doesn't need to be so sharp. Make these marks as light as possible and use pens that have lighter colors. Fineline ink markers also come in a range of black to gray and help give you better realism by switching colors. As the distance increases, things start to lose their color and appear less pronounced.
Creating Textures With Pen and Ink
After you have all the significant detail lines put into your drawing, this is when you can go back and start adding detail. This is when you can start plotting light direction and create shadows and extra details. Use a combination of pen and ink techniques to create the right textures in your drawing. Don't be afraid to add lots of detail to your grass since translucent inks will only add to what you've drawn.
Use a Variety of Marks
Since your nature drawing will include all kinds of natural objects, it will help combine pen and ink techniques. There can be rocks, trees, mountains, water, plants, and anything else imagined. Don't just stick with a single type of mark method since these sketching tricks look better if mixed within your scenery. It also may not look appropriate to particular objects in your picture, making them look less realistic.
How to Create Contrast with Your Drawing
If you are drawing anything outside, you realize that contrast will play a significant role in your picture. It's not going to be the perfect pretty Hollywood picture that you see where everything is in perfect focus. There will be days where the sun is shining very bright. You can counter this by wearing sunglasses, but don't forget that the contrast between light and dark in your picture needs to be followed.
To achieve this, you should use fineliner pens that come in different colors to have areas with darker lines in some areas and lighter lines for drawing a background or things very far away. It will look a bit odd at first. However, when you add ink to color, it will be easier to color due to the difference in light Vs. dark in your drawing.
Summary
Drawing grass using pen and ink techniques is only one part of your final picture that you will add. But since it plays a big part, you need to learn about what makes grass appear the way it does while drawing them. I hope you find this info helpful for you and that you can employ these new tricks in your pictures. The more you experience looking at real nature, it will ultimately help you understand how the grass has a flowing nature.
