When learning how to draw clouds, you aren't limited to estimating distance or depth. These are just a couple of examples of the rules that apply to perspective drawing. You will learn more about how these principles work to make drawings of clouds appear realistic in your sketches.
Related Posts:
- How to Draw Landscapes in Pen and Ink
- How to Draw Realistic Rain
- How to Draw Clouds with Charcoal
- What are the Basics of Sketching?
DRAWING DIFFERENT SIZE CLOUDS/SHAPED CLOUDS
• Learn What Type of Cloud you are Drawing
In nature, the type of cloud tells you a lot about the cloud you are drawing. The first mistake is to pick a cloud that doesn't belong in your picture. You wouldn't mistake drawing a rain cloud for one that is light and fluffy. There are essentially 4 different classifications for clouds. Each one of these will be in the sky for a specific reason depending on the weather.
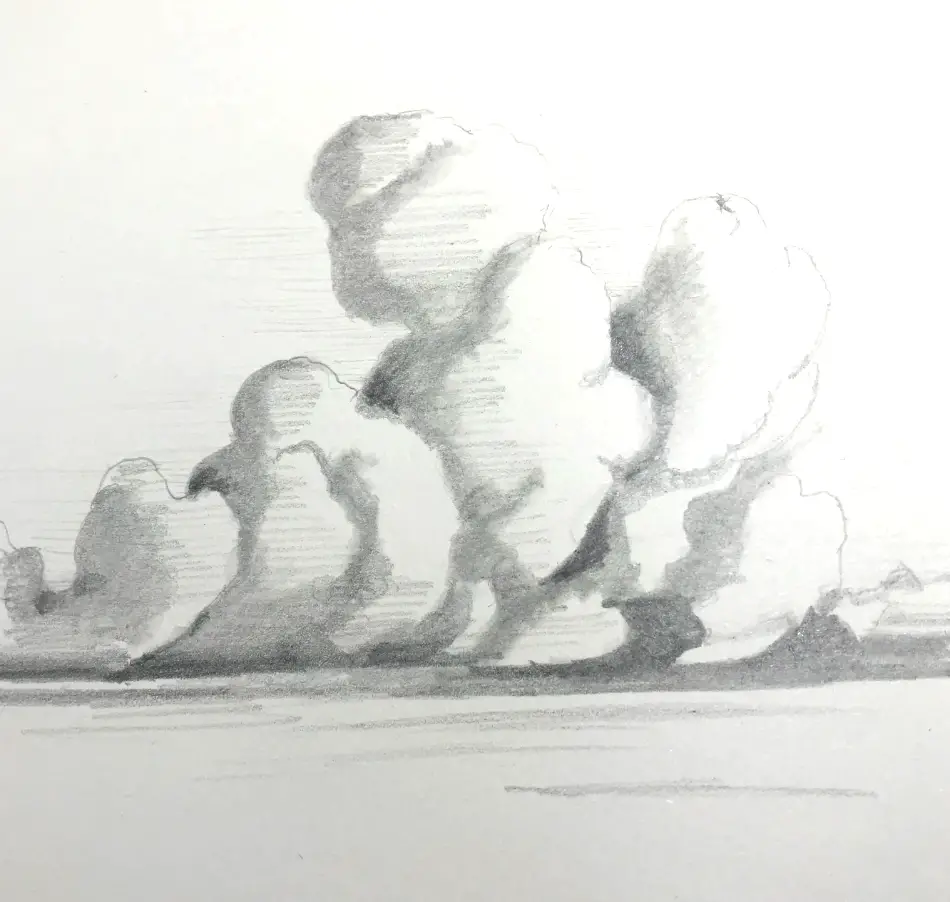
1. Cumulus
One of the most recognized types of clouds that everyone knows about. The shapes are light and fluffy, with an overall cotton ball appearance. The bottoms of these clouds are always flat and darkened. You'll see these clouds forming on sunny days in the morning that get the nickname ‘fair-weather clouds.' These quickly dissipate by the end of the day.
2. Cirrus
These clouds have long tendrils with wispy strands that spread outward from the Latin word' curl of hair.' These clouds are higher in the sky above the 20,000-foot level, where low temperatures are typical. These temperatures that contain very low water vapor will end-up crystallizing rather than being water droplets. This is why the strands that form are actually ice crystals.
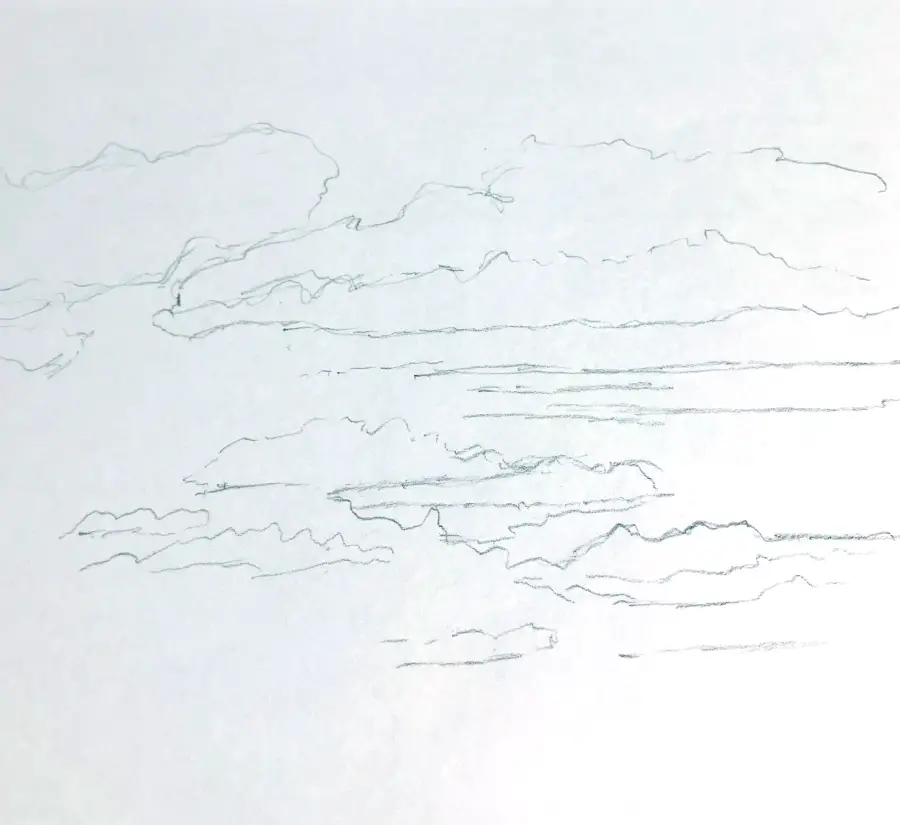
3. Stratus
Stratus formations are low and puffy on days filled with scattered showers and overcast cloudy days. They are gray colored with white highlights and appear patchy with open spots of blue sky peeking through. The texture is honeycombed when they are viewed from underneath them.
4. Nimbus
This is the ominous rain cloud that has a dark sheet falling underneath it. The general clouds resemble a Cumulus and Stratus but are darker due to the mass amount of water content. These clouds are also followed by lightning emerging in many spots. These sheets of rain that emerge often look like shower curtains with many layers in between.
The Illusion of Space Across the Sky
This is one part of the rules of drawing that always come back to what is called perspective. The illusion of space always takes into consideration the order of how you see objects that are seen from a certain angle. Since clouds are seen from above, the rules for perspective still apply using a reverse horizon line. The clouds above (despite their fluffy and vaporous appearance) still have a compound shape.
These clouds will all follow a gradual downward angle toward the vanishing point. All horizon lines represent the vanishing point. The very top corners of your drawing paper will all establish the left and right perspective angle. Just as you would draw lines at ground level, you need to determine where the viewing point is. Are you standing at the top of a hill looking down, or are you looking up from a valley floor?
If you haven't studied how perspective works, I suggest a quick introduction that gives you a clear idea of how clouds are drawn in perspective.
Scroll down to the section that talks about the rules of perspective, and you will see a picture of what looks like flying saucers. While it's a crude representation of clouds in the sky, what this shows you is that objects further away change their appearance through shading. The further away a cloud will be, the less likely you will see the underside of that cloud. You should practice this method using a straightforward formula.
To practice this simple perspective line of sight,' you can place several cereal bowls on a kitchen table. Now you can take a piece of paper and draw each bowl sitting down at the edge of the table. Bowls that are closer to you will show more of the inside of the bowl itself. The bowls placed behind will have less of this showing. When you've finished the outlines of your drawing, you can carefully shade in the inside portion of your bowls.
Now flip your picture upside down and see how this relates to objects in the sky. Even though they are technically still bowls, your clouds follow the same formula.
Distant Shapes/ Clouds
The one thing about drawing distance is that you have to follow another law of nature. This includes the atmosphere and the particles of dust, mist, and moisture that all make objects appear fuzzy and lighter the further away they are from you. If you've ever seen mountains that are 20-30 miles away from you, you'll always see them as looking hazier. On days where there are clouds, these clouds will look softer and not as sharp by contrast.
Just as this rule also implies, anything closer to you has sharper lines that you can see. Here is another exercise that will give you a better idea of how drawing distance is working.
• Start with Shape and Form
Clouds in your drawing that are placed further in the background will always appear above the horizon line. Draw light scribbles and shapes of the kind of cloud you want to add in the far background. If you plan to layer more clouds in the picture, you will need to establish a light infinity line. This is taking two lines that run from the perspective where you are on the ground.
These two opposing lines run along the top sections of your paper and have a vanishing point where they meet. Obviously, this is well above the actual horizon line that you will put somewhere on your paper. It will appear as if you are drawing a wide ‘V' shape on your paper's upper half. Now you can create layered lines that are lightly drawn into this ‘V' shape. Inside these lines are where your distant clouds will go at the lowest point.
Additionally, you don't have to place clouds only inside the V' zone since the V-shape aids you for perspective reasons only. Once you start drawing clouds at the lowest end of your drawing, you will need to soften them, using lots of shading and erasing. To the point, they are seen but not so well defined for added detail. This is where using a blender stump will come in handy.
Drawing Receding Forms of Shapes
Just as the V' line helps establish a visual perspective, you can add blocky shapes that somewhat create clouds. These shapes are essentially your building blocks that all form a specific cloud in your layering lines. Each one of these blocky clouds can follow the intersection line to infinity. This has less to do with the cloud shape per-se but makes it easier to shadow at the bottom of your cloud.
The rest of the blocky shape will ultimately be removed with shading and grayscale coloration of your cloud. There will also be a lot of erasing of needless hard lines and more soft-looking random shading inside the cloud. This is where you have to pay close attention to the type of cloud you are drawing.
• Pump Up the Volume
Give your cloud a lot of volume by using textures that are smudged and faded-looking. There will be so much texture that you can add using your pencil. The rest is blended using your finger or blending stick. Your eraser will play a large part in making the volume of a cloud appear more reflective than anything. Imagine where the light is hitting the top edges and highlight points.
Creating Depth
The closer your clouds are in the foreground, the more in focus than the ones in the background. This will be a refining process that you need to pay attention to, so the background clouds are 3-4 times lighter than the foreground clouds. Use pictures that you collect from the internet to get a sense of richer depth. Don't force the clouds to be evident if they are farther away. Just let the natural illusion of distance take over.
Stick to the layering aspect of perspective, and you can't go wrong. The other point is not to go overboard on drawing clouds that you aren't happy with. Your best friend is going to be an eraser and blender stick. Clouds are supposed to be a significant play with light and shadow. Drawing with a pencil also helps since you can always remove darker spots that just don't work.
Final Words
Clouds play a big part in a drawing that isn't always easy to master on the first try. Practice drawing a single cloud on your paper first to see how it looks. I don't recommend drawing foreground clouds first, so work from the background and work your way forward. This way, you can plot out where your cloud coverage is heading and where it has gone. With practice, you can master how to draw clouds in perspective with plenty of practice along the way.
