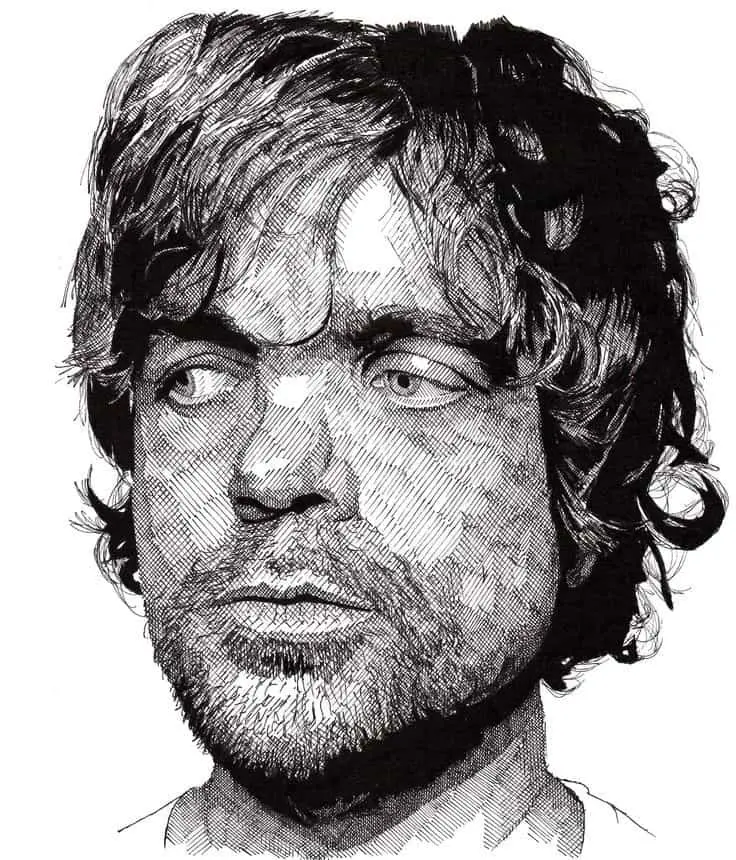
For any artist that is interested in creating a realistic-looking portrait, learning how to draw shadows on faces is a skill that must be developed.
How to draw shadows on a face. Shadows will add intensity to your subject, making it seem more lifelike. Utilizing a mixture of shading techniques can be applied to accomplish this. Blending, hatching, and graduated shading techniques when used correctly will support you achieve this goal.
The biggest challenge in drawing a realistic human face is learning to draw an image that everyone sees every day. The human face is the most recognizable thing in the world to a human being, so if your face is off, even a little, it's going to be very noticeable.
Unless, of course, you are going for a more abstract look to your drawing or painting. But, assuming that you are looking to create a realistic-looking drawing, then drawing shadows, as well as having the right proportions is the key to creating a realistic-looking picture.
How To Draw A Face
When drawing a face, proper proportions are extremely important. Since we are all intimately familiar with how a face should look, if the proportions are off, then your entire drawing won't look right.
It doesn't matter how well you render it, or how well you shade it if the underlying proportions aren't right; your drawing will fail to convey the realistic look you are trying to achieve.
Before you attempt to do a finished piece, you need to spend a lot of time practicing how to draw a face with proper proportions.
While all faces have the same elements, they are all a little bit different. These differences are even more pronounced when you look at people with different ethnic backgrounds. Spend as much time as you can draw from live models or photos. If you can, carry a sketchbook with you and sketch out people you see when you are out and about.
The more you practice, the better you will become.
Have you ever wondered what those sketchy lines are that you see on some faces when a drawing is being sketched out? Those are guidelines that will help you to determine where to place the eyes, nose, and mouth in a drawing or painting.
You can use those to help you. When you are starting a drawing that you intend to be a finished piece, you should still begin with light marks. Start out lightly to build up the foundation of your drawing, then slowly add more detail and get darker as you progress.
.
Lightsource and Identifying the Main Shadows On the Face
Determining where your light source is should be the first thing you do when you are drawing a face.
If you are working from a reference photo or live model, which you should be if you are trying to draw something realistic, then you can figure out where the light is by looking at your subject.
On a human face, the nose sticks out, as does the chin to a lesser extent. That means that any light coming from the side or above your model will hit the nose and chin and cast a shadow in the opposite direction of the light source.
The forehead will also be a point where light touches in most cases, even though it doesn't stick out from the rest of the face. The eyes, under the nose, and to a lesser extent under the cheeks should be areas where shadows are cast.
Adding Shadows to the Face
- When drawing a face with a light source from multiple directions, you will need to draw shadows above the eyes and beneath the nose, plus the jawline and neck.
- With the light source projected from the right. You will find cast mid tonal shadows on the following features. The left-sided cheekbones and jaw. Additionally, a cast shadow will be emitted onto the neck.
- Light source projected from above. This will create a bold shadow around the eyes, beneath the eyebrows and the cheekbones. The neck will also be cast in a full dark shadow.
- Shadows cast from beneath a tree. This situation will result in an unusual pattern of a broken cast shadow over all of the face. This will create a broken series of shadows and spaces and a range of irregular blotches across the face.
- Tips when drawing casts shadows. Using a table lamp and mirror. By moving a lamp across the surface of the face, you can observe how the shadows change on the face and head. This will allow you the study and gain an understanding of how light is cast onto the face and head.
Shading the Main Features
Before you start to draw a human face, take a moment to study your subject. How many lines do you see when you look at a face? None? Well, if you want to draw a realistic face, then you need to avoid lines as well.
How do you establish forms then?
- You can start out with light sketching lines, but when you start to flesh out a picture, you need to use the side of your pencil and start shading.
- Start out light and slowly apply more pressure and use softer lead, or charcoal, to create dark areas.
- By using shading to establish features, you can create a much more realistic looking drawing.
Drawing Cast Shadows on the Face
Drawing a realistic face means learning about light and shadows. Where is your light source? How does that light source affect the face you are drawing? Which direction is the shadow from the nose cast?
What about the eyes?
If the light source is from above, then the shadows will be directly under the eyebrows.
- If the light comes from above and to the right or left, then this will change the direction the shadows are cast. Is there anything obstructing your light source at all?
- If so, then this will cast a shadow on the face you are drawing as well. The head and face of the person you are drawing will also cast a shadow on the neck and body, so this is something you need to look for as well.
- When drawing cast shadows, you can't be afraid to really go dark.
- That doesn't mean that you should go dark all over the picture, but in areas where there is a deep shadow, you need to create really dark areas on your drawing.
- Dark shadows, combined with bright highlights, will help you to establish the illusion of depth when you are working on your drawing.
- After you have spotted where to put in your dark areas, then make sure that you have a whole range of values for shadows.
- If you have a shadow that is very dark, that ends abruptly, it usually looks like it isn't quite right.
- While there are exceptions in times when there is an extreme type of lighting, for the most part, shadows will gradually get lighter before they disappear.
Drawing and Shading The Jaw And Cheekbones
Drawing shadows in areas where there isn't a strong difference between the shaded areas and the highlights can be challenging. In areas around the jaw and cheekbones, there usually isn't a lot of difference in the values that you see.
But, while the differences in value are slight, they are there, and you need to capture the if you want your drawing to look realistic.
One trick that works well is to remember that the cheeks and jaw are almost always going to be lighter than the areas beneath them.
That's because these two areas are higher than the areas beneath them, so the light will strike them, and in turn, shadows will be cast beneath those areas. Remember, shading under the cheeks needs to be subtle, but shading under the jaw and into the neck should be darker.
Shading the Brow of the Head and the Eye Brows
The brow and the eyebrows are areas that artists often struggle with when they are drawing shadows on a face. While it's common to struggle with these areas, there's no need to struggle.
The brow should be an area that is a highlight in most cases. When drawing the eyebrows, you can actually break the rule of having no lines on a face, since there are going to be little hairs that you are drawing.
Now, when drawing the eyebrows less is more. You don't have to draw every single strand of hair that you see.
You can simply draw in the general shape of the eyebrows, shade them in, then add dark strands here and there to indicate the presence of hairs. In typical lighting situations, you should try to make the bottom of eyebrows darker, and use small, thin highlight areas on the top of them to also indicate the presence of hairs.
Drawing and Adding Shading to the Eyes
When drawing the eyes of a person, you need to spend extra time and pay attention to detail, even more so than when drawing the rest of the face.
If you don't get the eyes right when drawing a face, then your drawing will fail. Now, the eye shape is like an almond. That part is simple. But that's far from the end of it, you also need to draw eyelids that partially cover the top and bottom of the eye.
The eye itself is round, it's the eyelids that give it an almond-like shape.
Everyone knows what an eye looks like. There's the white portion, the iris, and the pupil. One thing to keep in mind is that the so-called white part of an eye is far from white. It's much closer to a grey in most people.
Depending on the level of detail you want to produce, you may also want to add some tiny lines for veins. The pupil will be darker than the eye, and adding lines in a circular pattern will make it look more realistic.
Then you have the iris. The iris should be the darkest part of the eye, in fact, it should be the darkest part of the face.
The hard part of drawing an eye is the fact that it's slightly reflective. The good news is that you don't have to go into an extreme level of detail to produce a reflection.
You can use a small kneaded eraser to remove parts of the graphite or charcoal in order to indicate a highlight. You may also want to consider using white-out, that's a simple way to add a bright area without having to deal with erasing anything.
Drawing and Adding Shading to the Nose
The nose is roughly triangular in shape and is the highest point on the face. That means that no matter which direction the light is coming from, it's going to hit the nose resulting in cast shadows somewhere on the face.
One widespread mistake that artists make when drawing a nose is to draw lines along the bridge to indicate that it is there.
Remember, lines on a face are bad! Instead of drawing lines, you can add some subtle shading along the side of the nose to indicate the point where it separate from the rest of the face.
Shading the Mouth and Lips
Drawing the mouth and lips presents some unique challenges, but it's nothing you can't handle once you understand how they are shaped, and how light interacts with them.
Much like the eye, they are often somewhat reflective of light, but to a lesser degree. The most important thing to remember when drawing the mouth and lips is how light and shadow affect them.
When drawing the mouth, it's actually the upper lip that usually is darker due to a shadow. That's because the top of the lipsticks out a bit further than the rest of the lip, which blocks light, resulting in a shadow.
The bottom lip sticks out far enough to not be covered by the top lip, which means that the bottom lip usually is lighter than the top lip.
Drawing Cast Shadows On The Neck
Drawing shadows on the neck is an essential part of creating a realistic-looking drawing of a person.
In most cases, the top of the neck is heavily shadowed due to it being beneath the jaw and head of a person. Light hits the jaw, face, and head, and is blocked from the neck.
The direction of the cast shadows are going to depend upon the direction of the light in your drawing, so you need to pay attention to how you put down shadows.
When the light source comes from the above left, it's going to result in shadows to the under the chin and to the right side of the neck. When the light comes from the above right, the shadows will be reversed.
Effective Shading is the Key to Creating a Drawing that has Depth
Fortunately, by utilizing shadows and highlights, it's possible to create a drawing that looks three dimensional. Will it take time to learn proper perspective and how to draw cast shadows and create highlights in your drawings?
Yes, but doing so will add a new dimension to your work, and give you the ability to draw every realistic looking faces.
Create Art With My Favourite Drawing Resources
General Drawing Courses. I like Udemy if you want to develop your knowledge of drawing techniques. Udemy is an excellent choice due to its wide range of creative courses and excellent refund policy. They often have monthly discounts for new customers, which you can check here. Use my link.
Sketching and Collage. Take a look at this sketching resource I have created. Use this link.
Proko. Is one of my favorite teachers who surpasses in the teaching of Anatomy and Figure drawing. Prokos course breaks down the drawing of the human body into easy-to-follow components aiding the beginner to make rapid progress. For this, I really like Proko.
Art Easels. One of my favorite ways to draw is by using a drawing easel, which develops the skill of drawing on a vertical surface. The H frame easel is an excellent vertical way to add variety to the style and type of marks you create when using a drawing board.
To see all of my most up-to-date recommendations, check out this resource I made for you.
