The Zentangle drawing methods have been known for a long time to be a meditation therapy. It involves drawing patterns if as many things as you would like. There are no clearly defined rules on drawing like this, I just mean to be a form of relaxation rather than paid art. To your kids how to draw Zentangle Patterns, please read my post, ‘ Easy Step-by-Step Zentangle Patterns For Kids‘.
All about Zentangle Patterns. Zentangle art was founded by artists Rick Roberts and Maria Thomas. Invented as a form of self-help art therapy. It involves drawing art by repetitive patterns according to the trademarked zentangle method.
The Zentangle Method
- The founding artists came up with a step by step guide on the zentangle method and how to articulately enjoy this form of art. You begin by offering gratitude and appreciation for the practice of zentangle drawing. You get the resources you need. The cotton paper, pen or pencil.
- Drawing up the corner dots. Next, you start drawing dots on the paper. Place dots on every corner. The paper used is a museum grade cotton paper which does not limit you otherwise. With the 3.5 inches square paper, draw clear dots on every edge and move to the next step.
- Drawing borderlines. Now it's time to connect the dots by use of lines, straight or curvy, there are no strict rules on that. It's meant to be art either way.
- Drawing string lines. Now draw up string lines to separate the tiles into sections. It can also be any shape.
- Tangle. Now the fun begins. Here is where you draw up patterns of your desire. The predefined sequence of simple stokes that you deliberately make to form a pattern.
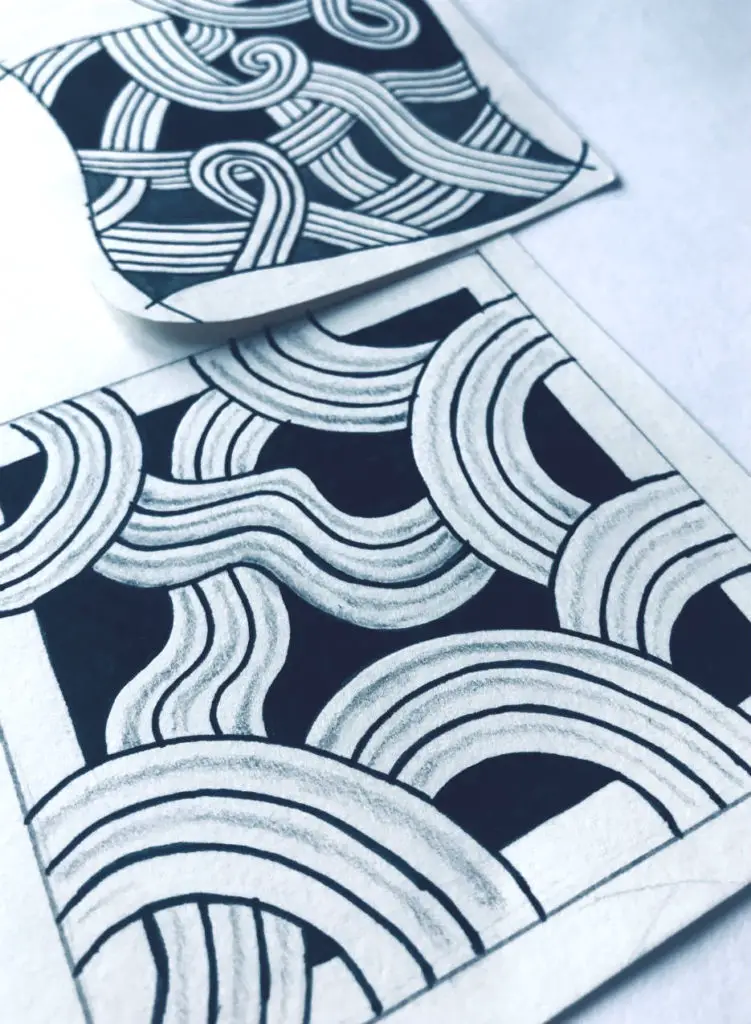
- Shade. Colors are usually black and white, a grey graphite pencil but you can include colors of your choice.
- Write up initials and sign your work.
- Show appreciation for the art you just expressed.
Zentangle drawing method is unique because of 4 features;
- They are unplanned
- It's deliberate
- Zentangles are celebratory
- It's timeless
There are many ideas you can include in your drawing from the zentangle cat drawing, Zentangle flowers, zentangle mandala, and other circle patterns.
In the zentangle drawing, there is no mistake and therefore no erasing of work. Below are a comprehensive list and elaboration of some of the easy zentangle patterns available for you. All the words used will be zentangle made accessible for all of you.
Zentangle art drawing is among the best therapeutic medicine out there, and it doesn't cost you anything to get started. You could enroll to join a zentangle class, but you can also freestyle at home and enjoy the art.
Zentangle art brings a lot of positive effects to the user by allowing them to build on their creativity, focus on their self-image and also problem-solving. A refined form of stress relief. It is thought to be beneficial for those with;
- Phobia anxiety
- Addictive behavior
- Pain management
- Conflict resolution
- Workplace burn out
Zentangle Patterns Explained
1)Beeline
Startup with the zentangle method, draw the dots, join them to form a border or a square and start to tangle. Draw 4 horizontal lines with the same width difference between them. Draw diamond shapes moving vertically, connecting with the horizontal lines. They should be 4 diamond lines running over the width of the square.
You could have full diamond shapes on one and the next you could start with an inverted triangle. Shade the inside of the diamonds with a dark shade. Lightly shade the remaining white parts so it can look like a greyish polish, darken the ends of the square for a fuller color pallet.
2)Blackbox
As the name suggests, you will be drawing boxes within the square. Draw up the square dome the zentangle method and draw lines within the square to form boxes. Ensure the lines appear as double lines. Shade the inside of all your 16 boxes with a very dark shade, by the end, you should have a dark surface with double lines running vertically and horizontally. For a finishing touch up, shade the intersect of the line with the same dark, and you're done.
3)Black-eyed peas
Startup as the zentangle method, once you arrive at the square step, start drawing bean-like shapes in the square and fill every inch of the space. All beans should have a distinct black dot. Shade the coat of the beans like shapes with a lighter pencil shade. All done!
4)Blooming butter
With the same resources, start to tangle. Draw up double short lines away from the middle of a spot. You can have 3 spots on the paper. Where the 4 double lines intersect, draw up a small been like shape, attach the top of the lines with an inward curve. Do the same for the other flower zentangles. Shade, the inside of the flowers, lighter with the initial lines with a dark shadow.
5)Bowties
Gather up your resources and begin drawing. Start off with your square and start to tangle. Draw vertical lines and horizontal lines to form a quadrant then smaller lines to form about 16 smaller squares. On every other intersection, draw up a circle, you should have 4 circles by the end of that step. Next, in the middle of the square, which should be empty, draw up a diamond shape. Continue for the upper intersection with the borders of the square, there should be 9 diamond shapes with the ones on edge looking like triangles.
If you keenly look at the shapes you have, it should be circles but with sharp edges. Start to color opposite sides of the circle, leaving dark and white portions all through. Every quadrant should have 6 dark spots and 6 white spots for equality. After that, you can lightly shade some white pieces in the square. To your liking of course, once that is over, you are done drawing the bowties zentangle.
6)BTI Joos
Startup with you a piece of paper and a pencil, draw the dots, borderline and get the square. Draw 2 curvy lines from one corner to the next like you are drawing an upward or downward river. Then draw tiny lines attaching the lines so you can have a segmented river. Draw another stream from the opposite side to intersect somewhere on the lower side close to the base of the square.
Now start to shade on other segments of the hypothetical river. Do that on both lines. On the sections that have dark shades, draw up curls protruding from the edge outwards. Like a curled hair, do that on either side of the river. Shade the curls with a lighter pencil shade for an artistic feel, all done.
7)Bucky
With a piece of paper and pencil, draw the border lines for the art, form up lines going vertically and horizontally to create 16 boxes in the square. Now draw diagonal lines moving only one direction to get 32 triangles. On every triangle, draw up dark dots. Now draw up hexagonal shapes with the same diagonal direction as the lines. Line the shapes moving inwards like you are forming an inside web. Start shading, you can only add little touch ups on the line but nothing dark as it will disrupt the pattern. All done!
8)Bulb lantern
Starting with your paper and pencil, start by drawing small orbits in the paper. Like the globe, or onion bulbs but smaller in size. You can draw even 3 of them. You can draw the onion bulbs from a straight line and then curves from one edge to the other edge. Then draw up zigzag lines on the covering of the bulbs. Add up dots in between the 3 bulbs and shade lightly.
9)Cadent
Pick up your paper and pen, draw up the square and start tangling. Draw dots inside and on the borders of the square like you want to attach the lines to form smaller squares but don't connect, leave them as dots. Start joining the lines with curvey lines from dot to dot. So that for all the dots. Shade the insides of the right sides of the curvy line. It should look like attached patches. All done!
10)Centrifuge
With your usual resources, draw up your square and begin to tangle. Draw 2 diagonal lines and other smaller lines within the square to form a tilted square within the square. You should have a square box with 4 quadrants. In every quadrant, draw a smaller square within it, then follow up with a circle inside the small square. In the circle again, place a small arc below like a smiley face. Web the outside of the first square box. The remaining spaces that are. Now shade the middle area between the circle and the second square. Lightly shade the lines forming webs outside moving inside to the inner circle. You can also darken the shade if the first square to show where the art all began.
11)Chard
With the zentangle method, draw up dots, borderlines, and the square. Now draw diagonal lines in every square to have triangles. Now on each side of the triangle, you will be drawing either vertical or horizontal lines. If you place one with the vertical, the other side of the triangle should be the opposite. Shade the diagonal lines you first drew with a dark shade and pass a lighter shade in the middle of the other lines. Do not go overboard on any of the squares or you will spoil the pattern. All done.
12)Chemistry
From the initial zentangle method steps, draw up the square, then from the base, start to draw up a vase or a mixing glass used for chemical reactions. Once you drew that, draw small circles or bean-like shapes on the inside in the vase, draw others in an ascending motion to show dropping pebbles. In the circular drawings, you can place a small vertical or horizontal line. Shading is optional. All done!
13)Corner box
Starting off with a piece of paper and pencil, draw up the square. Next, draw up horizontal and vertical lines on the square to form smaller boxes. Now draw inverted circles in every square. By the time you are done, it should look like a river that's meandering on the piece of paper. Most lines will attach and intersect at different spots of the paper. For every half circle, draw ray lines. Start to shade the inside of the ray lines to give up more color. Do not touch the remaining white parts. All done!
14)Cubine
Starting with the zentangle method, draw a square and lines in the box to form 4 quadrants. Now add more lines vertically and horizontally to form equally tiny boxes in the square. Next, draw small boxes on the edge of each box, preferable on the lower left edge of each box. Shade the small boxes within the bigger box. Draw straight line from the shaded box to the edge of the bigger box like you are dividing it to a triangle. One one side of the triangle, the upper side, shade with a light shade compared to that of the tiny box. Make sure you do that for all the triangles, all done.
15)Cyme
Start by drawing to intersecting lines to form a cross sign. Add one extra line on one quadrant. Draw umbrella shapes over every line to create a star. Once you are done, draw another line inside the star to double the lining. Now start to draw other umbrella shapes over the spaces left between the stars to form a bigger star. Go on to where you feel the star is big enough. Shade to your design with both dark and light shades.
16)Daggerly
With a piece of paper and pencil, start with the zentangle method and when you arrive at the square step, begin to draw revolving circles from the middle of the paper all the way out to the edges of the border lines. More draw a vertical line in the middle followed by a horizontal line, then the 2 diagonal lines to intersect all in the middle of where you started drawing the revolving circles. Now draw curved lines over the circles like you are drawing a moving tire of a wheel. They should look like they are moving, that's the concept. Now start to shade the other potion as you go round and round to the ends of the circles. When you're done, it will look like a mesmerizing piece of art.
17)Dex
Start off with your resources, then draw up horizontal S-shapes like 6 of them. Now combine the first curve from the first S to the other curve in the second S. Do the same for all of them and turn the paper. Join the S on the Lower side. You should have attached mushroom-like drawing.
18)Labyrinth
Again with the starting square, draw lines to form the 4 quadrants, then draw other lines to form equal small boxes. On each box keep drawing smaller and smaller shapes of that box like you are minimizing the frame of the box. Do that for all the boxes. It should look like over 64 boxes within the square.
19)DL Sunray
Starting off with the usual resources, draw up the borders to form a square. Draw up the smaller double line in the square. You should have about 16 tiny boxes within the square. From one box to another. Draw a curve on the edge of a box to emulate a protruding sun and lines from the circle to the edge of the tiny boxes to emulate sun rays. Shade the sun on every box to dark. Lightly shade the line as well to show a little intensity.
20)Drupe
Starting with the zentangle method, draw the border lines and then star lines in the square. Double line the corners of the star that look like triangles attached to one spot. Start to draw up circles in the middle of the square where they all join up. Move from one triangle to another forming an umbrella shape. Keep up with the same pattern till you arrive at the edges of the square. Inside the circles, draw up ray lines all the way up. On the initial star lines, shade the lines with a dark shade and with a lighter shade as you move into the drawings more detailed patterns.
21)Efilys
Startup with a box, a small box. Extend every corner line into a long edged curve like the end of a stairway rail. Shade the edges from outside the box. There should be small shaded triangles between the edge and the extended lines. Decorate with other tiny curls erupting from the middle of the line protruding outwards.
22)Ennies
Using the zentangle method, draw up curved borders, and draw small mountains within the boundaries. Draw other inverted curves where the spaces left between the mountains to form a patch in the drawing. Draw tiny rocks in the patch and fill every area in the patch
23)Eye-Wa
Starting with the same piece of paper and pencil, draw up a square, you can divide it into 9 portions. Inside every square, draw up leaf-like shapes.they should be 9 in total. Diagonally, shade the insides of the leaf-like shapes and the other portions, shape the outer space of the leaf-like shape. That's all!
24)Fans
Also known as falz, this zentangle pattern starts off with the zentangle method. Draw up the borders to get the square. From the base, if the square, draw small curves like 6 of them. Start overlapping the curves until you get to the top. The curves could look just like a valley or sharp like an umbrella. On each alternate horizontal line of mountains, ray lines within the circle. Start to shade the vase and all the lines circles with a lighter shade. You could also double darken the border lines for a broader effect.
25)Feathers
Take your paper and pencil and begin drawing. First draw up the midline of the leaf, a curvy line, moving up or down whichever direction. Then draw the curves on either side of the leaf, make the curves serrated or curly just like the shape of a leaf. Shade the edges and the tiny lines in the leaf. You could choose to draw up smaller other patterns within the leaf.
26)Fescu
Start with a pen and paper, draw the borders to form a square. From the base, spring up lines like you are drawing growing grass. Draw them to whatever direction your preform ensure the end of the lines ate shaded. Once you are done, shade the baseline to emulate soil.
27)Finery
The finery begins just like the others with your resources, borders and a square. Draw 3 curvy lines from the left border line going down. Connect the lines with smaller curves so it can look like a large leaf in the paper. Inside every small space, draw up tiny diamonds or circles. Go the end of the lines and add a curl to them, there should be 3 curls. Start shading, the edges of the leaf should be lighter than the ends of the wavy lines.
28)Flukes
Start with your paper and pencil, draw your square and two diagonal lines across the square. Next, add 2 other diagonal lines from the lower left edge moving up, combine to form a square. Add an additional 4 diagonal lines to the same direction and other 4 to the opposite direction. You should now have squares, but they will look like diamonds. Draw right angle shapes inside each and every box. Shade the smallest box on every square. Now shade the edges of every left diagonal line with a lighter pencil shape.
29)Florz
This kind of zentangle, you begin with the usual resources, draw up lines up and down to form tiny boxes. One side of the box should have unequal lines like a staircase. Start shading, draw up small shaded diamonds on the corners inside the boxes. It should be like you are shading the corners of each tiny box. Ensure you darken all corners even the edges.
30)Flutter tile
Beginning with the piece of paper and pencil, draw up the square first and then 5 stars in the square. The stars should just be in the form of pencil lines. That means you should draw a horizontal line than a horizontal line and 2 additional diagonal lines. Attach the corners of the star lines to form a net. The lines should be many and slim. You could add other half stars on the edge if the spaces feel empty. Start to shade the connecting lines with both dark and light colors to give off a look of a spider web. Finally shade the ones previously white empty space with a dark shade to look like you were drawing on a dark piece of paper, all done.
31)Hybrid
A hybrid zentangle is a combination of 2 or more art drawings combined. It could be flowers drawn together like tulips, sunflower and other two other flowers or it could be other 4 Zentagles together.
32)Holibaugh
Using the zentangle method, draw up the borders to form a square. Draw tiny parallel lines from edge to edge. Draw many if them interconnecting like a highway, once you are done, shade up the areas that don't have highways on them. When you are done shading, it should like tree trunks over a dark paper. Shade the roads with a lighter shade.
33)Huggins
This zentangle shape looks like a tied knot attached all through. Start off with the lines and the square. Draw up dots instead of lines that would form up 16 small squares. After you put the dots. Place other smaller dots to form a 32 box design but do not attach the dots with lines. When you reach here. Start to join the dots with curves. If you start with a concave, the best curves should be convex shapes. Attach all dots in the circle and start shading. Shade the horizontal lines with a dark shade and the horizontal lines with a lighter shade, they should look like a knitted scarf at the end.
34)Hurikan
The Hurikan looks like a synopsis paper. Startup with the borderline and draw up a curve. Shade the ends of the curve like a matchstick, and keep drawing curves. Ensure the dark ends are the same for every circle. Fill the entire circle with the revolving circles. Shade the dark ends that should be aligned towards each corner of the square.
35)Hurry
Take your piece of paper and pencil, draw up your border lines and create a square. Now draw diagonal lines across the square. Add 2 other lines just adjacent to the diagonal line so they will be 3 attached lines against other 3 connected lines. From where they intersect, draw other 3 lines to all the different 4 sides of the square, east, west, north, and south. Fill up the portions with the same lines following the initial lining direction. Start to add dark shades from the initial lines moving inner and inner. The smaller lines in the portions should have lighter shades than the first 6 lines you drew diagonally. All done!
36)Inapod
Use the zentangle method and draw borders and the square. From one corner going down. Draw a continuous infinity symbol or continuous number 8 attached to the other side of the corner. Draw a double line that you will use to shade the lining. Fill the empty spaces in the 8s with tiny stones. Any area that hasn't been filled by stone shade it dark to showcase the stones over a dark paper. Finish up by shading the double lines, should be a lighter shade than the ones inside the stones.
37)Jonqal
Start with your square shape and draw about four curves in the box, from up to down or vice versa. On the other side of the box, draw sharp horizontal lines like a staircase from the edge to the edge intersecting with the 4 curved vertical lines. Start to shade in other spaces. Because you drew 4 lines one alternate line draw lighter shades of pencil leaving the others white.
38)Kandysnake
Start with the zentangle method, when you reach the tangled part, draw up dots from one corner to another. Attach alternate dots to form a mountain, the other alternate dots should form peaks or curves on the other side. You should have something similar to valleys on either side. Shade the inside of the curves with lines like for sun rays. Shade the outer valley with a dark shade and a light shade over the inside lines.
39)Keeko
Take your piece of paper and pencil, place dots, attach them to form borders for the drawing. From one edge draw about 5 horizontal lines and 5 vertical lines of the same length, keep up with the pattern till the base of the square. Continue all over the paper until it looks something similar to a treble design on a cloth. Now it's time to shade, color dark pencil on the horizontal line and a lighter shade on the vertical lines. Ensure you are shading in the middle of the spaces, and not the lines as the lines will make your art look shabby. You can choose to do the opposite or mix and match to your liking.
40)Knitting
It all begins with the essential resources, paper, and pencil. Draw the borders, draw curvy lines from one border to the other. Draw different lines to the other side if the border. It should look like boxes, but not straight ones because you used curvy lines. Shade the boxes alternately so that one is clear and the other is shaded black. You could add some light shading in the white boxes, nothing deeper than the shade.
41)Laced
Take your usual resources and start to draw up. Draw two parallel curvy lines from below the page moving up. It should look like a bridge, about 2 inches long, cap the ends to look like the ends of a matchbox and start to draw another bridge after the cap. This second bridge should be capped both sides to look like open loops. Draw to the end of borderline. Start again from above, the opposite side, and draw the loops to criss-cross each other on the previous lines you had drawn up.
42)Lighting bolt
Start with your piece of paper and a pencil. Progress onto drawing a curved line downward, about 3 inches, draw another like to the right and draw another sharp line below again. You can now draw a back up, ensure you take a sharp line up to form an inverted triangle, about an inch longer than the other line. Draw another line to the left, shorter one this time.
Draw a line upwards almost parallel to the first line you drew, and finish up with a straight line back to where you started. Furthermore, shading is optional, but you can shade on the lines to give a substantial effect.
Conclusion
Zentangle art drawing is deemed to be a carefree form of art that requires not focusing at any point online doodling. The art is meant to be appreciated by everyone as a form of meditation. That is why you are encouraged to never erase any line or string you draw, it is all art. For a simple and straightforward form of stress relief, try the zentangle pattern drawing.
For further information regarding improvedrawing.com please visit our resources page.
