Why Draw an Underwater Scene?
If you are considering unusual and exciting topics to draw the ocean or, more specifically, an underwater scene is a worthy choice. Aquatic scenes include within theme a wide variety of unusual and extraordinary shapes, colors, and patterns that can be combined to create beautiful drawings.
How to draw a simple underwater scene? To draw a simple underwater scene, you will need to follow the following steps:
- Organize Your Equipment
- Make Some Sall Sketches
- List the Various Features You want To Draw
- Draw the Seabed
- Draw the Seaweed
- Create Space and Depth in Your Drawing
- Draw Large and Small Fish
- Draw Fish Shapes
- Draw Fish Patterns
- Organize Your Colors
- Use an Aquatic Color Scheme
In this post, I will describe how to draw and find inspiration drawing an underwater scene step by step.
Please look at this drawing and sketching video course I have created. Use this link.
Step 1.Organize your Equipment
Specialized and art supplies are not required to complete this task. All that is needed are necessary supplies such as pencil and paper. If you want to progress onto adding color pencil or watercolor or poster color can be used to apply color to complete an underwater drawing.
The basic copy paper is suitable for initial sketches.
However, if you are looking to add color, you will need sketching paper that will withstand paint and water. Read my related post, How to Choose the Best Drawing Paper for Graphite
Additional Posts You May Like:
- Drawing vs. Sketch Paper: What’s the Difference?
- How To Add Color To A Graphite Drawing: The Complete Guide
- Camera Lucida App: A Guide To Improving Your Drawing
- The Best Online Drawing Courses that are Actually Worth the Money
- What Stuff Do You Need For An Art Studio? The Essentials
Step 2. List the Various Features You Want to Draw
Making a quick list of the different things that are or can be associated with the ocean is an excellent way to prioritize what you want to draw. Here are my suggestions:
- Seabed. The seabed will be the base of your drawing from which the seaweed or coral may grow.
- Sharks and Fish. These will most likely become the dominant feature within the picture and can be drawn in many varied shapes and sizes.
- Starfish will introduce a variety of different shapes into your illustration and can also create interesting negative space shapes between the protruding.
- Underwater Snakes are also possible features you may want to consider drawing.
- Waves’ irregular shapes can be drawn at the top of your image to represent the sea.
- Shells can be drawn to break up the base of your drawing and make it more visually appealing.
Step 3.Make Preliminary Underwater Sketches in Pen or Pencil
Before beginning your illustration on a quality sheet of paper, it is always a good idea to reflect on the type of composition you want to draw.
Small compositional sketches are an excellent way to draw out and compare the different features that you intend to draw. This is also a useful warmup exercise as you start your main piece.
Consider the space between the various parts of the drawing. Think about and how the various shapes will look next to each other. For example, long seaweed will look different to angle fish. Drawing quick small compositions will allow you to try out various ideas until you find something that works.
Step 4. Start by Drawing The Seabed
Begin with seabed by sketching a light line at the bottom of the page. This can be drawn using a
faintly drawn irregular flowing line. Carefully consider the amount of drawing room or space you want the seabed to take up before you draw any definite lines.
Step 5.Draw Seaweed
Seaweed can also be sketched at this stage in the drawing using irregular shapes and a variety of long wavy ways of different lengths. Seaweed is also great for creating visually attractive patterns within the representation.
Step 6.Create Space and Depth in your Drawing
There are several useful techniques you can quickly apply to create the illusion of space within your drawing. First, creating light and dark sections within the picture. This can be done in two ways.
Use the side of a pencil to generate a delicately drawn graded shadow in the background of your picture. Next, draw large and small features within your drawing, this will produce the illusion of smaller objects which appear little in the background of the drawing.
Step 7. Drawing Fish Shapes Underwater?
The simplest method you can practice to draw a fish is to start by sketching the basic shapes which make up the form of the creature. Drawing with a faint continuous line, draw rounded shapes of different proportions.
These shapes will represent the body of the fish, and the tail, head, and fins can quickly be drawn onto the outside of this central outline.
Step 9.Drawing Fish Patterns
Once you have drawn the basic outline shapes of the fish and established your overall composition. You can start sketching the surface details and the patterns that can be found on the fish, for example. The scales on the surface of the fish can be drawn by faintly drawing small interlinking loops.
By drawing closing drawn repeating shapes, you can quickly add visual interest to the surface of the fish.
The patterns and colors found on various varieties of tropical fish can also provide an excellent source of inspiration to apply patterns to the surface of one of the main features in your drawing.
Step 10. Use an Aquatic Color Scheme
There are several ways you can successfully apply color to your drawing. One of the simplest methods is to split the colors that you want to incorporate in your drawing into simple color schemes.
Alternative zones of warm and cold color is an effective way the make the different features of the drawing have an impact and stand out. Select the necessary primary and secondary colors and mix several variations of color.
This can easily be achieved, mixing darker and lighter shades and tints of the colors you have chosen to use.
- Backgrounds with light values will tend to make objects in front of them appear darker.
- An excellent way to apply this simple color scheme is to mixe and add various shapes of blue and green.
Step 11. Draw a Grid
If you are looking for a simple way to organize the colors in your drawing that a novice or beginner can handle the addition of a drawing grid easily is a good idea.
- Begin by taking a clean ruler to draw vertical lines drawn at a regular interval across the page.
- Make sure for guide purposes only that the lines are drawn lightly and faintly.
- Next, repeat the process but draw horizontal lines from the top down to the bottom of the sheet. Make sure the edges are straight and evenly spaced out.
- A simple trick to create even intervals is to use the width of a 30-centimeter rule to draw the lines. This will enable you to cut out any unnecessary measuring.
- The end result should be a faintly drawn framework above the initial pencil drawing. You can now begin to apply color to the picture.
Step 12. How to Add Color to Your Underwater Scene
Firstly, think carefully about the sense of depth you want to produce in your drawing. Do you require a shallow field of depth? Or do you want to generate a deeper depth of space separating the foreground and the background of the drawing?
I stated beforehand that you can produce depth by representing larger and small shapes. However, you can apply different values of value to increase that sense of space, and here’s how you can achieve this:
- Separate your color scheme into cold, cool into light and dark values.
- Mix a range of blues and greens on a separate test sheet to see how the color appears when layered or juxtaposed next to each other.
- A short value range of pale color will create and result in a more concise sense of depth in your drawing.
- If you are looking to develop a greater sense of space. You will need to create a more robust and more profound sense of contrast. For example, adding a stronger sense of contrast in the foreground of the drawing will create a greater sense of depth in your drawing.
- Finally, consider how you want to dominant features of the picture stand out. The best way to achieve this goal is to color the fish in bright, bold colors.
Additional Ideas
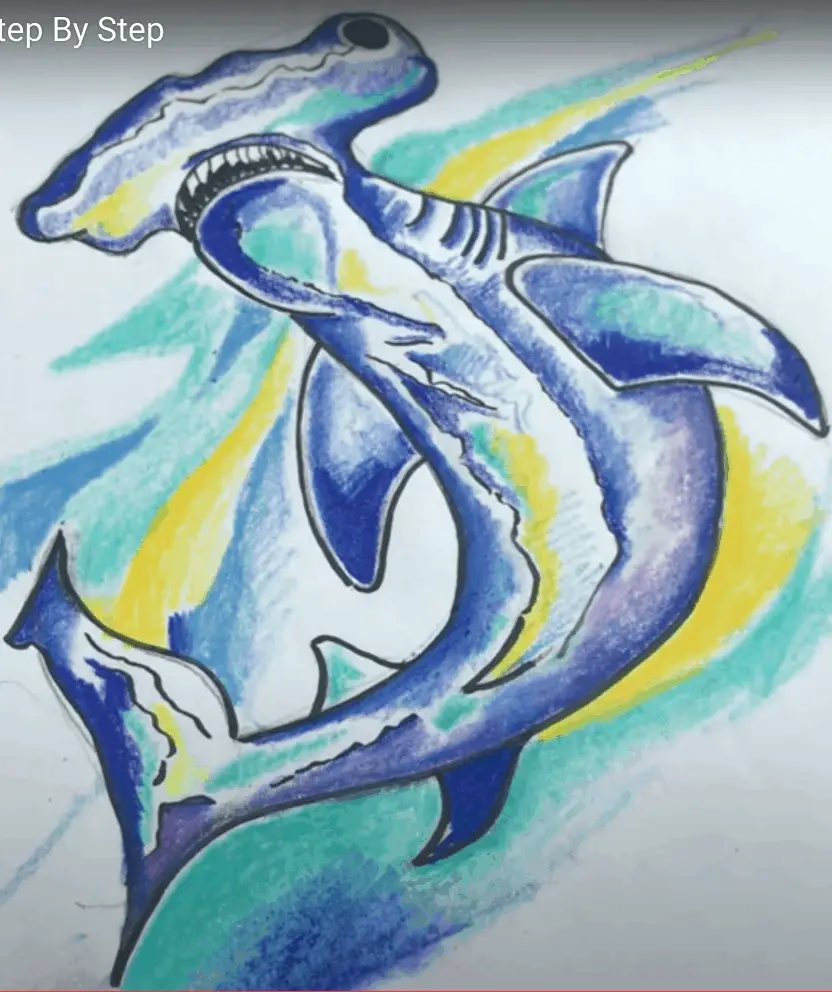
How to Draw a Shark
Other exciting ideas that can link to the subject of the underwater scenes are drawing of the individual sea creatures. A perfect example of this is drawing sharks: Heres my clip on how to draw a Hammerhead Shark.
Create Art With My Favourite Drawing Resources
General Drawing Courses. I like Udemy if you want to develop your knowledge of drawing techniques. Udemy is an excellent choice due to its wide range of creative courses and excellent refund policy. They often have monthly discounts for new customers, which you can check here. Use my link.
Sketching and Collage. Take a look at this sketching resource I have created. Use this link.
Proko. Is one of my favorite teachers who surpasses in the teaching of Anatomy and Figure drawing. Prokos course breaks down the drawing of the human body into easy-to-follow components aiding the beginner to make rapid progress. For this, I really like Proko.
Art Easels. One of my favorite ways to draw is by using a drawing easel, which develops the skill of drawing on a vertical surface. The H frame easel is an excellent vertical way to add variety to the style and type of marks you create when using a drawing board.
To see all of my most up-to-date recommendations, check out this resource I made for you.