Drawing water can be challenging to draw due to its continual change and movement. Are you looking for some simple drawing techniques that will teach you how to draw water and sketch the water's surface?
The following post will outline some simple methods to help draw water simply and easily.
How do you draw water and waves? The drawing and sketching of water can be learned relatively quickly if you follow a simple step-by-step plan. Observe and analyze the surface, select an appropriate technique and interpret your subject according to that method.
Drawing Water Step by Step
The calming and mediating effect of the water's surface can be experienced in many ways. Be it the sound of waves crashing into the shore or the gentle sound of a water fountain.
The fluid nature of water makes it a wonder to behold and one of the main reasons artists have sought to draw, paint and represent it in many ways.
The drawing and sketching of shadows on the water can be complex for those of us who have never attempted it. The reflection of light and the application of tone and color seem to present the artists with a real challenge.
The following tips will provide you with a clear outline of drawing water.
Choose Your Medium You Want to Use
The illustration of water or light and shadows cast onto the water's surface can be illustrated in many different artistic mediums.
Select materials that you are familiar with and used to working with. Read my post about the Artist's Basic Equipment List.
Graphite and charcoal pencils are an excellent choice as you will be able to produce immediate marks on the paper.
They will also enable you to quickly create different sizes and types of marks. Conveying distance and the angle and spacing between the waves can easily be achieved with graphite and charcoal. The following charcoal pencil set offers excellent value; click here.
Ink and water are other suitable materials to draw water waves quickly and immediately. Creating the rhythm and fluidity of the surface of a stream or lake can be formed using inks diluted with water.
Observe the Surface of Water
When drawing water, a problem that most people have is that it continually moves and changes. To overcome the difficulties in interpreting the water's surface, the waves, reflections, and light source.
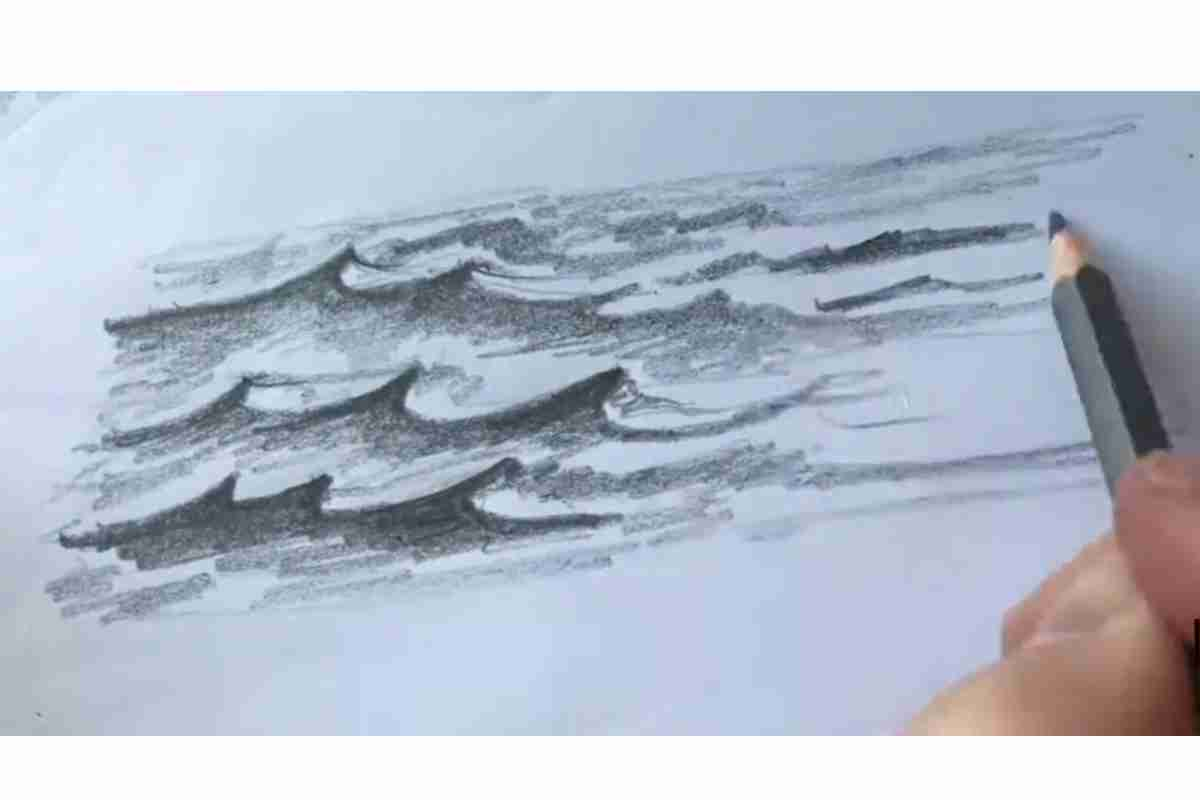
My advice is to simplify the process into a series of large and minor marks.
The marks that you will draw will represent the waves and the shadows created by the waves.
Drawing significant marks in the foreground. There will be darker.
An important rule is that marks drawn in the foreground should be more intense than those illustrated in the background.
Drawing more minor marks in the midground and progress on adding smaller dots.
Draw From a Photographic Reference
A Photography reference is an effective way to isolate sections of a complex image an reduce the range of values you intend to draw.
Look carefully at your subject and study the reflections and colors on the surface.
To help you see areas on the water which have reflections. Take a simple digital photograph.
Create a black and white photograph, allowing you to reduce the number of values in the picture.
The next stage is to crop the image. This simple technique will let you look at one section of the image in isolation.
Cropping the image will also allow you to focus on the values and ripples on the water's surface.
Basic Rules of Drawing Reflections in Water
A basic rule that you will need to follow when drawing reflections on the water is that objects above the water will be lighter when drawn as reflections in the water.
In your drawing, subjects that are lighter and seem pale on land will need to be rendered darker in the water.
Consider the density of the different sections of the darker, as water is denser than the air above it.
Experimental Techniques to Draw Water
Creating surface texture onto which you can draw reflections on the water is an effective way to create more preliminary drawings.
Paper
One technique that works well with tonal graphite drawing is to layer tissue paper.
First, collect some good-quality white cards or cartridge paper.
Collage
Collect some thin tissue paper and tear it into horizontal strips and irregular shapes and sizes.
Once you have finished preparing your paper. Begin to paste it to the surface of your card.
To speed up the drying process, you can use a drying tool to dry the surface of your college.
Mixed Media
Creating a textural surface onto which you can apply tone can be taken a stage further by working onto the surface with a piece of sandpaper.
Use sandpaper to create areas of texture.
Repeat the process once or twice until you are satisfied with the result.
You can now begin applying tone and shading with a graphite stick.
The exact process of drawing marks of various sizes can be applied to the sheet's surface.
Use a soft grade pencil applied at an angle or a graphite stick. Again, with more prominent marks in the foreground and smaller marks drawn in the mid and background areas.
Other tools that can by used to blend the graphite include blending stumps or a cotton bud
Look at finished by the artist Ian Murphy.
Drawing Reflections on Water
To visualize the fluid nature of water and how the environmental conditions affect how it moves and looks.
You can draw different shapes and sizes of waves to convey shadows and reflections.
To draw a reflection on the water, you will need to begin by drawing the basic outline of the object above the water's surface.
Draw the object's shape faintly, and once finished, bring your attention to drawing the reflection directly beneath it.
Repeat drawing the same shape and proportions, except it should be drawn in reverse.
Once you have completed drawing the outline shapes, begin to add more detail to your reflection. You are now ready to begin shading.
If the reflection you are trying to represent is on rippled water, you can convey this using oval-shaped lines and shading.
To begin to add more detail to the reflection, you can need to blur the details of the image with a blending stick.
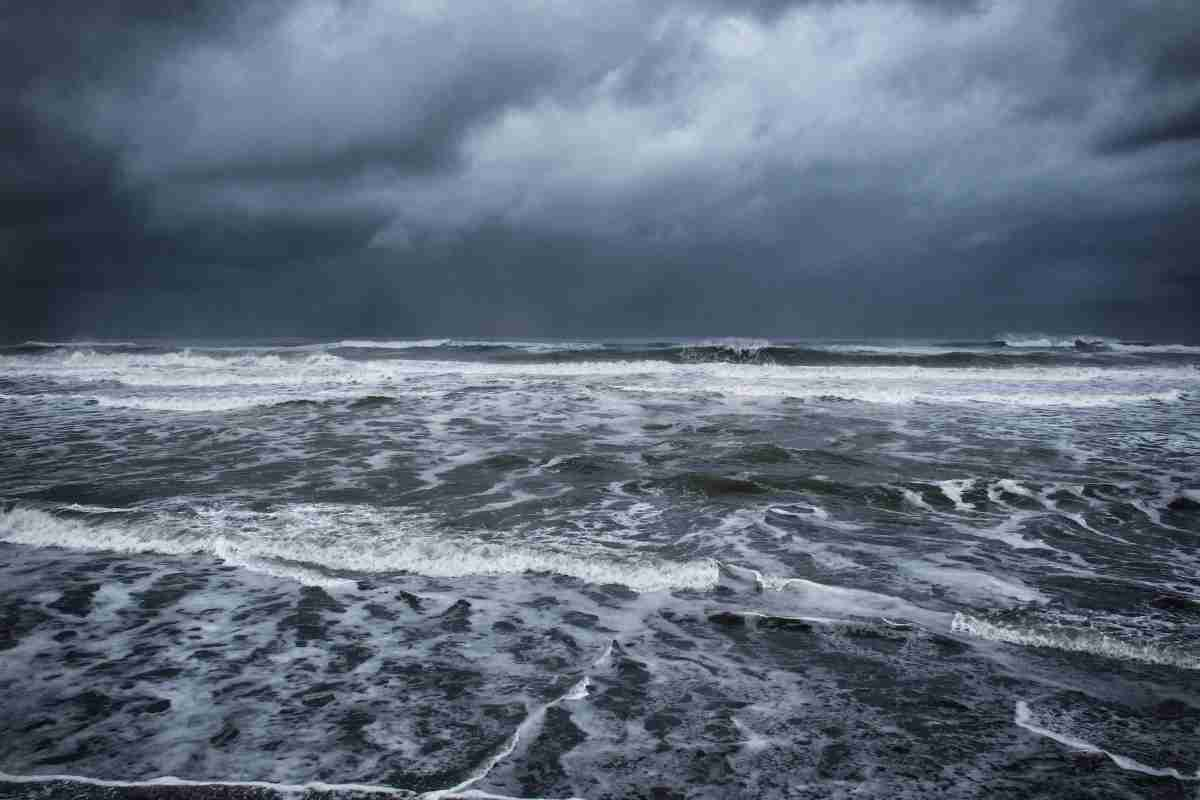
How to Draw Ocean Water
This type of wave can be found on the coastline or with a surfer riding a wave. Follow these steps to draw a basic concave wave in pencil.
You will need a good-quality HB pencil, blending stick, and eraser to complete this drawing. You can also use a mechanical pencil.
Draw and establish the horizon line. This can be drawn at a slight angle.
Progress onto the drawing and define the top and bottom of the waves with a faint line.
As you are drawing with a single line, the lines at the front of the image will be darker than the waves depicted in the background.
The next stage is to draw wavy lines and draw the water's edge. Apply an underlying layer of shading to each wave. These can then be blended together with the blending stick. This will begin to form the appearance of shadows with darker shading.
How to Draw an Ocean Wave
Pen and ink is a medium that lends itself particularly well to the drawing and sketching of reflections and the water's surface and water droplets. Ballpoint pens, as well as fine line nips, are all great for drawing precise lines.
To draw a basic drawing of a wave in pen follows this simple technique.
Draw a curved line that dips towards the end. This is a basic shape onto which the details of the wave will be built upon.
Next, draw a concave C shape under the crest of the wave.
Draw a smaller irregular line that will represent the whitewash foam.
Drawing Waves Step by Step
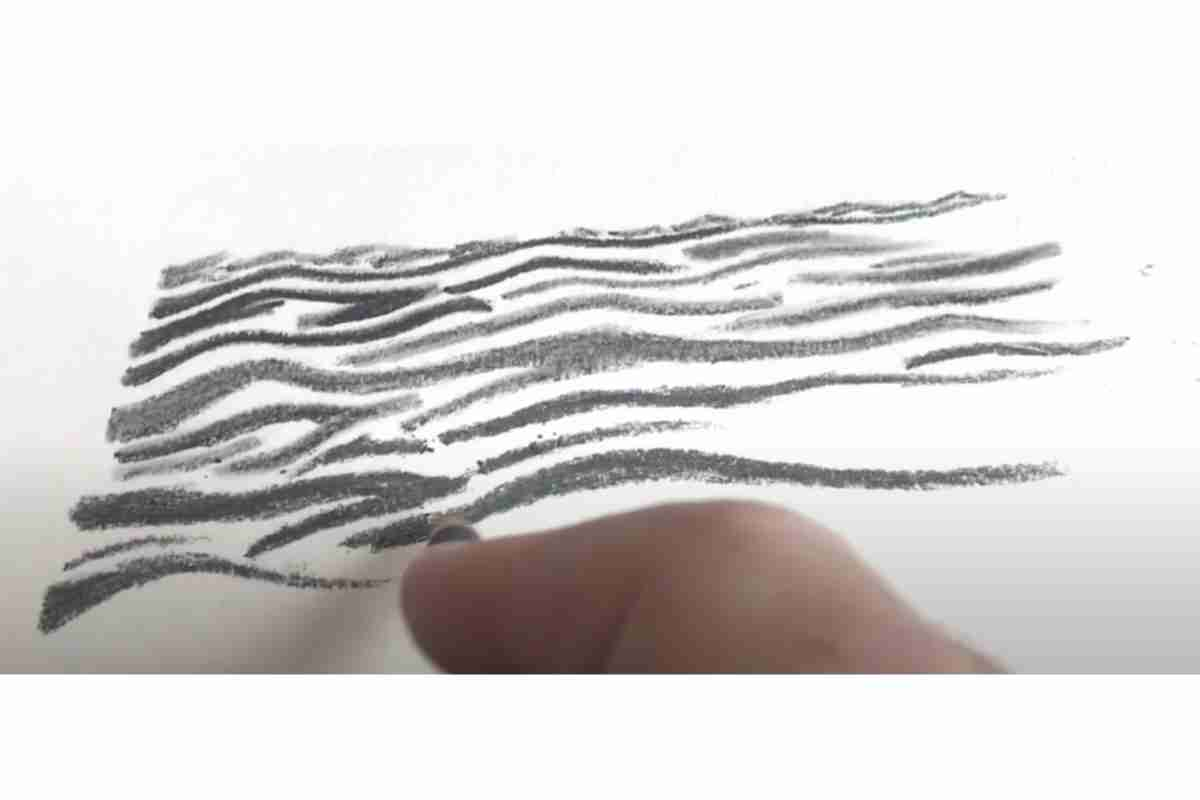
Water lends itself particularly well to the stylized drawing of straight lines waves in the linear form. Combining bold and finely drawn lines can result in a range of aesthetically pleasing images.
To draw a wave inline form, you will need an HB pencil and a fine line pen for drawing with.
Use the pencil to draw a series of repeating shapes drawn in sequences and at different scales.
Once you have achieved the desired results of a drawing
Artists Inspired by Water
Waves Breaking by Claudia Monet. This is a dramatic coastline painting that depicts waves crashing onto the beach. Painted in an impressionist style, the picture incorporates a range of blues and greens to convey the energy and movement of waves as they hit a rock line on the Normandy coast.
Monets' sketches of water are also well worth a look if you are research artists who draw water.
David Hockney painted ‘A Bigger Splash‘ in a Californian swimming pool in 1967. Many artists are inspired by the surface and waves of water and Hockney is well known for his bold and colorful acrylic paintings. Hockney's focus in this painting is a splash of water in a swimming pool. Painted in a range of different tones of pale blue with areas of flat color dripped paint and brushwork.
The wave was painted by Maggie Hambling. Hambling has produced a series of compelling paintings based on the power and grandeur of waves and the sea. Hambling is fascinated by the everchanging character of the sea, its energy sounds, and everchanging mood.
When interviewed about her painting, Hambling said she was trying to paint the sound of the sea. With each individual wave has its own character. Hambling is also inspired by erosion and the effect of the sea on the land over time.
Ian Murphy is a contemporary graphite artist who has experimented widely with drawings of reflections, seascapes, and abstraction. Murphy's drawings are predominately created using graphite pencils, graphite powder, and blending sticks.
He produces drawings and sketches from direct observation, then taken back to develop in the studio and developed into larger pictures and artwork.
Drawing Water with Colored Pencils
Select a range of different shades of blue and green. Prismacolors are ideal for applying color click here to read the latest reviews and check prices.
Most artists would agree the advantage of using colored pencils is that they can be built up in layers.
Begin by applying the light layer of horizontal color across the page. Remember that you will shade with bright color and then apply darker shades of blue over the first layer.
Take a darker shade of tone and apply color pencil to the horizon, remembering that this will be the most shaded area on the page.
When holding the pencil's shade at an angle and progressively building up
Remember that the reflections of the sun and clouds will need to be rendered on the paper.
Continue to build up dark shades of blue using short horizontal strokes of color.
Use a good-quality vinyl eraser to lift some of the pigment off the surface of the page. When doing this, you need to use a curved motion to depict the movement of the waves in the ocean.
Progress onto applying darker green onto the background area of the horizon. Again remember to use the pencil at an angle.
Next, to increase the contrast of different shades of blue and green, take a dark blue shadow, apply tone to the horizon, and add definition to the white spaces created by the eraser.
Finally, use a white color pencil to blend white into the blank spaces and layers over the different shades of blue and green.
Draw Straight Lines and Create Water Ripples
To successfully draw water ripples, I would advise that you begin with a simple line drawing onto which you will be able to apply shade and tone.
Water ripples are formed by any kind of disturbance on the water's surface. When an object breaks the surface tension of the water.
To draw water ripples, begin by drawing a focal point. This point is basically where the water ripples start.
The center of the ripple will take the form of a small elliptical drawn shape, which is basically a circle in perspective.
Next, to reproduce the effect of the ripple growing, draw another larger ellipse outside the first shape. This pancake-like shape will progressively become more extensive as it becomes more prominent and moves away from the focal point.
However, the lines closest to the center point should draw closer together?
As the ripple grows, draw a broken, discontinued line representing the water ripples fanning out in different directions.
The next stage is to apply shading and tone to your drawing in the spaces created by drawing the ripples. Apply a darker shade of pencil to draw water shadows in these spaces.
Finally, you can draw an object in the center of the ripple. This has the effect of making the drawing look a little more realistic. The object can be a stone, fish, or an imaginary character of your choice.
How to Draw a Pool of Water
The application of oil pastels is an effective way to draw water in a pond or swimming pool.
To begin your drawing, prepare a piece of card or heavy-duty card to work on.
Draw a grid from which you will be able to apply areas of tone and shadow.
Begin by applying the basic shapes and colors of your composition down onto the top surface of your drawing.
Once all of the primary areas of color are applied to the surface. Including the reflections and highlights, begin to render the edges of the shadow.
Continue with these tasks until all of the colors have an even-looking surface.
FAQ:
How to Draw Water Easily?
The simple approach if you are looking for how to draw water is to apply a simple wavy line to the surface of the paper. Draw is a simple and stylized manner following the shape of the waves in the sea, or the water ripples on a calm lake, or on the water's edge or seascape.
